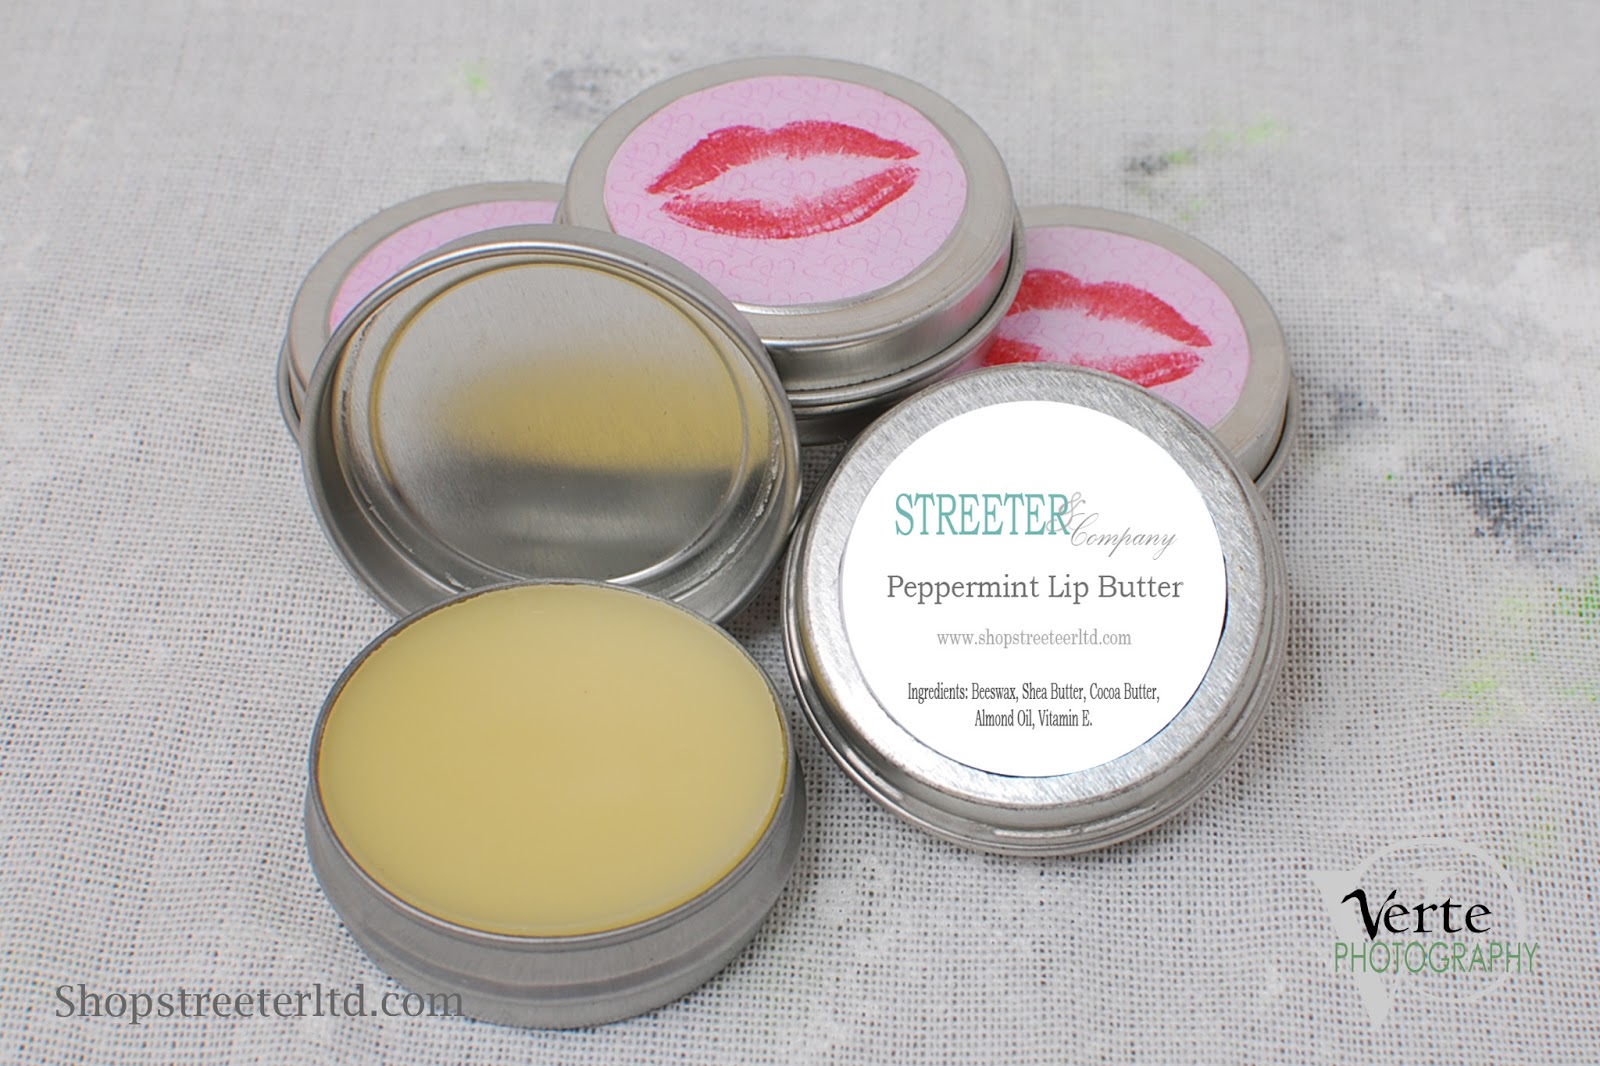
©Verte Photography All Rights Reserved

Showing posts with label Business. Show all posts

Monday, May 12, 2014

My New VA

I am going to preface this post with a slight disclaimer. There are many things that I know I am "not" I try very hard not to be several things. 
Including "The gadget girl". Oh, don't get me wrong... if it's a photography or kitchen gadget... I'm all in. However, when it comes to tech... I try very hard to be selective about what I get sucked into.

During a recent networking chat, I suggested a VA (Virtual Assistant) program that I had seen when I was researching some personal safety apps. I tried a couple out, before settling on my current one.
Speaktoit Assistant


This is a virtual assistant for Android devices. Your very own customizable Assistant just waiting for your commands! She (or he if you choose, like I did) can answer your questions... like "who sang Girls just want to have fun in the 80's"... or pretty much any other random question you (or your child) might ask. 

I'm going to add... freaking awesome for the 'mom brain' when you completely draw a blank between Cindy Lauper and Madonna... 

It can also perform tasks, like sending emails, text messages, posting to facebook, twitter and other social media accounts - by using voice commands and talk to text functions. Even reading messages (both incoming and outgoing) back to you - so if your in the car you don't have to be distracted by reading them. Most everything is done with voice commands, and it has a surprisingly good voice recognition, and rarely replaces words with other random words that would be "awkward". 


The task manager, birthday reminders and Google calendar syncing has been super helpful for me! I don't have to open my Google calendar to add an event to my schedule. I can just shake my phone and tell Asher... (yep I re-named my little man Asher.)  to add it for me.

He also can set alarms - which is easier for me than opening my clock and pushing around the buttons to set it myself. I am telling you... saving me a ton of time. Notifying you about important events, and making your daily routine easier (and, often, more fun along the way).


Asher tells jokes, reminds me that I will see a ring on my finger soon... and has many other fantastic qualities... except the small fact that I have to purchase the "full version" in order for him to have a man's voice.  That's just not cool... not cool at all. 

I am sure this doesn't do anything that Suri doesn't do... although I have never checked... it's a fun program and has entertained me more than it should have on many occasions for being something I primarly looked at to keep me on task for work. If your in the market for some helpful reminders, or to make your day a bit easier - I would certainly recommend you give it a shake!

Friday, April 12, 2013

What Clients Say: Streeter & Co

April Showers bring more then May Flowers! This month I am  super excited to add this segment to my blog! 


I hope to share with you, a clients perspective on my services, or tips and solutions from them during this segment and let this continue as a guest blogging option for you all to "put in your two cents".  If your interested in creating a post, please contact me! I would love to hear what you have to say!

So now, I will be turning it over to Kristina at Streeter & CO for our First "What Clients Say" post!


"I used to be guilty of what I like to call the "Jack of All Trades Syndrome". I was always the business owner that wanted to do everything myself, if for no other reason that I wasn't willing to invest the time or the money into having someone else do things for me instead. Did you notice I used "used to be" in that first sentence? That's because I learned the value of having my items shot professionally.

Although I know my photos were better than others I have seen around the handmade shop industry, heck lets me honest - even in small business images - we've all seen them, the grainy, unclear photos - mine weren't quite that bad, but they weren't the quality I needed.  As an online merchant I know that the photos are the one chance I get to grab the customers attention and want my product, low quality images won't help me achieve that one bit. Sure, I was getting return customers that had used my products in person ordering from my store but I wasn't having the sales that I hoped for from "new customers" - why? My product photography. The images I was shooting with my amateur skills and less than fabulous camera quality (or iPhone whichever was closest) wasn't doing my products justice. I needed a different solution.


Verte Photography was the solution to my problem and I never looked back. With Verte Photography I know my products are in the hands of a passionate, talented photographer.  Candy is so wonderful to work with and thrives on making the image look so wonderful that you would like to grab it off of the screen.  I have seen such a big difference in sales and page views. Customers are liking what they see and I know this not only by the sales but by the fabulous comments that I have received.


Not only does Verte Photo have a lifetime customer but I also refer every other shop owner I know to Candy. Why wouldn't I? A Shop with fabulous products needs nothing less than the best." - Kristina Streeter, Owner of Streeter & Company

Wednesday, April 10, 2013

Product Composition

Composition: The placement or arrangement of visual elements or ingredients in a work of art.

In photography there are a lot of general composition rules.  I covered some of these in our Photography 101 series back in January. Many of them will still apply to product photography. I thought in order to keep us well rounded I should touch on this as part of our placement and perspective discussion this week... because composition and perspective really are interlinked.  In fact, Perspective is the name of one very popular style of composition!


Perspective: The angle at which you shoot your subject. We ended yesterday talking about this... you want your camera to be in line with your product, not off to a side, or higher or lower then your product.


Correct Camera height.


Shot with camera directly in front of product


But if you have jewelry or other items you need to shoot flat.. then you may need to shoot directly DOWN on your item.  I don't suggest it, but I know sometimes you have to. I suggest busting out a step ladder and leaning over your workspace. Be careful not to get in front of any lighting source!

Shooting Down at product. / Product provided by Sweetsies

Fill the Frame. Our second composition rule tells us simple what to do... rather then leaving a lot of extra space around your product, get closer and fill the frame with your item! This will provide better details as well as simply "looking nicer"
Too Far Away.


Full Frame / Product Provided by: Streeter & Co

Tip: If you have a high resolution camera, but can't focus close enough to your product you can crop in! Be sure to read up on the best way to do that, and keep your image looking sharp!


WIDE/TALL: If your product is wider then it is tall shoot horizontally, more tall then wide, shoot vertically.


More Wide = Horizontal Image / Product by: L.W. Hooks
Taller then Wide. Gift Unknown vendor.

Tip: This may also depend on where your images are going! If your uploading to a online shop, your thumbnail images may be more square, be sure to learn about any dimensional restrictions you may have before shooting!

Show the DETAILS. I don't mean just crop in on the same image... but I like to see DETAILS when I shop online. I want to see the different beads, the chain, the clasp... give me DETAILS.

Product Provided by: Streeter & CO


Product Provided by: Crafty Gal Creations

Product Provided by: Crafty Gal Creations


Monday, April 8, 2013

Setting up for Sucess

Why bother to shoot your own products if your not going to take the time to be SUCCESSFUL! The point to having photo's is to showcase your images, so people can see what they are buying right? So let's make sure we have the tools we need to from this....


To this!
Product Provided by: Crafty Gal Creations


Depending on your product, and set up you need to think about how the light will hit the items, what part will reflect, what shadows can be created, and what adjustments do you need to make so you don't see shadows, as well as making sure each part is shown, and showcased the best it can be.

There are a few secrets to this.


1. Tweezers are your friend. I use these to place each stone, bead and chain in just the right place.
2. Cleaning cloth. I use my soft clothes from cleaning my lens to polish stones and remove any finger prints, fibers or dust that may be on a product
3. Cotton Gloves. These are so I don't get new finger prints on items as I am working on them. They are special gloves from the photo lab, same quality that they use when handling negatives. You can also use latex or even finger cots (found in the bandage section of your drug store). I never cared for them, but its a viable option.
4. Time. Don't try to do this in a rush
5. Stable work area. Placing product on a table that can be bumped or with a fan moving in the room can be a nightmare...please save yourself the headache.


Now, if you have been following along in this series we have covered...
Backgrounds: Part 1 Part 2 and Part 3
Finding the right location for your home studio
Finding the right light
White Balance
Setting up your DIY studio*
and now, collecting the tools to success.

Which brings us to product placement, posing, and perspective.
These will be our focus this week! Be sure to come back!

*I have delayed the release of the DIY studio available light - as well as a followup to the Dollar Store studio due to (of all things) TIME to shoot the images for them! I hope to get the images done this week and fit them back into the schedule - but I wanted to make sure you still had some great information to chew on this week! For now, you can view the First part of the Dollar Store Studio from the link above - it gives you some basic guidelines and some very helpful tips!


Wednesday, March 27, 2013

The Making of a Light Reflector

What is a light reflector?
Simply it is a tool used in photography to reflect light towards the subject. You can use them with all different light sources such as sunlight, flash or strobe lights, our continuous lights commonly used in home studio photography, or video.


The concept is simple, light hits the reflector and due to placement it reflects it back towards the subject.  One of the most common used reflectors would be a white wall or ceiling, remember the light will change color if you bounce it off something colored! You simply point your adjustable flash towards it and the light bounces off at an angle, or use the reflector to bounce your sunlight back towards your subject!


Today, I will be showing you how to make 3 different versions of a Light Reflectors, that would be helpful in a home-made studio, like one used for small product photography. You will be happy to know that I purchased only $3 in supplies and used only these few other items that everyone should have at home, or would be easy to find! You can use any of the techniques with any of the products and mix and match to make the type that works best for you!
  • 2 1/4 boxes (recycled from shipments I have received)
  • Tape 
  • Scissors
First let me show you the Gold reflector. This is a great option to have on hand if you are shooting on a cold day, in shadows, or even when overcast. It adds a "warm" light to your image.

For this reflector I purchased 1 gold tissue pack from my local dollar store. Yep, that's it. Simply make sure that you select one that is solid gold and without any patterns to it.

I then folded my box flat and cut one edge of it, creating a long bendable piece.

Next, I set out my tissue paper (which is a thick metallic sheet, which I didn't know has silver on the other side... so in reality you could buy 1 pack and use 1/2 for one gold reflector and the other 1/2 for the silver!) 

 I used two sheets to cover the whole box, and I cut them so I could fold each section nice and smoothy.I just used clear tape I had on hand, you could do glue or whatever... just make sure its as smooth and flat as you can get it.


Then, as you can see it can be stood up and bent around in order to reflect light towards my product. (To see why I am shooting with this studio set up visit TSUA-List and read "My Dollar Store Studio")


Here is the finished product image using the Gold Reflector and shooting with the diffused light from the window....  you can see some of the gold picked up in the white background on the table and in the label.While for purposes of the other post this is done in program mode, with no editing... it shows you what you can expect... a warmer tone where the gold reflects on the product.

Next I made a silver reflector. This time I used a shallow box and wrapped it in my $1 aluminum foil purchase. I covered the whole box and flaps here it is while I was working on it.  

Again, try to keep it as smooth as possible, and I simply used tape to keep it from moving around.

Then as I set it up to be used...this one allows it to stand easily, and I can adjust flaps to angle the light if I need.


And the finished image - there is still a slight shadow from the product, but I shot this with the window to the right and the reflector to the left, with a backdrop against the wall behind.


As an alternative, you can use the aluminum foil as both the reflector and the bottom side of your background. Below, I did just that, shooting directly towards my window with the white background over it filtering some light. This is a really nice effect! Again, the product is showing a little dark because I am shooting program, with no post-editing and NO exposure compensation... all things that are easily done to create sharp and well exposed images as shown in the second image. 

No edits.


Simple Photoshop Edit

And lastly, I made a simple white reflector buy cutting down a piece of foam core and attaching a part of an old cardboard box to it to create a stand. I just used packing tape to secure it, and bent it to create the stand.


I do have to keep something (like my bottle of paint) behind now to keep the right position.


It does a great job of reflecting light to reduce shadows and provide even soft light from the diffused light already coming in from the window. Below you see an unedited, and shot in Program mode, image with the window on the left, and white reflector on the right. 


All of these reflectors provide you with a means to manipulate your available light.  With small adjustments in a basic editing program, or by simple adjustments to the camera mode all of these would make nice product images. 

This how-to post is brought to you by Streeter & Co, in partnership with TSUA-List. I have been a member of the A-List since it rolled out, and I LOVE what it does for small businesses!

To learn more about creating a home studio for your products check out my "dollar store studio" guest post on the Indie A-List blog.

 I will be continuing to tackle home studio projects, and provide you with great DIY product photography tips! I hope you come back and learn more!

Monday, March 25, 2013

Shooting with Natural Light

Understanding Light vs. Time of Day, is a KEY factor in your photography success.

Lets start by understanding how light works. For the photographer who is shooting next to a window with available light, or even taking products outside time of day becomes OVERWHELMINGLY important. Just like when your doing portraits, the color temperature of your available light, namely the sun, is dictated by time of day. When asked recently "Is it better to use available light or natural light" I very quickly answered... it DEPENDS! A lot of natural light, isn't very "good" for shooting... say late at night or during a thunderstorm.... but the same can be said for available light (house lights) it all depends on your camera settings and understanding how to work with what you have!

As a reminder, anytime I start talking about light... you have to remember that all light has a color temperature, if you remember that from your basic science classes, or my previous posts. (light 101)


Because of the way digital camera's work, we want to find the most "white" light possible in order to produce the most accurate colors. As you can see white, is not on this simple chart, but its closest to the 5000K-5500K temp even tho it is not shown and tends to be the closest  to "noon" time sun. Regardless you will  have to work with your camera to understand your lighting scenario and produce the best results if you are working with sunlight in most cases. This means knowing roughly the temputure or color cast your lighting situation is most likly to produce.

If you shoot like I did here about 2 hours after sunrise, with direct light coming in from a rising sun, you notice the image has a warm almost yellow cast to it, t. The background on the table and leaning on the wall should be white, and the walls a light tan not yellow.
You would get the same sort of yellow orange tone if you were to shoot at sunset, which most of you see when you take images at the park or of your own families I am sure. 


The good news is, all digital camera's have a white balance mode (WB) by learning what kind of light you are shooting in and how to set your camera to see it as "white" you will be well ahead of the curve when it comes time to shoot your images. In most cases, this is set to auto and will function very well for you. You may never need to change this! However, if you find yourself with a yellow, green, blue, or reddish tone to your images (easy to spot on white) you can typically use one of the preset modes to adjust for that sort of lighting situation. The two charts below offer you some assistance listing both the common lightning scenario as well as the icon commonly used for camera manufactures so that you can simply select the one you need to adjust your white balance.


 If it doesn't fully fix the issue , there are other options... like working  with a reflector or diffuser to adjust your light in the area. If you are shooting with light that is more blue, like in the shade, use the gold part of the reflector to direct a warm glow onto your subject. If your light is too warm (like the yellow glow from above, use the white or silver, depending on how cool you need to make it. If your sun is very harsh and casting a lot of shadows... utilize a diffuser and put that between the sun and your product to reduce the amount of light hitting your product. (FYI, I find wax paper to make a great product diffuser if you are in a pinch!)
Look for a great DIY reflector post next week!


Or, use the manual WB settings to make your own adjustments. Either by guessing or by using tools such as a expodisk or white card.

www.expoimaging.com


There is even a simple way to edit for WB within some new Photoshop and editing programs, such as Lightroom, if you choose to do it in post-production... which I find harder, honestly.

To figure out what additional supplies and what studio set up will work best for you, do a test shoot during the time of day that you plan to shoot.  Set up your studio the way you think it will be utilized the best and take some test images. Now, try different WB settings, make a note of what you select on which image. Then, review them on your computer, send them to friends - unedited. Remember we want to shoot correctly (or as correctly as we can) and not count on spending time adjusting in Photoshop. Which ones turned out the closest to an image you would use? Look at what adjustments will need to be made. Can you now adjust your set up to remove shadows, or add a reflector or diffuser to provide an additional light source or to filter the bright light coming in? That will be our next step in creating a functional home studio set up for you!


Wednesday, February 6, 2013

Wedding Photography Sessions Explained!

Since February is the month of love I thought I would spend some time talking about wedding, and couple photography! Today, I want to share with you some "hot" terms that you will be seeing as you start shopping for wedding photographers!

First, what kind of photography are you wanting? You should sit down and decide how much of your wedding photography budget should be spent on "other" sessions! Or, decide if other sessions can be budgeted out of your every day account! Here are some additional sessions, some photographers include in packages with your Wedding Day, some offer in addition, and some you will have to find someone else to do entirely depending on your photographer choices. Not every wedding photographer does, or should do it all!

 Different kinds of photography sessions:

Engagement Session: In this photo session photographers typically highlight  the couple’s personality. Locations can vary from the photographer’s studio to popular tourist spots in their hometown, back yards, or a special location that sets the tone.  The dress is  more casual than other wedding-related photo sessions. While the engagement sessions have been used for newspaper announcements, photo-wedding invitations and the popular photo guest book in the past, many are now choosing to use this photo-op to do "save the date" images. You can do an engagement session at any time during your engagement, and for any end purpose. It is a really good idea to schedule this session with your photographer for your wedding since it will give you a good idea of how well your personalities and styles work together. If you don't have a good experience with this session you may want to consider a different photographer for your wedding!

Bridal Portraits:  In this formal affair it is ALL about the dress. While this is typically done in a studio setting, some brides may opt for a 'clean" outdoor scene as well. While the formal name leans towards tradition it is perfectly acceptable to have some fun with it as well! For brides who want tons of pictures of their PERFECT gown that was chosen after careful and laborious consideration, this is a non-negotiable. This is also very popular with traditional brides, and traditional parents!


©Verte Photography / Image of Theresa J. of Theresa J Photography.com


The Wedding Day: You will want to be sure your contract includes times and addresses of where your photographer will be, and exactly what will be covered on this day.
Pre-Ceremony: This is everything that happens prior to the ceremony itself. Be specific in your needs here. It can include the bride getting hair and make up done, getting into the dress, to informal shots with attendants and family, for large weddings I have even suggested doing all the formal shots of the bride and groom separately that can be done, so any formals done after would include them both. Of course some couples will even see each other prior allowing all the formal shots to be done prior.
Ceremony: These are the images taken during the ceremony itself. You should check with your church or venue for rules regarding flash, and access the photographer will have.
©Verte Photography

Formals Bridal Party and Family: Even if your a non-traditional bride, you will find yourself doing some sort of images with your bridal party, and family members. The poses and scene will set the tone for how formal these images come out, but I suggest you do some just for the traditional family members and keepsake images.
©Verte Photography

Informal Portraits: These would be the crazy fun images, more for the bride and groom they can include anyone they wish, but it is kept low key and less posed (or at least less formally posed).


Reception Images: This is pretty much anything that happens at the reception. Typically I suggest the standard cake, toasts, first dance, etc... and maybe an hour or so of dancing... it is not necessary to have your photographer there for the "whole" party, one dancing shot looks much like the other. However, it depends on your day and if you have a "big send off" planned, how long the reception is etc.

Photo Booth: This is a HOT gig right now. Many people are using photo-booths as entertainment for guests, others are using it to put together a photo guest book. Some photographers will offer this as part of their service, some wont allow it at all. You really need to check with them if you are thinking this will be an option for you!

Day After: Shot the “day after” the wedding (although some are after the honeymoon) this is a great time saver if you don’t want to spend the majority of the wedding day taking pictures.  The bride and the groom are more relaxed, and it shows! This can be done at a family brunch, or for more casual family or private couple images. The "newest" trend is to do them as sexy, boudoir style images in a hotel room, just for the couple to enjoy.

Trash the Dress: Another type of day after session.  This varies from aggressive “trashing” with brides engaging in paintball or mud wrestling, to the more genteel trashing of walking through ocean surf or swimming in a lake. Since today it is becoming increasingly uncommon to pass a dress from generation to generation, this lets the bride have "one more day" in it and do something unexpected.

Boudoir: Typically this is just of the bride who wants to give her husband-to-be something private to commemorate the occasion, or even to celebrate the first Valentines day or Christmas together.

Additional Event Photography: Many couples want the wedding events captured with equal skill and talent as their wedding portraits.  While most photographers do not include these optional type of photo sessions, most photographers can and will  cover bridal showers, wedding rehearsal dinners, bachelor parties, etc.


It is really up to you to figure out what style, and how many sessions you will want. Work with your photographer, if they will be doing multiple sessions for you. Some will include an engagement shoot, or if you don't want that, they may offer a holiday session, or 1 yr anniversary session or something else instead!

You really have to balance your budget, with all the cool ideas and everything you want!

Monday, January 28, 2013

Time to Click: Composition

Did you know there are basic rules that photographers follow... it's not all technical and functional!

Composition from Wikipedia is described as:  the placement or arrangement of visual elements or ingredients in a work of art or a photograph, as distinct from the subject of a work. It can also be thought of as the organization of the elements of art according to the principles of art.
The term composition means 'putting together,' and can apply to any work of art, from music to writing to photography, that is arranged or put together using conscious thought.


So to kick off our "putting it all together" week... I thought what better place to start then the real down and dirty... core element of photography... Composition. 

There are several "rules of composition" that photographers commonly follow. Here are some of my fav's! 

(I have posted some of this prior, if it seems familiar... this is a much more in depth and inclusive list)


1. Fill the Frame with your subject. (imagine if Dad was shown... it would really limit what you could see of baby! Plus it would make him look HUGE because she is SO small!)


 #2 If your subject is TALLER then they are WIDE, shoot VERTICAL

#3 If your subject is WIDER then they are TALL shoot horizontally

Note: If you cant get what you need with your camera's zoom or lens, use your physical zoom... YOUR LEGS! Move yourself closer or farther to be able to fit your subject!
Leading Lines: When we look at an image our eye is naturally drawn along lines. These lines can be made from a background such as a road, bricks, steps, as well as using people and your pose to create it!  Look for lines within your image to create interest and tell the viewer where to look! Check out your favorite scenic shot... I bet you find a leading line in it!

Lines from the elbows up to the topmost head
Perspective or Viewpoint: Before photographing your subject, take time to think about where you will shoot it from. Rather than shooting from eye level, consider photographing from high above, down at ground level, from the side, from the back, change it up!
Angled Down


Rule of 3rd's: Imagine you have a tic-tac-toe board over your frame. It is separated into 9 equal parts with 2 vertical and 2 horizontal lines. This rule says that you should position the most important elements in your scene along these lines, or at the points where they intersect. Filling either 1/3rd or 2/3s of your frame to do so.


NOTE! Some cameras even offer an option to superimpose a rule of thirds grid over the LCD screen! This is EXTRA handy when shooting anything with a horizon line so you can keep your perspective and horizon straight!

Balancing Elements: Sometimes having a subject on one side of the frame, may leave a lot of empty space on the other, and it may feel unbalanced especially in scenic photography. You can balance the "weight" of your subject my including another object of lesser importance to fill that space.


Symmetry and Patterns: Capturing a pattern, or symmetry in your image can make for breath taking views and amazing scenic photography. This image is framed amazingly, with a full square shown around the border, patterns in the windows and symmetry on both sides. Sometimes adding an item of interest or (in portrait photography) your subject into this will break the symmetry but create more interest.  I am hard pressed to find a better example of Symmetry and Pattern for you, however I wish the bucket was larger (or more preferred it was a little girl playing on the side of the steps) to better showcase the broken effect.


The symmetry of this chapel is broken by the bucket in the bottom right corner. Image by Fabio Montalto.
Framing Your Subject: While the above image does create it's own frame along the edge... Framing your subject typically applies to using things to highlight your subject. Utilizing natural elements or props to "frame" out your subject. Trees, holes, archways, shadows, grass, door frames... even real "frames"!
©VertePhotography


Background: The human eye is great at distinguishing between subjects and backgrounds. Your camera however does tend to flatten the image, and subjects tend to "get lost" into busy backgrounds. Creating images that are not as dramatic or engaging as the could be. You can control your background with aperture, backdrops, or even light placement to create the perfect image.

Example of a "lost" background opportunity.


Clean backgrounds make products pop!

Amazing baby... distracting background.

Priceless

Well there you go... a more in-depth look at composition and how it will effect, change and improve your photography! Keep in mind, several of these images have more then one technique being used... besides the baby who's image I used twice, can you find some? Be sure to comment below and let me know!