©Verte Photography All Rights Reserved

Showing posts with label Photography. Show all posts

Friday, April 25, 2014

The Crypto Crud

It's malicious, a virus designed to prey on the one thing people hold so near,
and yet are typically so horrifically undereducated about protecting.
Have you heard?
 Are you at risk?

The newest in a round of computer viruses is making it's way around in cyberspace. This one comes to you via email and is usually embedded into an attachment that you download and open. The ultimate goal of this infection is to hold your computer
 ransom and encrypt your files until you pay the fee to have it removed and the files decrypted. 

The reason this newest virus is making the news... the type of file it is targeting..

Your Images.

 
After the system becomes infected, the CryptoLocker Virus will immediately start popping up on the computer.  If this happens, the best course of action is to remove it immediately.  The longer it stays on the system, the more difficult it becomes to remove and the more damage it can do to the system.

The easiest way not to fall prey to such a virus is to not open attachments that you are unsure of. Even if the email comes from a known account... if it is just a web link, or an attachment with a generic greeting... you should CALL your friend and verify that they sent it to you first!  
Be smart, use some common sense when your dealing with anything online! 

You wouldn't walk down the street waving around a million dollars in cash right?

There are a few additional steps you can take to protect yourself! 
Not just from this newest threat but for all the others that will come after it.

Thankfully many security and virus checker programs are already coming out with updates in order to find and remove this virus. If you don't already have something like...

(What I use, and have had great luck with as a anti-virus, internet security program)
or
Hitman Pro 
(which is a secondary line of defense, that I also use.) 
I suggest you look into a virus / malware security program that would best suit your needs. 
While I use these two... there are several options out there and I suggest you do your research in selecting your own.
If you're online, on a computer or any device that also contains important documents or images you want to protect that you make sure you install some sort of virus and malware protections. 
Yes. DEVICE. Even your smartphone or tablets could be suspepable to viruses and malware.

The second step I suggest would be to BACK UP your images regularly.
Back them up to a removeable harddrive, a NAS, the cloud... Disks, USB....
I suggest at least 3 different options. 
I personally drop our family images onto disks and keep a copy in our fire/waterproof safe along with a copy that is sent to Grandma, so we have one complete set "off site" so to speak.

I also use BACKBLAZE
which is a cloud based backup system that copies your ENTIRE system, as many hard drives as you want, for roughtly $5 a month. You can set it to run at night, so you have a continuous cloud backup. 
I personally like Backblaze over other cloud backup systems because you can download a whole drive, or 1 file. You can also order a drive or USB of your backup to be shipped to you if your entire computer crashes. Many people find sites such as Dropbox, or even their Google Drive account a suitable option for an online storage option for documents and image storage.
It's peace of mind. 
I also, backup all Images (personal and professional) to a removable hard drive weekly as well as a NAS (Network Attached Storage) which is basically several Hard Drives that are connected to my network. It backups any changes, or new files each night.

I don't believe that this is the first, nor will it be the last virus that will seek to attack at the heartstrings of your family... those things that everyone holds most precious... your family.
Your memories. 

I can not begin to tell you how many clients and friends I have heard crying and devastated that their images have been lost... either from computer crashes, virus, or (eek) a lost phone.With the release of this newest virus it's a good time to remind each of you how easily digital files can be lost.

However, if you take a little time... spend a minor amount of money you can safegaurd yourself!


Friday, April 11, 2014

The MagMod

Every now and then Kickstarter provides my family with a new toy. This time, I was lucky enough to have this little gem picked up for me as part of a gift. Introducing the MagMod.


When I first looked at it I thought... well that looks fun... but I don't know how often I would really bust that out to use.... and then I put it on my flash.

See, the first odd piece with the square cut out stretches to fit over your speed light. It has magnets in it that you can then literally SLAP on the honeycomb filter... or multiple honeycomb filters. This image shows the filter being held by the magnet - but not properly placed for use. (just to clarify)


Here is how it looks attached.

Now... there are times when I want to use my flash, but I don't want that harsh "flash" look... and this is a great option to break up that light. I haven't had a chance to test it on portraits but I think it would be a solid option. the part that has me dancing... like really moving and grooving and bouncing in my seat...  gel options.

While I don't use gel's in my photography as a general rule, it has mostly been due to a complete hatred of the thin plastic sheets and that they get torn or bent too easily. 


WHALLLLAH! Introducing hard plastic, easy to pop in and out gels that fit over my speed light! Slap on... slap off! It's MAGIC I tell you MAGIC! (Okay, really it's ingenuous... not magic but I LOVE it!)

Now the kit that I got came with 2 honey combs, and a variety of gels... red, yellow, blue, there's like 6 or 8 of them. you simply stretch the plastic away from the gel that is inside to pop one out and the other in. They are nice and flat and store easily in a pocket of my camera bag. Why oh why am I head over heals in love with this? Because, it means that I can use my speed light as my back-light, and be a little more creative and custom on backgrounds for clients.

Taking an image like this....
Which is perfectly acceptable... (and an amazing product made by Dragon Flight Dreams)

and make it a bit more special... like this.

In an instant.

As for new cool must have toys, I give this one two big thumbs up for my use. Is it a product everyone needs... of course not! That's what makes it FUN! 

Friday, January 31, 2014

What's in the Studio, Friday?

Some days I find a fantastic new friend in the studio... some day's its an old one. Here is a behind the scenes peek at both that I had visiting this week!

 This is Ano (on-yo), our cat. She took on the job of photo assistant by claiming a spot under my worktable in the studio while I was working this week. In case your wondering... this is her "If you would stop dancing, I could get some sleep." cat face. This photo is fantastic proof that a 1.8 lens is your friend when all the lights in the room are off except one small model light, and your subject is under the table not on it.


This is Genie. She became a new studio employee this week helping out CONSIDERABLY acting as our resident model. My child didn't think it was "proper" to leave her naked when she was done working, so she found something out of the dress up bin for her. If the sparkles don't do you in the chimes will.

Don't forget next week were starting the Feb Photo challenge and the first week will be all about "Inspire" I can't wait!!!


Monday, September 23, 2013

Life Lately


Life Lately, here are just some of the wonderful people I have had the pleasure of spending time with and experiences we have had latley. 


Code for posts:

Thursday, September 19, 2013

My Home.


All images are copyright ©Vertephotography  
If you would like to order a print of any of these images, please contact me. 

Wednesday, September 4, 2013

3 Months of Bliss


If I could do anything for 3 months, I would travel. I would eat crazy good food, I would laugh, love and boy would I travel!
From the Philippines
 
South of France


 To the end of the rainbow and back again. I would visit panda's in China, and see the outback of Australia...

Have Camera, Will Travel.


Tuesday, July 16, 2013

Tuesday Tip: Understanding Lens Terms

Wow are there a lot of different types of Lenses! I thought I could break down some terms for you so as you grow with your camera's you will have a better understanding of each and how it applies to you!

Now fair enough most lens don't come with coffee inside them... but I couldn't resist sharing this with you! I LOVE THIS!

Now... lets get started...

WIDE ANGLE LENS:  Basically if you look directly ahead of yourself, and hold your arms out to the edges of your vision (without moving your eyes... that was what the film standard was considered to be 50mm. As you move your arms out wider, it was considered to be "wide angle" showing more in your image then your eye would see. This is shown in the above image as the light blue and 15mm landscape.

Now with digital these numbers may mean different things due to the different size sensors and how your lens work with those sensor sizes... I know... can't make anything easy can they!? For our purposes today tho, we are going to work off of "standards" where 50mm is what your eye sees.

TELEPHOTO LENS:  If you move your arms in closer together, it is "telephoto" bringing a section of your field of view in closer to you. The closer your arms are the less field of view, but the closer things appear, and the higher number you would need to accomplish this such as the Green line above shown as a 400mm.

ZOOM LENS:  Also referred to as a Variable Focal Length Lens. When you look through it, you can change the magnification. Examples: 18-55mm, 24-70mm. This doesn't mean it has a great telephoto, simply that it changes. It's a very loose term, typically applied to point and shoot camera's with a 3x  or 16x "zoom".

Point and Shoot owners get to do some math to figure out what that all means - basically the higher the X (magnification) the more telephoto you have. If you want to figure out how much, simply take the wide angle number of your lens such as 38mm (a standard) and times it by your zoom number... for example: 38mm x 10x zoom = 380mm telephoto

FISHEYE LENS: A wide-angle lens that takes a hemispherical image. It produces a distorted image, convex in appearance, and covers a broad area of view by doing so. Focal lengths typically range from 16mm and lower. Examples: 8mm, 10mm. 

FAST LENS:  A lens that has a large aperture which allows you to take photos in low lighting without a flash. When someone is talking about "fast" lens they are talking about the "F-stop" ability of that lens, basically the maximum aperture on that lens such as: 50mm f1.4
As you will learn with Aperture settings the smaller the number of the F  the more light is is able to gather, the "faster" it is. The LARGER the number the less light that can be gathered the "slower" it is.


STANDARD LENS:  Also referred to as a normal lens. This would be considered to be the lens that gives you about the same perspective as normal vision. Nothing would appear any closer (or further away) than you would see it with your normal vision. This focal length will change depending on which type of camera that you use. If using a 35mm film camera, a 50mm lens would be considered as the normal or STANDARD lens, When using a digital camera, the magnification or crop factor must be considered when determining a normal lens.  (Again, Standard and Normal is simply the mm number of what is equivalent on your camera to what your eye sees when you look straight ahead.)

PRIME LENS:  Any lens with a fixed focal length. When you look through it, you can't change the magnification. Examples: 28mm, 50mm, 85mm, 135mm. Also referred to as a Fixed Focal Length Lens. Yes,  a 50mm lens is a "standard" as well as a PRIME lens...


MACRO LENS:  A lens that allows you to focus much closer to the subject (than a non-macro lens). Examples: 50mm 2.5 macro, 60mm 2.8 macro, 100mm 2.8 macro. Not all Macro lens are Prime lens, it is just as common to have a 28-70 macro, where you have to "lock in" the macro function when you want to use it. This simply is telling you that the lens has the ability to focus closer on a subject then others for the same range.


PORTRAIT LENS:  A lens that gives the best perspective for taking portraits. This will vary depending on the camera that you're using. Typically you will find an 85mm prime lens, while some photographers prefer not to shoot with prime lens, and opt for something with better range like an 28-120mm. It is pretty subjective, tho most professional photographers agree staying within that 28 - 85mm range is common.


While this doesn't cover all the differences of lens types... it does give you a good overview of the different classifications of lens!

Happy Shooting!

Tuesday, July 2, 2013

Tuesday Tip: Shutter Control

What does that "S" mode stand for?
Shutter Priority. It is a great function for situations where you want to control the shutter speed, but let your camera handle the rest of the settings. Almost ALL DSLR cameras, and many Point and Shoot or Bridge camera's have some form of "S" mode. Typically this is found on the dial next to your P, A, and M.

I have talked about some other modes to use to control your shutter, but we haven't really dived into "S".

So, what is Shutter Speed.

Simple. It is the speed at which your shutter opens and closes.

Perhaps the better question to start with is What is a Shutter?

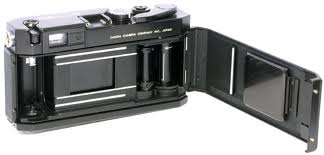
Remember you old school film camera, the film went in the back and there was the "soft spot" in the middle that you never wanted to put your fingers in... and most of you did anyways. This is your shutter... here is what it looks like close up.

The shutter sits between your lens, and your film... or your sensor chip these days. It moves out of the way opening to expose the sensor to your scene and thus creating your image. How long that shutter stays open has a direct effect on exposure of your image. I like to think of the shutter as the eyelid of your camera... if the aperture is the iris that moves larger or smaller to allow more or less light in, the shutter controls HOW LONG the light comes in... and the sensor would be the brain capturing the image. As we know from previous lessons 3 things control your exposure. (How MUCH light, How LONG your sensor is allowed to see that light, and How SENSITIVE your sensor is to that light)


So, why would you want to control the amount of time your camera sees a scene? 
Have you ever taken an image of someone waving? Was their hand blurry or clear? This has everything to do with your shutter speed.

TIP: Shutter speed is measured in seconds – or in most cases fractions of seconds. The bigger the denominator the faster the speed (ie 1/1000 is much faster than 1/100).
A shutter speed of 1/100th of a second is better for shooting HIGH speed, such as action, sports, waving hands... because it stops the action.. it is open for such a small amount of time that it appears you have frozen the movement.Where if you take the same image with a shutter speed of 1/100 it could still appear blurry.
Shutter Priority setting 1/100
 Here is my fan this morning... as you can tell the blades are moving along at a pretty good clip, seeing as how its already above 80 and its not quite 7am yet.

Note: The yellow is due to not using a flash. The light available from the ceiling fan is simply producing the yellow light, I choose not to WB or adjust anything else so we would have a baseline image as we move forward.

Shutter Priority setting 1/1000

Now it looks like the fan is turned off, right? It's not! My shutter simple opened and closed so fast that it "froze" that action.

So when would you use Shutter Priority?

When you want to stop action... such as sports, cars moving, babies moving, birds in flight, butterfly or humming bird wings... these are all calling out for a high shutter speed.


When you want to SHOW movement. Crazy idea, right? But think about it... what is the most beautiful image of a waterfall? The one where its all blending together and looks magically smooth... That's done by blurring the motion, leaving the shutter open for a longer amount of time. What about shooting your holiday photos? What if you want to show that the hummingbird was really flying when you took the image? You want it to be clear, but the wings to show motion. It helps to tell your story.

Now, this is where things get tricky... the longer you leave the shutter open the more things can go wrong for you. Even if you can hold your hands steady, you might pick up what is called motion blur or camera shake, from you breathing or moving the camera ever so slightly. The solution. TRIPOD or MONOPOD. If you plan on doing long shutter photography, like night skys, lighting or even holiday lights, putting your camera on a steady surface and not touching it is your friend!

With the 4th of July coming up.... I bet you know why this was on my mind! FIREWORKS, Baby! Controlling your shutter means you can show the movement in the fall! But remember, a TRIPOD needs to be used so you don't blur the image by holding your camera!

Happy 4th and Happy Shooting!!!!

Tuesday, June 18, 2013

Top 5 DIY Product Photography Tips

I have had several online shop owners coming to me asking for advice on how to make their DIY product images better... and time after time, I find myself writing the same (or similar) email back... I thought I would simply post a quick Tips post to be able to point people to!

If your images are dark, grainy, have a color cast, blurry or simply "yucky"....


Here are my top tips, for starting to troubleshoot and solve your DIY Dilemma!

1. Lets talk set up. Here is a great post about how to set up next to a window. http://www.tsualist.blogspot.com/2013/03/the-dollar-store-studio.html
You do want to make sure you understand the difference between shooting in the morning, afternoon, night... sunny, partly sunny, or during a rainstorm... each difference changes the type and quality of your light. I have some great posts on this on the blog... There are a ton of posts in March for product photography - and previously about white balance and types of light... like this one http://vertephoto.blogspot.com/2013/03/the-best-time-to-do-product-photography.html

2. Camera settings. Usually the biggest issue isn't the type of camera (tho lens quality will play a role) but focusing on an item close up, and possible reflection off the materials may be the root of the issue. Here is what to look for in order to over come those issues:

  • Keep your flash off.  When your shooting close up and you use your flash... it creates an overexposed image with too much light and the subject looks blurry or "ghostly" because of the reflection of the light back into the camera.
  • Make sure your shooting in a Program mode (not auto which is commonly a green square or green P, or AUTO... but a regular P) this will allow you to control your flash and access additional options.

  • Find a Macro Function: I would suggest using the "flower" or "close up" mode that it lists under your Scene (SCN) mode... these will allow your camera to focus closer and typically allow more light to your sensor. This will help (maybe solve) the complaint you had about the images being so dark - by gathering more light to your sensor your images will be better exposed. Depending on your camera, it may allow you to physically get closer to your subject and still remain in focus as well. (NOTE: Most point and shoot style cameras will only allow you access to find this SCN mode when your camera is in Program. If your in Auto, this menu will not be visible)
  •  If you have an "anti shake" or "DIS" or any sort of Image Stabilization option turned on for your CAMERA - turn it off.  These functions when on the camera are adjusting your ISO setting which is what is causing the images to look really broken down and poor quality.. your seeing the noise created by your pixels. To learn more: http://vertephoto.blogspot.com/2013/05/tuesday-tip-dis-function.html
  • Now, it's hard for me to tell.. you could have adjusted the ISO (which is what controls the noise) by selecting an anti shake type function, or you could have done it manually by adjusting your ISO - If you selected it manually you want to read just and go down to auto or 100 (maybe 200 if you want to shoot on a cloudy day) Typically auto is just fine, and you should never really "need" to adjust this off of auto. If it is set to auto and it is forcing your ISO settings up on its own with no adjustments from a IS function or you... then you have WAAAY to little light going on! You can check your camera settings to see what the auto is shooting at typically on your camera, if you cant find it let me know and I can show you how to find it on your image on your computer by viewing the meta-information.
  • Back off. In most cases you've got high enough resolution - you could back off a little if you need in order to get focus.. then simply edit the images to crop closer :) If you need a photo editor I can give you some to check out - that you can either download free or that would be fairly inexpensive. (you can pick up old versions of Photoshop Elements, a consumer level photoshop program that is easy to use for as low as $10... and they work perfectly for 90% of your photoshop needs!) 

4. Lets talk backgrounds.
  • Black adsorbs light and is great when TOO much light is your issue... but it rarely is.
  • White backdrops (like poster board) help to reflect the light you have creating  an overall more balanced look to your images. In most cases of DIY, the issue is not enough light... so by using white your adding extra light to your area.
  • If you don't want to go white - go Grey. You can find poster board still at the dollar store or any craft store :) super easy and cheap fix.While grey is a neutral, it wont bounce light... it wont absorb it either.
5. Add Light. ADD LIGHT..... ADD LIGHT! 99% of issues, the image posted above included will benefit from MORE LIGHT. Just because you think something is well lit, doesn't mean your camera will see it that way. Your camera sees about a 1/3 of the light you see. (ok this is really "depending" on the settings and type of camera... but its a good rule of thumb)
Use reflectors to bounce light where you have shadows. Use diffusers to soften harsh light. Read up on white balance, to make sure your getting the best quality of light. Again... I talk about light ALL the time because it is the SINGLE most important factor in photography. EVERYTHING is contingent upon light.

Bonus Tip: Be sure to keep your manual for a quick reference to find the different scene modes, or other adjustments and settings that I am talking about! If you don't have it, google your camera and look for the PDF manual, there hasn't been a camera I haven't been able to find one for yet!

Now, after you have put these tips to use... if you still want some additional help.. I am HAPPY to help troubleshoot! Simply leave me a message, or shoot me an email and I will be sure to take a look at what you have going on!

Tuesday, June 11, 2013

5 Camera Bag Vacation Essentials

Summer is almost synonymous with vacation. Regardless if your taking a day trip, stay-cation, road trip, or flying abroad.. I've got your back with these 5 tips on what to pack in your camera bag!


1. Rain/Sand cover.  This is a really great item to pack in your bag, and simply leave there. Most are plastic and fold down to take up virtually no space. I love these little bags, because while they are designed for photographers shooting in rain, or humid conditions they also make great added protection around the pool, lakes, and ocean!! Protecting your camera from water is HUGE! Nothing fries out electronics faster then water! Except possibly sand! I couple of little sand crystals in your lens (Dslr, or point and shoot alike) and your looking at some $$ for repairs or possibly purchasing a new one all together!


This little bad boy can be found in many forms from Amazon or your local camera shop. The plastic covers aren't really made for long term use, but with care you can get more then your monies worth since they start at only $6!

The heavier duty bag for SLR style cameras is WELL worth the investment! Again I found this one online at Amazon starting at $12 and is built to be the last one you would "need" to buy!
Now, these are designed for larger slrs... they would work fine for bridge cameras with lens that extend out... but they make them for point and shoots, as well as other electronics like ipads, phones etc. Just remember your looking for a bag to shoot with, not simply something to protect from splashes... if you have to take it out to shoot, it wont help!

2. Silicon Packs. Crazy right? But save those packs you get with new shoes and drop a few in with your memory cards, and around your camera bag.

Believe it or not, they do help draw some of the moisture away from your electronics. If your going (or live) some place with a lot of humidity, every little bit helps! You can also pick up a handy product like Nikon's 8073 Fog Eliminator which you can wipe your lens with and it keeps them from fogging up in the humidity! Some work better then others, personally I have had good luck with this one!

3. Backups and Storage. Memory cards are a no-brainer these days... you always want to have more then you think, and personally I suggest you never shoot a whole vacation day or event on one card. Cards can get corrupted, and are prone to static shock... so I swap back and forth between several cards so if one has an issue - I still have images on another card. While that increasing my time slightly for separating them on my computer, its time well spent in my opinion. The first time you have to pay $300 for image recovery due to static shock you will thank me too!

Now backup isn't simply extra cards. I suggest if your doing more then a day trip you think about a portable hard drive, or lap top as a backup as well. I DON'T suggest that you delete the images from your card.. but simply have 2 or 3 copies as your traveling. You can pick up a 1T drive, that you can hook up a card reader via USB to for under $100 - the larger the drive the more $$ it will cost... but to me, not losing my vacation images = priceless! While your at it, pick up a nice hard, travel case for this device - they start at only $8!

4. Memory Card Storage Case. I don't trust the little pockets in my camera bag for important small things like memory cards! I suggest you pick up something like this:


This hard case, can be found in a water-tight (sand proof) option also. It protects your cards, not just from static, humidity and those types of things.. but its a great investment to keep your cards safe at home, and while traveling. Losing a card would be FAR worse then having to hassle with image recovery! They aren't expensive and in my book its just as important as my camera bag itself!


5. WIFI booster. If your traveling and expecting to be able to post images along the way, or utilize online or cloud storage sites for backups, this little guy is fantastic! On twitter the other day I was complaining about my WiFi not reaching the pool... and a friend suggested this. I was like "OH DUH!" so now I get to work while my daughter swims this summer! Perfect! It's also super handy for poor connections at hotels, or other more dodgy options such as the local coffee house. It is a super practical purchase for anyone using a WiFi while traveling... and I find it a great goody to keep in my camera bag for the "just in case" moments!

I hope you have a FUN, and SAFE Vacation season! I can't wait to see your memories!


Thursday, June 6, 2013

Interested in Guest Blogging?

As you might have noticed May is the start of our busiest season here at Verte. So we have been sharing some people and products we love... and several of them have been kind enough to help out with some guests posts! I love it when other people stop by and share with you... and I hope you do as well!

So I wanted to put out an open call for help this summer. While I still plan to hold true to my plans and give you solid advice and photography tips... I also thought it would be fun to share some of your memories, and stories along the way! It helps give me a break (and you!) from those very long thought out technical posts!

To that end, I am asking for some additional guest posts... perhaps you want to share YOUR best camera secret, or maybe simply some wordless stories. I also would LOVE some Road Trippin posts for July's series! Your best tips, advice, places to go, what to see.... travel stories! (I personally want to bring you a vacation Anthony Bordain style... but I lack his finesse).

If your interested in guest blogging - please contact me! Leave a message, drop me a line on Twitter, or email me direct! We would love to have you!

Tuesday, May 28, 2013

Tuesday Tip: Family Portraits

Summer. The ultimate time to get outside, and focus on family fun! Many people take vacations, and attend family reunions, go to weddings... its all part of the Family Photo Season!

Today, I wanted to give you a couple "out of the box" tips for capturing those family moments, without setting up a big "to-do" or stressing yourself out! You can add a lot to your basic snapshot by following a just 2 basic photography guidelines.

1. Learn some basic poses. If your taking group images, nothing ruins a good portrait like poor posing. It doesn't need to be any big deal! By utilizing this basic triangle you can successfully shoot 2 - 20 people in a snap!


The Stair, is created when one subjects eyes are in line with the others chin.


You can easily add people, by going from a single stair to a triangle.


Now you can add as many triangles to your image as you have people!


The key to this - is not to put anyone's head directly on top of someone else... you have to leave room to see part of their chest and shoulders! 

Tip: Keep children and babies in front, not only will this help you get their attention if they are close together, but it will also keep them from looking oddly small due to them being farther away!


Another classic pose is the: LINE
It doesn't get easier, just put everyone on the same line in front of you! 


2. Learn a couple easy rules of composition. These rules apply to all types of photography, and are common in all different types of art as well!
This shows you some guidelines for what's called "The Rule of Thirds" it simply states that 2/3's your image should be subject and a 1/3 dead space. (or vise versa). You see this a lot with off centered portraits, and landscapes like beach images where the horizon line will be the bottom 1/3 and the setting sun and sky will fill the top 2/3's!

Another MUST have in your bag of tricks is...

If your subject is wider then they are tall, shoot Horizontally.

 Taller then they are wide? Shoot Vertically!


I hope you put these super simple tricks to use this summer! Remember, it's more important to capture the moment... then to capture the moment perfectly. Relax and have FUN!


Thursday, May 23, 2013

A Crafty Gal

 It seems only fitting that I do a introduction to the woman behind Crafty Gal Creations. Pam has been a client of mine for so long, and I use her items as examples here all the time!

I first met Pam when she opened her business in 2010, she was looking for a product photographer who could "think out of the box". A typical white background... just not Pam's style. It was a natural fit! Pam looks for scenes and props to be used with her jewelry to really open up the imagination of her buyers. She feels that this really separates her from so many other shop owners. Pam also finds that she is picked up, and showcased in many treasuries on Etsy due to the more unique style of images she has!

Pam created her business because she was tired of department store, mass produced items. Pam found a passion in jewelry, so much so that before she knew it she had made over 100 items! She had to start selling. Today, Pam is so proud to have a shop where each and every customer feels like they are her only buyer. Pam exudes customer service and provides quality products at extremely competitive prices. While her store began as a hobby, it grew to be Pam's therapy. She finds herself the happiest when she is alone and quiet in her studio with her beads and stones. If she could do it for her sole income, she would!

Pam's best sellers are items with Earth's Natural stones in them, which is fitting because it is where her passion lies, she loves working with them. She does offer other items, and non natural stones, but that's not her focus. Combining the fact that she works with these Earth Natural stones, and that Pam only creates only one of a kind items creates an EXTREMELY special product, that she often refers to as her treasures. She jokes (at least I think she jokes) that she finds often finds it difficult to pass on something she has created because she loves each of them so much!


Recently, Pam has been making items with a little more "bling" in them. Since she has had many requests for these items. She is currently trying to have a few of these new items in her shop at all times to provide some variety.  I have to say I have LOVED seeing these in the studio! This one might be my newest favorite!
    

Pam finds inspration in many different places, including seeing a piece of jewelry on someone else. She often sees something and thinks... "If I made that, I would have______" and then she goes home and she creates it!  Other times, she is simply drawn to a particular stone, and she will make several different pieces to showcase it. 
 
 
Even though Pam and I have known each other for so long, and I see her items in my own studio every 6 weeks or so, I still learned a thing or two about her while gathering information for this post. Pam is one tough cookie! She is a retired Army veteran... and flew in a helicopter during combat training! THAT is no run-of-the-mill helicopter ride. From someone who has been afraid of flying for a large part of my life... simply getting into a helicopter is something I'm not sure I would want to do... combat training... pretty sure that includes some quick turns and ups and downs... no thank you! I am SUPER impressed by this! 

For my closing note, I DO realize that I showcased most of the items with close up, detailed shots, I did this because Pam has paid such amazing attention to detail and crafted each item with care and love.  I very much wanted you to see those details!! She offers necklaces, lanyards, earrings, bracelets, bookmarks and SO much more in her shop... I literally never know what to expect from her... but I know I always love each item! I hope you enjoyed getting to know a little more about Pam, shes a fantastic client and I consider her to be a good friend! She's stuck with my business even after she also moved away from the Denver area, and has always been supportive of my goals! Pam does offer sporadic sales AND FREE giveaways for her Facebook fans. All of her sales and promotions are announced via FB, so take a few moments and like, love, and share this fantastic shop owners social media and shop links!
www.craftygalcreations.etsy.com             http://pinterest.com/pamsjewels/         http://www.facebook.com/pages/CraftyGalCreations/128737910505845