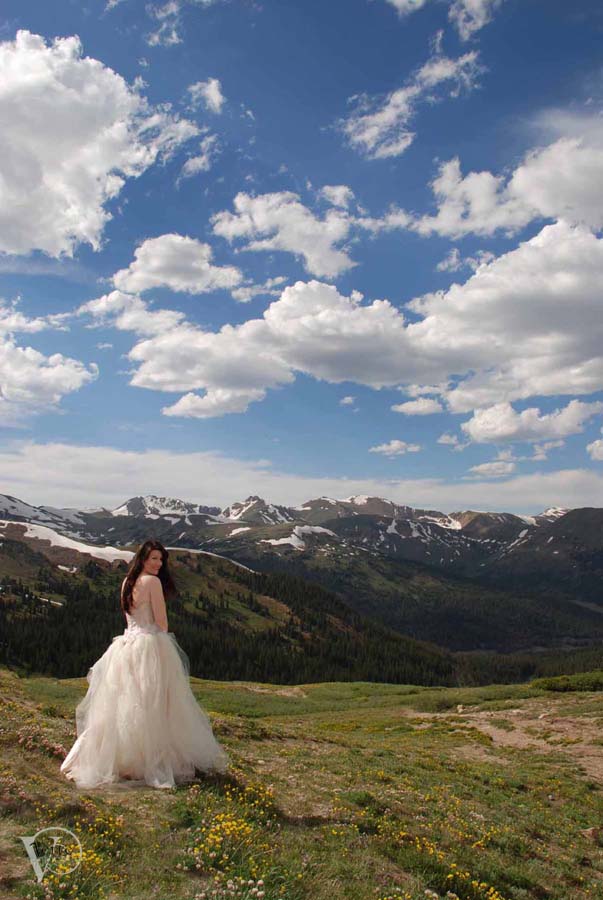
©Verte Photography All Rights Reserved

Showing posts with label Family. Show all posts

Tuesday, April 29, 2014

5 sentances only a mom would say.

"No. Running your tongue around the outside of your mouth does not count as washing your face."  

...and 4 other sentences I never thought I would have to say more than once as a parent.

There are days, especially now that my child is a bit older when I have to stop myself and ask... do I really need to say that... AGAIN?
Never mind that I had to say it once... 

I don't know if it is common place in your home, but I feel like I am always surprising myself with the string of words that get put together in order to create a respectful, thoughtful and sweet child who will one day be an AMAZING adult. 


"Yes, I wish you were a princess, too. That would make me a Queen, and someone else would have to do the dishes."


"Yes. You have to wear clean underwear." 


"How could you possibly think it would have been "okay" to "decorate" my couch with chalk?" (chalk can be substituted with, crayon, marker, paint, glitter, glue...)


and the one that inspired this over-share Tuesday post....

"Get your food out of the bathroom. We don't eat while we are peeing."


Friday, January 17, 2014

Scintilate

scin·til·late

[sin-tl-eyt] Show IPA
verb (used without object), scin·til·lat·ed, scin·til·lat·ing.
1.
to emit sparks.
2.
to sparkle; flash: a mind that scintillates with brilliance.
3.
to twinkle, as the stars. 

Today is Dictionary day!!! In our school they celebrate by dressing up as words for the day!  
I wish I could take credit for the fantastic word... however I owe the idea to the fab Kristina from 


I thought that it was the perfect note to end our week on! 

Keep on shining!

Tuesday, January 7, 2014

Family


One hundred years.

That's a long time.

It's even longer when you look at it in one image. This image was over 5 years ago, but I can't help reflect back on the moment while we explore our topic this week. This was taken on the weekend of by grandpa's 100th birthday, just months after my daughters birth. We are extremely lucky that my child has gotten to know her Great Grandpa, who is still living on his own, alone and every bit as feisty (and maybe more so) then we remember. When you reflect back on those things that are important to you this week, I hope that you have a few simple memories like this.

VERTETIP: Looking at the camera isn't all it's cracked up to be. Sometimes the true expressions in the moment are much... MUCH more important. Capture the moment, not the perfect shot.

Friday, November 22, 2013

Shopping For A Photographer?

Are you looking for a new camera for the holidays?

Have a photographer on your list this season?

I have you covered!

The first question I always ask when someone comes to me for advice on what camera to purchase is...

What KIND of camera do you want?

Do you know the differences between them?

I always suggest you get a camera that not only fits your current needs but allows you to continue to learn slightly more then you think you will. So let me first talk to you about some basic camera differences.

First, Phones. Phones are not Cameras. Ipads are not camera's. They can be great tools, some work well in a pinch, and some even have decent enough mp's to make up for the poor quality lens, some even have flashes. However...  I strongly feel that they are not "camera's" for the sake of what I am going to be teaching and talking about. They don't have the same functions, quality, or  standards. So most of what I teach wont make sense if your using your phone or other device.

Starting the line up are Standard "pocket" point and shoots. These are small, compact camera's. Every camera manufacture makes some style of Point and Shoot.


Compact digital camera's for our purposes will be any camera with a retractable lens, this lens will come back in to the body of the camera, it is not removable. This creates the nice, small, lightweight camera that can be tucked into a purse or pocket. Let's be clear, it is great starting camera and as such has all your basic modes, and important needs are covered, such as flash, zoom, and megapixels.You will find these cameras from any reputable manufacture will range from $80 on up. Depending on features, lenses, and other options. (By the way, if your interested my top picks for this category would be cameras made by Panasonic, Fuji, Nikon, Canon, Pentax not in any order, and those are not the only ones out there.. but I find these companies tend to put out a good product for most your needs at this level.)

Here are some important details to keep in mind
1. Not all flashes are created equal.
2. Not all batteries are the same, or even "good" to use for photography.
3. The size of a CCD chip (what replaced the "film" and is the capture device on digital cameras) is MUCH smaller then on DSLR's, meaning the quality of detail wont be the same even with the same "size" of megapixel. 12mp on a compact camera is NOT the same as a 12 mp on a DSLR.
4. It is no longer a megapixel race. Any camera these days has enough for you to print and share your images with out the "digital" look.
5. Digital zoom, is NOT a feature you want to shop for or use. Ever.

VERTE TIP some of these camera's are water-proof, some weather-proof, some are impact resistant... etc... it is important if you will be using this as a travel, or "family" camera that you check out some of these options, and the warranties as they do vary. Personally, I like the rugged water proofing cameras for travel, beach and everyday wear. I would NEVER take my pro camera to the pool and let my kid take photos... where the waterproof one I wouldn't be worried about.
Its all about peace of mind.

Second on our list of types of digital cameras would be what I term the "Advanced" or "growing" P&S (point and shoot). Sometimes these are called "Bridge" camera's. This style of camera typically has a lens that remains out, in some way. It is larger and has some sort of Aperture, Shutter and/or Manual modes.

This kind of camera is still very lightweight, but in addition to the different modes of operation they often have a pop up flash and sometimes the ability to attach a flash or work with additional strobes or off camera flashes. Some of these cameras allow for lens modifiers, or possibly let you change your lens. They are not considered DSLR's because they dont have an optical viewfinder, or in some cases a viewfinder at all. If you have a viewfinder it is still a digital display. This is a great option for someone who doesn't know a lot about photography, doesn't want to invest a TON of money, but needs some options and ability to grow say perhaps someone looking to document a new family, do kid sports, vacations, or even some basic blog or homemade shop photography. You can find them from $200 on up again depending on features.

That brings us to our last style, which is the DSLR. This style is typically FULLY functional, interchangeable lens, flash options, full manual modes etc. These also "typically" have optical viewfinders, although many allow you for live shooting while using the back LCD screen as well. The important part for our needs is that you would have the ability to pick the lens, add flash or stobes, and have full control over your manual modes.

As we go forward, it's important for you to know what level your camera is. So if you don't know which category you fit into please drop me a message or comment below and let me know your make and model (you can always find that on the front of your camera). There are less and less clear lines in separation between these styles, so please don't feel bad asking!

Also, as a disclaimer - yes I used all Nikon images, yes I shoot Nikon. NO I don't think this is the "right" camera for you in every case. It is simply what I had available because I do shoot one, I like the product and the company. Like I said earlier, there are a lot of really good companies and products out there. It will depend greatly on what your needs are, for you to find the "right" camera for you!

Wednesday, November 20, 2013

Gearing up for Family.

It's that time again! Family Portrait time! I know so many of you go in for portraits, or take advantage of being with family on Thanksgiving to knock out your Holiday Images.

Everyone always asks.... What do I wear!
Well... lets talk about what NOT to Wear first......


 Gone are the days of "matching" everyone in the same outfit... it didn't really look good then... and it would be the last "retro" style I would suggest today! This particular example provided by http://awkwardfamilyphotos.com/ Also shows a PRIME example of why stripes...  thick distracting patterns in general in an overwhelming amount are a poor choice.

Plus, because two great points are not enough.... lets talk about the color choice! Red... in particular the bright red like this image... BAD. Red close to your face brings out every red blemish and cheek there is, even if your skin tone isn't normally reddish, it will be if you wear it because (as you know, if your a regular reader here) colors reflect light and impact your subject... so if your reflecting red light around the things that it is closest to is going to absorb it... and that means your face picks up that red tone.

So what's a current stylish way to pull of Stripes? Or do something colorful... or even "match" Take a look at this sample I found from Brenda Landrum.... this is a PERFECT amount of color, patten.


By combining neutrals, and adding in pops of color or pattern everyone gets to showcase their personal style in a casual comfortable way... while still matching as you do different combinations during your session.


VERTE TIP: Never buy clothes for a photography session that you wouldn't wear everyday. If you don't normally wear "Sunday best" you wont look good in it for your portraits. It's ok to highlight a personal style... so if your daughter is a little more Rock and Roll, and your a little more Country... its OK! Opposites work! Just toss in something you can both live with, like a good ol'pair of jeans then she can have her leather, or skull shirt and you can be a little more reserved ... and it totally WORKS!

Plus it makes an amazing portrait because it's uniquely YOURS.

Tuesday, July 9, 2013

5 Survivor Tips to Traveling with a Kid.

 I tell you I LOVE road trips... always have!
I was easier before the family... me, a friend... the open road.

I think it reminds me of when we were young, Dad would load us up in the red Ford truck... no matter where we where, there always seemed to be a red Ford truck in our lives. Funny. We would survive on warm Coke, melted Hershey bars... oh the good ol'days... before I knew what calories and real chocolate tasted like!

In my 20's I spent a lot of time driving with the music blaring, windows down... and sunglasses on.

Now, road-trips or traveling in general has taken a whole different spin. Sure I go old school with maps not GPS, and I still bring some tunes to rock out to.. and snacks... MMMM snacks... but they tend to be more like grapes, pretzels, trail mix, water...

I also tend to have a passenger now... the bug. Who, by the way... used to get car sick. YUM. So, I thought rather then writing to you about all those travel tips you hear about all the time... I would share a few tips for traveling with a kid who does (or might) get car sick. Here are the things everyone should pack... and know... but no one ever tells you!

1. Wear a tank top under your clothes. This is extra special if your in tight quarters such as a plane when the vomit starts flying... so much easier to change (pack extra shirts (for both of you)in your carry on, or easily stored so you can change in your car) if you don't have to carry a sick kid to the tiny restroom... covered in yuck.

2. Plastic bags are your friend. Not only do they easily separate toys, or games as you travel, keep markers and other activities easy to reach... but you can put trash, or vomit covered items in them, zip them closed... and presto... smell contained.

3. Bring along Vinegar. Ok, TSA not approved. But a little spray bottle inside your toiletries bag is hardly looked at twice and kills the smell, while helping to clean seats, tray tables, car seat covers and seat belts. Extra towels when your in your own car is super nice as well!

4. Ginger Cookies. If your packing snacks anyways, bring these along. It's nice and dry, and the ginger helps to calm tummies. Keep plenty of water around as well, it will keep the kiddo hydrated as well as providing relief from the spice.

5. Skip the Milk. Now, maybe it was just us... but it seemed like Milk+Travel (of any kind even across town)+ Heat = DISASTER. Once I stopped offering milk (milk products of any sort) on days I knew we would be traveling, like to see Great Grandpa 300+ miles away.. my life got a lot easier! We would have Soy or Almond milk with our breakfast, even carring a bottle with me when we moved across country so we would have it at the Hotels. On times when I followed this rule we NEVER had an issue with being car sick. 
AMAZING!

Many kids get sick from looking out the window while traveling so if you can keep them entertained with activities inside the car, so much the better, we tried to keep her in the middle seat so she could look out the front whenever possible - did it help? Eh, maybe... it certainly didn't hurt.

Now that she's older, we have grown out of most of it... but I still follow these rules... I had a VERY hard flight to San Diego one year... and now I am more prepared. 
Plus, I can help someone else out and pay things forward if it ever comes up!

Tuesday, June 25, 2013

Tuesday Tip: Soft Focus Filter

This is one of my favorite cheats or photography hacks!


A Filter, is something an item that attaches to your camera lens and typically changes something. We have talked about using a UV filter to protect your lens... and I STRONGLY believe everyone should have one on every lens they own. It's clear and it doesn't effect your photos - but it provides awesome protection against dust, scratches and falls for your lens at a very reasonable price.

I am not a filter nut, however I get a TON of use out of my Polarized Filter, which is like sunglasses for your camera. It reduces the reflective light and adds contrast to your images. It's super awesome for darkening skies and removing reflections in glass, and water... I use mine ALL the time!


But, one of my favorites is the soft focus filter... This was probably used a little too much in the 80's and 90's portraits... and it was the spring board for the "center focus" filters which blurred out all but the face in the middle of the portrait.  However, I find that this "hack" of one of the most popular filters for portrait photography... is not only convenient and practical... but looks AWESOME!

All you need is a Rubber Band... and Tulle.


Simply use the rubber band to hold the tulle tightly to the front of your lens No wrinkles. Be sure to hold the extra down away from your flash and so it doesn't go back into the field of view. I use white when I am shooting on a light background or outside, black tulle when I am on dark backgrounds.

This creates a sort of diffusion, or soft focus filter effect. As you can see by my fab model below... 

No Filter
Stinking kid wouldn't take a bath, so you have to forgive the creepy model. 
However, you can see there is a lot of shine on the hair and face... and you can see a lot of whispy frizz in the hair. On a regular person you would see all the uneven skin tone, even blemishes and all the wrinkles. 
1 Layer of Tulle

With this simple step while shooting you see the shine and wispy hairs are reduced... on humans you would see some evening of the skin tone, less reflections from shiny skin... even smother appearing wrinkles and blemishes. 

Is it removing them.. no. But without spending time in Photoshop, it is giving you a solid option to add a natural, softer look to your portraits.. for virtually free. The best part about this... is it is easy to carry, tucks into a pocket...and unlike my filters it doesn't mind going through the wash when I forget to take it out of those pockets! 

Happy Shooting!


Tuesday, June 11, 2013

5 Camera Bag Vacation Essentials

Summer is almost synonymous with vacation. Regardless if your taking a day trip, stay-cation, road trip, or flying abroad.. I've got your back with these 5 tips on what to pack in your camera bag!


1. Rain/Sand cover.  This is a really great item to pack in your bag, and simply leave there. Most are plastic and fold down to take up virtually no space. I love these little bags, because while they are designed for photographers shooting in rain, or humid conditions they also make great added protection around the pool, lakes, and ocean!! Protecting your camera from water is HUGE! Nothing fries out electronics faster then water! Except possibly sand! I couple of little sand crystals in your lens (Dslr, or point and shoot alike) and your looking at some $$ for repairs or possibly purchasing a new one all together!


This little bad boy can be found in many forms from Amazon or your local camera shop. The plastic covers aren't really made for long term use, but with care you can get more then your monies worth since they start at only $6!

The heavier duty bag for SLR style cameras is WELL worth the investment! Again I found this one online at Amazon starting at $12 and is built to be the last one you would "need" to buy!
Now, these are designed for larger slrs... they would work fine for bridge cameras with lens that extend out... but they make them for point and shoots, as well as other electronics like ipads, phones etc. Just remember your looking for a bag to shoot with, not simply something to protect from splashes... if you have to take it out to shoot, it wont help!

2. Silicon Packs. Crazy right? But save those packs you get with new shoes and drop a few in with your memory cards, and around your camera bag.

Believe it or not, they do help draw some of the moisture away from your electronics. If your going (or live) some place with a lot of humidity, every little bit helps! You can also pick up a handy product like Nikon's 8073 Fog Eliminator which you can wipe your lens with and it keeps them from fogging up in the humidity! Some work better then others, personally I have had good luck with this one!

3. Backups and Storage. Memory cards are a no-brainer these days... you always want to have more then you think, and personally I suggest you never shoot a whole vacation day or event on one card. Cards can get corrupted, and are prone to static shock... so I swap back and forth between several cards so if one has an issue - I still have images on another card. While that increasing my time slightly for separating them on my computer, its time well spent in my opinion. The first time you have to pay $300 for image recovery due to static shock you will thank me too!

Now backup isn't simply extra cards. I suggest if your doing more then a day trip you think about a portable hard drive, or lap top as a backup as well. I DON'T suggest that you delete the images from your card.. but simply have 2 or 3 copies as your traveling. You can pick up a 1T drive, that you can hook up a card reader via USB to for under $100 - the larger the drive the more $$ it will cost... but to me, not losing my vacation images = priceless! While your at it, pick up a nice hard, travel case for this device - they start at only $8!

4. Memory Card Storage Case. I don't trust the little pockets in my camera bag for important small things like memory cards! I suggest you pick up something like this:


This hard case, can be found in a water-tight (sand proof) option also. It protects your cards, not just from static, humidity and those types of things.. but its a great investment to keep your cards safe at home, and while traveling. Losing a card would be FAR worse then having to hassle with image recovery! They aren't expensive and in my book its just as important as my camera bag itself!


5. WIFI booster. If your traveling and expecting to be able to post images along the way, or utilize online or cloud storage sites for backups, this little guy is fantastic! On twitter the other day I was complaining about my WiFi not reaching the pool... and a friend suggested this. I was like "OH DUH!" so now I get to work while my daughter swims this summer! Perfect! It's also super handy for poor connections at hotels, or other more dodgy options such as the local coffee house. It is a super practical purchase for anyone using a WiFi while traveling... and I find it a great goody to keep in my camera bag for the "just in case" moments!

I hope you have a FUN, and SAFE Vacation season! I can't wait to see your memories!


Tuesday, June 4, 2013

Tuesday Tip: Senior Portraits

Summer is rolling around and for many of you that means.... 

HIGH SCHOOL SENIOR PORTRAITS! 


Since I myself am all ready booking, I thought that I would make it easy, for my clients as well as my readers to get some great tips on what to wear, bring, etc to make your senior session a success! 

Today we will be talking about ideas for you, and general Senior Portrait suggestions! If you are having portraits with me... these are my recommendations! If you are having portraits done with another photographer, you should take these as general suggestions and talk them over with your photographer. Since each person uses different tools and creativity to produce your images they may have their own rules, guidelines or suggestions.

  1. Think about your location. Are you doing portraits indoors, or outdoors? 
  2. Think about your style. This is a session about YOU. Your clothes, accessories and make-up matter. Let them tell your story.
  3. Think about who your giving them to. Your grandmother loves you. She may not love seeing you dressed to go clubbing.

Personalize your session.

When you schedule your appointment, I will work with you to find the right locations. I have several "go to" locations, but I want your portraits to be a reflection of you.

Punk, skater, or rock and roll: Graffiti walls, brick, or more urban and edgy locations fit the bill.
More country or casual: Then we can look for a barn, hayloft, horses... railroad tracks, tall grasses and old fences. The more information you can provide during your consultation prior to scheduling the more I can offer personalized suggestions and options. 
Feminine, traditional or classic: Flowers, lakes, parks, green grass. 

BYOP: Bring your own Prop! Skateboard, football, ballet slippers, or an instrument. Bringing something that shares your interest helps tell your story!

What to bring:


Clothing Changes. I ask that you bring 3-5 clothing changes (if possible) to your session and even some extra accessories, shoes, and jackets or sweaters to change the look easily. I will then assist you on what will look best for your shape, coloring and setting.  The clothes will then be edited down to the best of the best!

When selecting outfits I recommend that you avoid large stripes and too many patterns.  Choose clothing that will best fit your shape and body style.   

You should always bring things that you love and fit your personality. However, I also suggest you bring at least one  “classic” look as well. If your a girl and you NEVER wear dresses... don't bring one. You will be uncomfortable, and it will show. Instead opt for a nice shirt or sweater, even a jacket that can be put on to create a "Grandparent friendly" or classic option! I understand that if you are a bold, trendy person it would look unnatural to put you in a baby pink button up! You can however do a solid color stylish cut shirt, in a bold color, or even a classic white with a showcase jewelry piece!

That being said I still love trendy, fashion statements... I love when someone has a unique look and really owns it. I just suggest you create a little balance, a compromise for just a few shots, and think about how your outfit will look hanging on Grandma's wall! I'm a parent, I have to say it!

 I suggest also that you think in layers, bringing along a few simple options like a jacket or sweatshirt that can be slipped on and off can help give you different looks, and be more suitable especially if your on location and walking around! 

Shoes. Don't forget different shoes... if your going formal, bring a formal pair of shoes... casual we can do bare feet, or sandals.... but be sure they are in good shape, and clean. I will do full body as well as close up images, so your feet and shoes will show!

Accessories: If your bringing jewelery, I suggest you pack it carefully so it doesn't break or get tangled. Bring it in a pouch or something that wont be lost easily! 

Makeup/Hair: For most clients I suggest you come with your hair and make-up already done. If you would like me to schedule a hair or make-up artist to do this for your prior to your session, that can be arranged however you will be responsible for covering the additional expense.  

Ladies should remember to bring extra lip gloss or lipstick, and powder to help with shine.

You should bring your own comb or brush, hairspray and small water bottle for location shoots. If we are in the studio, I will have plenty of these items around.

Tip: Verte Photography is not responsible for hair dissatisfaction since we are not familiar with your preferences, tolerances for styles, locks or strands. Retouching is done at the client's expense

WATER! While, again I have this in the studio, you should bring 2 or 3 times more water then you would normally drink when your outside. Being a model for a few hours really is HARD work, if your outside and walking around on location you will be thankful for the extra refreshment!

Bring your own Sherpa: I always recommend a friend or loved one come along with the senior. Not only can they help carry your items on location (because there is a lot!), but it sometimes helps you feel more comfortable to have a friend! They can help check your hair and remind you to fix make-up and things as well! While I am happy to help tote items, and always check your details... I do have my own pack of goods to tote and an extra set of eyes is always helpful! 


Verte Extras:
I offer my clients a portable changing room for location shoots. It isn't glamorous, or spacious but it does provide privacy in public areas. However, I do limit full clothing changes to 3 per hour session so that we don't spend all of our time changing clothes!

If you plan on adding a make-up or hair service contact me directly before you schedule your appointment. We will need to co-ordinate the services and times appropriately.

Typically an outdoor session is 1 hour, depending on location. Some locations may require more walking time to get from spot to spot. I never suggest a shoot last longer then 2 hours. I never limit my clients on a number of images. I shoot way more then you will ever need. Trust me.  

I offer all seniors a free digital yearbook image, or depending on the school 2 wallets. I ask each senior to bring, or email me the school information regarding portraits.

Verte also provides 1 free social media image, for each senior to share online with each package, and a 25% discount for a graduation session, that you can use for announcements or collage applications during the spring the following year.


Tuesday, May 28, 2013

Tuesday Tip: Family Portraits

Summer. The ultimate time to get outside, and focus on family fun! Many people take vacations, and attend family reunions, go to weddings... its all part of the Family Photo Season!

Today, I wanted to give you a couple "out of the box" tips for capturing those family moments, without setting up a big "to-do" or stressing yourself out! You can add a lot to your basic snapshot by following a just 2 basic photography guidelines.

1. Learn some basic poses. If your taking group images, nothing ruins a good portrait like poor posing. It doesn't need to be any big deal! By utilizing this basic triangle you can successfully shoot 2 - 20 people in a snap!


The Stair, is created when one subjects eyes are in line with the others chin.


You can easily add people, by going from a single stair to a triangle.


Now you can add as many triangles to your image as you have people!


The key to this - is not to put anyone's head directly on top of someone else... you have to leave room to see part of their chest and shoulders! 

Tip: Keep children and babies in front, not only will this help you get their attention if they are close together, but it will also keep them from looking oddly small due to them being farther away!


Another classic pose is the: LINE
It doesn't get easier, just put everyone on the same line in front of you! 


2. Learn a couple easy rules of composition. These rules apply to all types of photography, and are common in all different types of art as well!
This shows you some guidelines for what's called "The Rule of Thirds" it simply states that 2/3's your image should be subject and a 1/3 dead space. (or vise versa). You see this a lot with off centered portraits, and landscapes like beach images where the horizon line will be the bottom 1/3 and the setting sun and sky will fill the top 2/3's!

Another MUST have in your bag of tricks is...

If your subject is wider then they are tall, shoot Horizontally.

 Taller then they are wide? Shoot Vertically!


I hope you put these super simple tricks to use this summer! Remember, it's more important to capture the moment... then to capture the moment perfectly. Relax and have FUN!


Tuesday, February 19, 2013

The Wedding Contract

Contracts can be scary... hopefully you have taken some time to get to know your photographer, and feel good about your decision to hire them for your wedding images. However, before you sign the deal and give any money you should read the contract and make sure you understand it fully.

If possible when you are interviewing your candidates, ask them for a copy of a contract that you can take with you. This will allow you to review everything at your convenience and with out pressure. Contracts should be as specific as possible on the photographers obligations, with everything clearly written out. This will protect both client (you) and the photographer from misunderstandings. There should be no verbal additions or promises made beyond the scope of the document.

A professional photographer will have some sort of contract for you to view. Be sure your contract has:
  • Your wedding photographer, and their contact information imprinted on it.
  • Be sure you receive a copy of the contract for your records!
  • Due dates and amounts for all payments

In a solid wedding contract there are three main parts. Here are some things to look for and be sure your contract has. If your photographer doesn't include this information generally, you may consider asking them to do a longer contract for you so that it will all be written!

General Terms/ Information:
This portion should list all the details for your wedding.
  • Date, location and time of your wedding
  • Contact information for Bride and Groom
  • Additional emergency contact for the day of the wedding
  • What time and location the photographer is to report to
  • The address of any and all venues the photographer will be required to be at. (church, park, reception area)
  • Bridal Party and Family information, who the important people are
  • Name and Cell number of the photographer
  • Name(s) of assistant photographers or second shooters (at the least a count of how many people the photographer is bringing)
  • Style of photography and important must have shots listed
  • Subjects, events to be covered such as first dance, pre-wedding, formal images... etc
  • Any additional requests or requirements from you, or your venues.


Coverage/Price:
  • Length of coverage on wedding day
  • Additional sessions included and details of packages or prints included from these
  • What kind of equipment will be used / back up equipment available
  • Film or Digital ( Is there a min/max number of images to be shot or delivered)
  • Date proofs will be available (printed or digital view?)
  • Number of proofs and complete package details 
  • Delivery details of finished package (how, when you will receive them)
  • Editing, Retouching, or other finishing details that are included or additional cost 
  • Overtime or other additional fees listed
  • Total price (itemized if possible) 
  • Re-order policy and prices
  • Meal plan. Are you required / or offering to plan a meal for the photographer?

Liability/Terms
  • Copyright: who owns the finished images, can you print them yourself, will you receive a photo release in order to do so?
  • Public usage of images (who owns what, can you post images to facebook or a blog, can your photographer? )
  • Additional Photographer/ Photo services (most have exclusions, to insure they are the only "photographer" at your wedding. If you plan on having a photo booth from a separate company or service you will need to have an amendment added so that the photo booth or operator is not considered "another photographer"
  • Limit of liability: this covers "what if"
  •  Insurance coverage of damage to property for venue
Sample Limit of Liability: If Photographer cannot perform this Agreement in whole or in part due to a fire or other casualty, acts of God or nature or terror, or other cause beyond the control of the parties or due to Photographer's illness or injury, then Studio will return all fees to the Client(s) but shall have no further liability with respect to this Agreement. This limitation on liability shall also apply in the event that photographic materials are damaged in processing, lost through camera malfunction, lost in the mail, or otherwise lost or damaged without fault on the part of Photographer. Client(s) agree that an entire wedding cannot be replicated, reenacted or repeated for the purpose of a re shoot and limits Studio's liability to the amount paid under this contract.

A Limit of Liability is basically a disclosure of what the photographer, studio or company is going to do if something goes wrong. It should list everything from if the photographer, or promised assistants do not show up to camera failure or cancellation of the wedding itself and under what circumstances they will offer a refund, or reschedule, or offer replacement product.

In most cases the limit will be a reflection of any deposits or monies already collected at that point. If you haven't paid the full amount, the photographer wont refund more then what has been paid. That line about "clients agree that an entire wedding can not be replicated, reenacted or repeated" basically means if the photographer ruins your day, your images, or your memories... your not getting back more then your photography money... nor will a court require them to. 

This is where all your due diligence, checking references, and trusting your decision to hire a professional will come to play. At the end of the day, because of the limit of liability your trusting that professional with your memories. 


Wednesday, February 13, 2013

The Photographer Search pt.2

Now you know where to look... but other then price and style what should you be looking FOR in a photographer... Here is my list of things to look for or ask before meeting with the top candidates.

Most of these questions can be answered by viewing someones website. If you don't see the answer, or it's not clear, or up to your standards either move on to the next, or if it's not a deal breaker for you then ask for clarification or explanation on the phone prior to meeting. If your mind is at ease, and you like the style and price THEN put them on the short list of photographers to meet with! Remember, you want that list to be around 3. 

1. Stability. 
  •  Look how long they have been doing weddings?
  • How long they have been in business?
  • Do they work Full Time as a photographer? 
  • Do they have a studio location?
2. Price and Service.
  • Are they in your budget?
  • Does the portfolio fit your style? Can you imagine those images hanging on your walls?
  •  What is included in the package?
This is where I am going to put in my 2 cents... many people will want the photographer to hand over a disk of images, maybe even unedited images because they have Photoshop experience. Don't fall into the trap of discounting a photographer because they wont offer you that. First, understand digital files (unwatermarked) are basically like negatives as far as copyright laws stand. A photographer makes money based on sales, its retail as much as it is a service industry. So first, if they hand you a disk they know they wont see you again. But more importantly, photographers have a certain pride in their work as artists... handing over a disk, especially an unedited disk would be akin to a painter drawing a paint by numbers - without giving you the number code and dumping paints in your lap. It's not a finished product, and they wont give you a price break for saving them the work.

Is this true of everyone, no. I in fact sell disks of my images. However, even the "unedited" images have been touched in some way. I don't give RAW images, ever. Every image of mine is "processed" through Photoshop, in what I call my "editing" process. That doesn't mean that I am whitening teeth, or fixing out of place hairs... it means I am choosing the "best of images" tossing the accidentals, and ones I knew were bad as soon as I took them... and doing what I do to provide you with the best images I can. I offer all my clients the right to purchase a disk with a photo release so you can print your own images, or use in shops and online if it is product or commercial images. I choose to do this not because I don't want to see you again, but in truth I don't like shipping prints nor do I have the time to hand deliver them anymore. Quiet frankly I find constantly pulling out images 3 months, or a year later to print 1 or 2 images a huge pain and super time consuming... so for me, it simply makes sense to offer a disk. In addition, I offer clients what most would classify as "editing" as a retouching service. This allows me to fix the teeth, hair, and do creative edits if you want me to spend extra time on that... at your request.  I can charge you per image, or for everything, but I charge extra for that work.

Because every photographer is different in this way, it is VERY important to clarify what they mean, and include when they say "editing". Just as it is when they say they give you a "disk" of images... does that mean you get a release to print and share also, are they watermarked... etc. I will cover more of this in the contract details.. dont miss that!

3. Registered business
  • Are they registered as a business with the state? You can ask to see a business license, ask for the number, or go to your states official small business website and typically search there for the name. 
  • Are they registered with PPA, WPPA, or other photography groups? This just goes towards how serious they are... are they respected by peers, well known in the community? Don't discount someone because they are not members, I know many great photographers who are not. But you may ask them why they are not.
  • Do they have insurance? Not just on their gear, but what if they damage something at the location? When I was doing time as an assistant the photographer I was with took a large backdrop up an escalator for a commercial gig... and it punched a hole in the ceiling. oops. 
4. Equipment / Assistance

  • What kind of  equipment do they own? ( I suggest looking for professional grade slr equipment multiple flashes, lenses... this would be someone serious about guaranteeing quality for your day)
  • Do they have back up gear, what is that?
  • Do they have an assistant, or a second shooter? ( the difference being an assistant, helps.. carries things, holds reflectors etc. A second shooter does additional photography when they are not helping the photographer and doubles your chances or gives two perspectives of events like the bouquet toss... one photographer could capture your face - the other the bridesmaids)
  • Is the second shooter always the same? Many photographers don't have an official "go to second" but I think if you are going to have them shoot - you should be able to see THEIR work as well as the main photographer! (interview both if possible!)
5.  Turn around time.
  • When do you get to see your proofs? 
  • Are they printed or digital proofs
  • If digital, do you have a private gallery online that you can share with friends and family?
  • Are they posted to Facebook or a blog for public viewing? (personally I am not a fan of that... for privacy reasons)
  • How long before you see the finished product?

This should give you solid information to make a short list of photographers. Keep in mind, while some of it should be very openly displayed on the website, if it's not.... ask! Don't call a studio or office and expect to be able to ask them all of this just on a random call, however. Photographers don't make money sitting around answering phones! Be respectful of their time, tell them your a bride or groom looking for additional information and you would like to ask them a slew of questions prior to possibly meeting, ask if they will schedule a phone meeting with you, or if they have 15-20 minutes to answer your questions now.  That respect will go a long way! Also, they may have an assistant or office manager answering phones... don't feel like you have to talk to the photographer only... its a good chance to get an inside look at the dynamics of the team. If they have time and the answers you need you might get more information from them!


Tuesday, February 12, 2013

Starting the Photographer Search

It really doesn't matter if your searching for a family photographer, commercial, or even wedding photographer there is a vast number to choose from and many different places to find them!

The Referral: First, look for a friend who has had a similar need, in our case someone who has gotten married in the past year or so. Ask, if they were happy with the service, quality, and if they could have changed anything what would that be? Look at their images.. they could be LOVELY but just not your "style". If you find a good referral but they are out of budget, or not really the style that your looking for, ask for a referral from THEM and let them know why. Photographers tend to know other photographers in different price ranges, styles, as well as others similar to them in case they are booked the day you need!

Also, ask other wedding vendors that you have already chosen... ask at the bridal salon, DJ, Cake maker... in many cases they will know or have cards on-hand even if they don't have first hand experience of the service.

Check the online ads: There are TONS of websites that list wedding services. Most the photographer has to pay to be a part of... but show sample portfolios and sometimes offer client reviews like SnapKnot , The Knot, Wedding Photography Select and One Wed.

I personally like The Wedding Wire you can not only review clients ratings and comments, but you can talk to other brides online in the forums! Super awesome for ideas and getting more information!

A great place to check also is PPA (Professional Photographers of America)  which lists a data base of its members. PPA offers education, certifications and hosts trade-shows for photographers. While not all awesome photographers are members, its a great place to look for a serious professional! Another great option is WPPI (Wedding Portrait Photographers International) being more specific you wont have commercial or landscape photographers clouding up the listings. Plus its a great start if your planning a destination wedding!

If your style lends towards photo-journalistic there is a site for that too! The Wedding Photojournalisic Association (WPJA) Links you directly to their members in your area. Founded in 2002 it is a "newb" in the world of Photo Associations, but they have some amazing inspirational images and solid reviews of their members! 

The Budget Finds: Many "good deals" can be found for someone starting out and working to build a portfolio... keep in mind you still want someone who will be professional with your guests, you wont find them at the bar, and trustworthy! You WANT to be able to find them after and get the images! You also want there to be quality images! Rather then trusting your images to little Bobby who has a camera and took photography in high school, check the local Art Institute, or Collage in your area with a Photography program. Go to the TEACHER and ask who they would recommend! Also, checking with local studio photographers who have / or have had interns, or might be going into that direction themselves is a really good bet! Please be careful tho, not every landscape photographer or portrait photographer can do an equally good job for you at your wedding!

Now... many people will suggest places like Craigslist - where you can place an ad or review ads... like classifieds. Since this is free for both... your basically opening yourself up to any number of scary situations, not just "have point and shoot and want to do weddings" but scammers, and other crazy people alike. There are too many other good places to search for me to ever recommend this... but if you do... make sure they have a website, client referrals and clients you can call to talk to, and ALWAYS meet in a public place, and NEVER meet anyone alone. (ok, mom rant over)


Google does a good job of finding photographers with websites or blogs in most areas, so you can do that as well just to get some names to look into! Before I go on to talk to you about the meeting, we are going to talk a little about research and questions to ask before you set a meeting. This will help you select your "top candidates" as well as not waste multiple photographers (and your) time by meeting with more then three.

I hope you keep coming back to check in as we continue our month of LOVE!

Friday, February 8, 2013

Friday and I'm in Love


I don't care if Monday's blue
Tuesday's gray and Wednesday too
Thursday I don't care about you
It's Friday, I'm in love
-The Cure


Since this month is all about love... I thought I would share a few things that I love! Enjoy!


Babies, crying, sleeping, smiling.... it doesn't really matter!


Crazy Funky designs and fabrics


Lip Butter from Streeter & CO


Lilacs, lavender and all things French


Wednesday, February 6, 2013

Wedding Photography Sessions Explained!

Since February is the month of love I thought I would spend some time talking about wedding, and couple photography! Today, I want to share with you some "hot" terms that you will be seeing as you start shopping for wedding photographers!

First, what kind of photography are you wanting? You should sit down and decide how much of your wedding photography budget should be spent on "other" sessions! Or, decide if other sessions can be budgeted out of your every day account! Here are some additional sessions, some photographers include in packages with your Wedding Day, some offer in addition, and some you will have to find someone else to do entirely depending on your photographer choices. Not every wedding photographer does, or should do it all!

 Different kinds of photography sessions:

Engagement Session: In this photo session photographers typically highlight  the couple’s personality. Locations can vary from the photographer’s studio to popular tourist spots in their hometown, back yards, or a special location that sets the tone.  The dress is  more casual than other wedding-related photo sessions. While the engagement sessions have been used for newspaper announcements, photo-wedding invitations and the popular photo guest book in the past, many are now choosing to use this photo-op to do "save the date" images. You can do an engagement session at any time during your engagement, and for any end purpose. It is a really good idea to schedule this session with your photographer for your wedding since it will give you a good idea of how well your personalities and styles work together. If you don't have a good experience with this session you may want to consider a different photographer for your wedding!

Bridal Portraits:  In this formal affair it is ALL about the dress. While this is typically done in a studio setting, some brides may opt for a 'clean" outdoor scene as well. While the formal name leans towards tradition it is perfectly acceptable to have some fun with it as well! For brides who want tons of pictures of their PERFECT gown that was chosen after careful and laborious consideration, this is a non-negotiable. This is also very popular with traditional brides, and traditional parents!


©Verte Photography / Image of Theresa J. of Theresa J Photography.com


The Wedding Day: You will want to be sure your contract includes times and addresses of where your photographer will be, and exactly what will be covered on this day.
Pre-Ceremony: This is everything that happens prior to the ceremony itself. Be specific in your needs here. It can include the bride getting hair and make up done, getting into the dress, to informal shots with attendants and family, for large weddings I have even suggested doing all the formal shots of the bride and groom separately that can be done, so any formals done after would include them both. Of course some couples will even see each other prior allowing all the formal shots to be done prior.
Ceremony: These are the images taken during the ceremony itself. You should check with your church or venue for rules regarding flash, and access the photographer will have.
©Verte Photography

Formals Bridal Party and Family: Even if your a non-traditional bride, you will find yourself doing some sort of images with your bridal party, and family members. The poses and scene will set the tone for how formal these images come out, but I suggest you do some just for the traditional family members and keepsake images.
©Verte Photography

Informal Portraits: These would be the crazy fun images, more for the bride and groom they can include anyone they wish, but it is kept low key and less posed (or at least less formally posed).


Reception Images: This is pretty much anything that happens at the reception. Typically I suggest the standard cake, toasts, first dance, etc... and maybe an hour or so of dancing... it is not necessary to have your photographer there for the "whole" party, one dancing shot looks much like the other. However, it depends on your day and if you have a "big send off" planned, how long the reception is etc.

Photo Booth: This is a HOT gig right now. Many people are using photo-booths as entertainment for guests, others are using it to put together a photo guest book. Some photographers will offer this as part of their service, some wont allow it at all. You really need to check with them if you are thinking this will be an option for you!

Day After: Shot the “day after” the wedding (although some are after the honeymoon) this is a great time saver if you don’t want to spend the majority of the wedding day taking pictures.  The bride and the groom are more relaxed, and it shows! This can be done at a family brunch, or for more casual family or private couple images. The "newest" trend is to do them as sexy, boudoir style images in a hotel room, just for the couple to enjoy.

Trash the Dress: Another type of day after session.  This varies from aggressive “trashing” with brides engaging in paintball or mud wrestling, to the more genteel trashing of walking through ocean surf or swimming in a lake. Since today it is becoming increasingly uncommon to pass a dress from generation to generation, this lets the bride have "one more day" in it and do something unexpected.

Boudoir: Typically this is just of the bride who wants to give her husband-to-be something private to commemorate the occasion, or even to celebrate the first Valentines day or Christmas together.

Additional Event Photography: Many couples want the wedding events captured with equal skill and talent as their wedding portraits.  While most photographers do not include these optional type of photo sessions, most photographers can and will  cover bridal showers, wedding rehearsal dinners, bachelor parties, etc.


It is really up to you to figure out what style, and how many sessions you will want. Work with your photographer, if they will be doing multiple sessions for you. Some will include an engagement shoot, or if you don't want that, they may offer a holiday session, or 1 yr anniversary session or something else instead!

You really have to balance your budget, with all the cool ideas and everything you want!

Monday, February 4, 2013

Photography Styles

Today you have more choices then ever before for "types" of photographers... how do you chose? So many times I have brides approach me and simply want to book for their wedding or event... and I have to slow them down and really make sure they know "my style".

It's really hard with people pinning ideas for photography images, and then expecting any photographer to recreate that moment. Let's forget the differences in equipment, knowlage, location, and everything else... just the difference in shooting style can dramatically effect how your images turn out.

So how do you know what "style" of photographer you should be looking for? Let's look at some of the popular words photographers use to describe themselves and then you can sort by what style your eye is most drawn to!

Traditional Portrait: (Classic style) This typically referrals to a more formal and posed images. Straight forward, well composed, beautifully exposed, and simple images with a focus on the people. This can refer to any location and is common with many  photographers. This photographer is typically on top of posing, adjusting hair, placing hands... very much at the forefront of the action directing each shot. While older generations will be more comfortable with this style, some modern brides feel it makes them look stiff and uninteresting. The trick is to find a photographer that you enjoy so you will remain relaxed even in a "posed" session.. this will lead to great traditional images!


Contemporary Portraiture: Much more relaxed and lends towards less formal images, this style can result in more spontaneous images. Capturing the spirit of fun, while still incorporating formal elements. The photographer may be less involved in every moment, allowing your personalities and interactions to shine, however they may still set up some shots, or adjust details as needed to improve the overall image. This photographer will tend to seek out unique locations, or angles in which to set apart your wedding from others. 


Documentary / Journalistic Style: In the classical sense, this style is completely hands off. It is a direct record of your day, typically without any posed images, or real input from your  photographer. A sort of fly-on-the-wall approach, where the photographer blends into the crowd and simply records the events.  


This can also be described as candid photography... but candid simply means informal, un-posed and most photographers utilize candid images for reception shots, so be sure to clarify if "candid photography" is mentioned!

This style can also be referred to when people think of images that take great care to take advantage of aperture controls to blur backgrounds, and add interest to images by having greater control over the camera. You will need to see the photographer's work to know WHICH he is really describing,  with this term, as they can produce drastically different results. 


Artistic: I am not personally a fan of this description, it seems to be used as a "catch all" however, when used "properly" this term implies individualism of the artist or photographer. Depending on photographer this may require a great deal of intervention, or none. It may be heavily altered images by Photoshop, or it could be entirely produced by camera, filters etc. You simply wont know what this term is implying without viewing the portfolio of this photographer. Please do your research here!


Glamour or Fashion Photography: This is more of a type of photography then a description of a style, but we are seeing it used more and more often as a description for  modern wedding images where the images have the look of a fashion magazine or what you would think of as a model being posed. Typically a lot of attention to detail, along with lighting is given priority to comfort. 


 .    
Many photographers will describe themselves somewhere along these lines, or within combinations of these.... some come up with their own "labels", but for the most part everyone will fall in one of these categories or a combination of them.

Professional wedding photographers views their work as art, and the only way to know if you enjoy that style is to read the descriptions and view the portfolios. Keep in mind a portfolio is representative of "the best of" from that photographer, not "every shot".  It is perfectly acceptable to ask a photographer to show you a sample wedding, cover to cover so to speak so you can see their style from start to finish of the same day.

Regardless of if you are looking for a commercial photographer, Wedding photographer, or family photographer... I hope understanding these basic descriptions helps you weed through some of the multitudes of choices you have! 
 .