©Verte Photography All Rights Reserved

Friday, May 31, 2013

Don't forget Violet, Too!

Do you know that song... it plays over and over in my head...
Red, orange, yellow, green, blue... and don't forget Violet too! 


 Today, I'm not really talking about rainbows or cute little mice with songs that you can't get out of your head... nope... I am introducing you to an AMAZING shop owner who very generously offered up a prize for my birthday giveaway. During which time I feel like I got to know her, and her shop so much more and I can't wait to share more about her with you!

Violet's Buds


Violet's Buds, named after her daughter was officially started in 2011. After wanting way too many cute hair accessories for her daughter, owner Melanie decided to try to make them herself. Quickly hooked she began making accessories for her nieces, and as gifts. At the encouragement of her friends and family she opened shop, and have been enjoying it every since.  Melanie enjoys what she does because she is a SAHM, and needs that creative outlet, like so many others do. Her shop allows her to be creative, and flexible with her schedule. Working along side her is business namesake Violet, who gets to be introduced to different patterns, colors and textures of fabric! Which only inspires Melanie more!


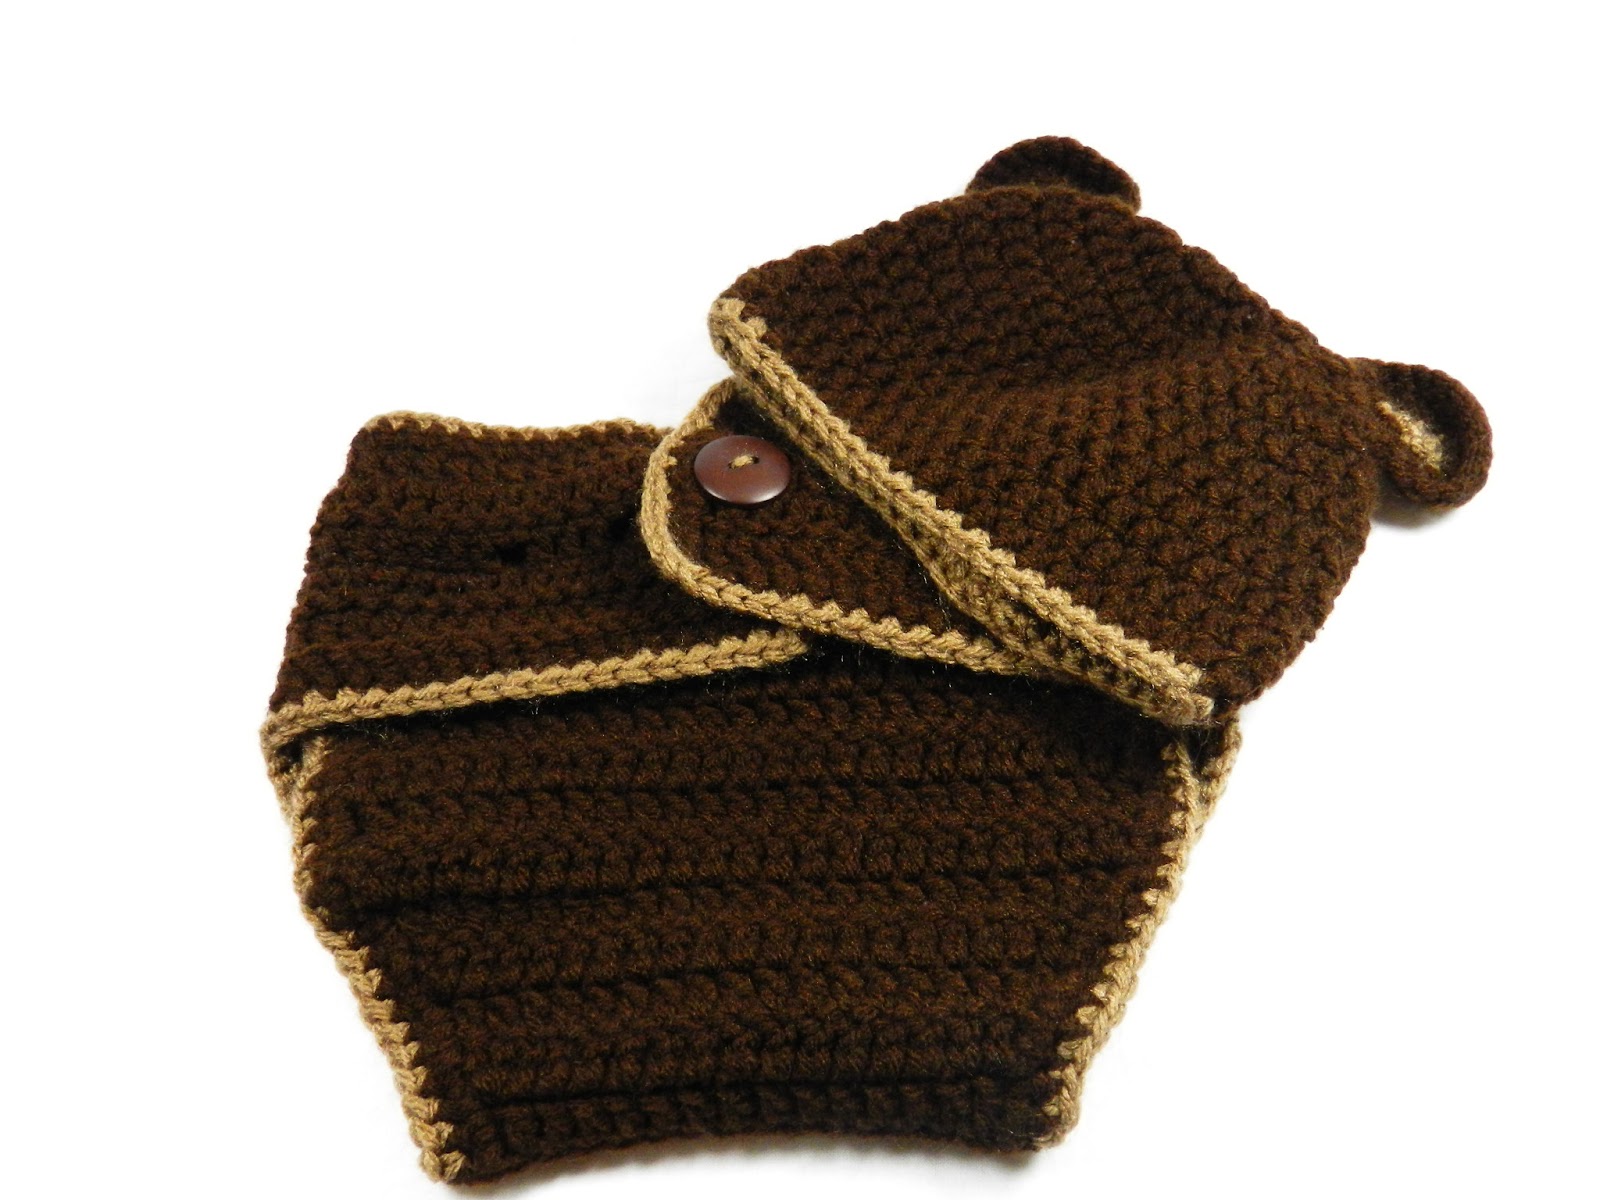
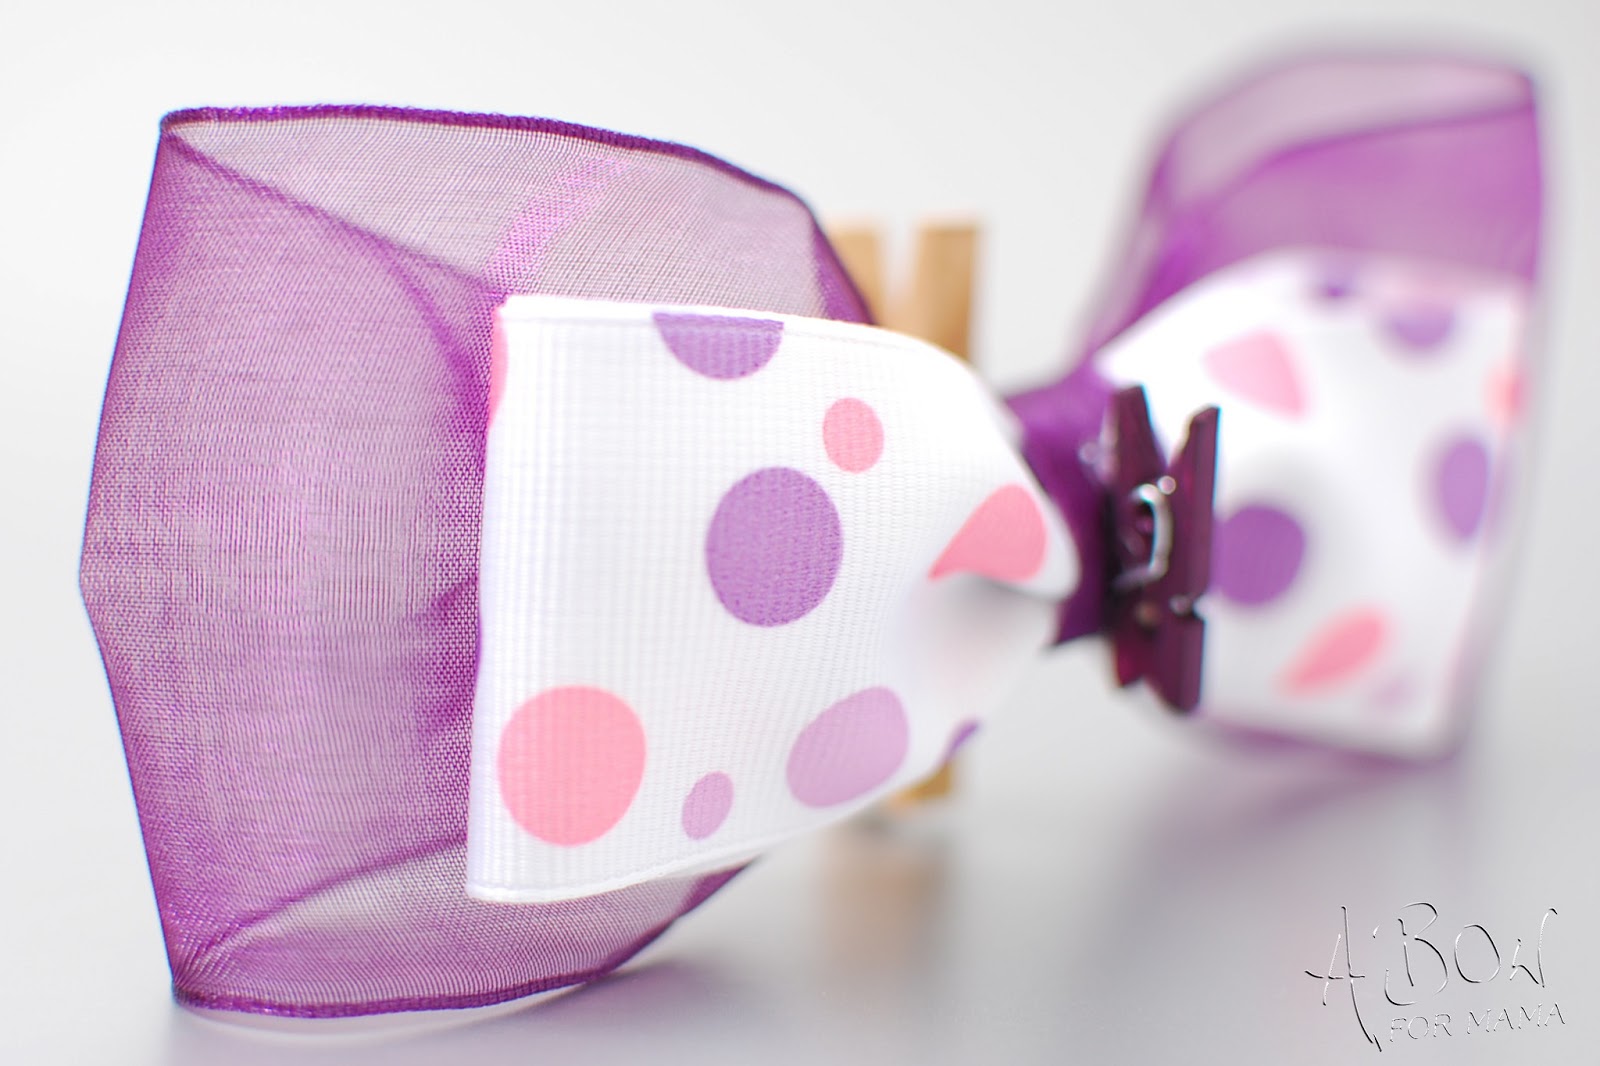
While her top selling item may be the custom fabric jewelry sets she offers which includes bracelet, ring and hair clip, I personally have fallen head over heels in love with her photo props and headbands.

Melanie is most proud of the fact that she found something she likes to do and has stuck with it! When I asked her about it she said, "I'm happy to say that I am learning new things from both the crafty side & business side of things. I love meeting new crafty friends!" As for her advice for a new business or shop owner, Melanie encourages them to, "Plan on spending as much time, if not more, on marketing, advertising, and other business tasks as you do on creating your products. It is a somewhat daunting task, but can be a lot of fun too! Finding a few like minded groups of crafters/businesses that work together to build each other up (rather than compete) has been the best part of this venture for me." 

GREAT ADVICE! I couldn't agree more!


Part of what I love about Violet's Buds is that each item is unique and handmade, many pieces are one of a kind, and have vintage or upcycled elements to them! Melanie talks more about how she likes to be green in her blog post here. http://violetsbuds.blogspot.com/2013/04/how-are-you-green.html 


I LOVE it when a business has a green side!

What's new in the shop? Melanie currently has several new "Dolly & Me" sets which include a hair clip for both your little girl and her dolly. The sets are also good for Mommy & Me, and for sisters! HOW CUTE IS THAT!

Plus in July husband (and shop owner of Gipson Wands) is joining her at the Strawberry Swing Indie Craft Fair in Kansas City .They LOVE meeting fans and customers in person so this is your chance!!! Pack up the kids and head out for a super fun time! They also have a special something planned when they reach 10K Facebook fans... so you better jump in and like that page, I have a feeling it will be AWESOME! https://www.facebook.com/violetsbuds
I asked Melanie What is the craziest (PG) thing you have ever done? Her response, "I bought a house with a guy that I had only dated for 3 months. That was 10 years ago, and we are still in the same house, and will have been happily married for 8 years in September."  That might also be the sweetest thing ever said! awwww!

One last thing, before I tell you to check out all her fab links... I want to point out, all of these images are Melanie's. She is not only crafty, but quite the accomplished photographer as well! I LOVE that!

Links you MUST check out!
http://violetsbuds.blogspot.com/
pinterest.com/goobers18/violets-buds/
http://violetsbuds.storenvy.com/
http://www.etsy.com/shop/violetsbuds
http://wanelo.com/violetsbuds
https://www.facebook.com/violetsbuds
http://twitter.com/violetsbuds

Tuesday, May 28, 2013

Tuesday Tip: Family Portraits

Summer. The ultimate time to get outside, and focus on family fun! Many people take vacations, and attend family reunions, go to weddings... its all part of the Family Photo Season!

Today, I wanted to give you a couple "out of the box" tips for capturing those family moments, without setting up a big "to-do" or stressing yourself out! You can add a lot to your basic snapshot by following a just 2 basic photography guidelines.

1. Learn some basic poses. If your taking group images, nothing ruins a good portrait like poor posing. It doesn't need to be any big deal! By utilizing this basic triangle you can successfully shoot 2 - 20 people in a snap!


The Stair, is created when one subjects eyes are in line with the others chin.


You can easily add people, by going from a single stair to a triangle.


Now you can add as many triangles to your image as you have people!


The key to this - is not to put anyone's head directly on top of someone else... you have to leave room to see part of their chest and shoulders! 

Tip: Keep children and babies in front, not only will this help you get their attention if they are close together, but it will also keep them from looking oddly small due to them being farther away!


Another classic pose is the: LINE
It doesn't get easier, just put everyone on the same line in front of you! 


2. Learn a couple easy rules of composition. These rules apply to all types of photography, and are common in all different types of art as well!
This shows you some guidelines for what's called "The Rule of Thirds" it simply states that 2/3's your image should be subject and a 1/3 dead space. (or vise versa). You see this a lot with off centered portraits, and landscapes like beach images where the horizon line will be the bottom 1/3 and the setting sun and sky will fill the top 2/3's!

Another MUST have in your bag of tricks is...

If your subject is wider then they are tall, shoot Horizontally.

 Taller then they are wide? Shoot Vertically!


I hope you put these super simple tricks to use this summer! Remember, it's more important to capture the moment... then to capture the moment perfectly. Relax and have FUN!


Monday, May 27, 2013

A little gift.

I hope you all have been learning a lot during our product photography series! As you know, I've been busy in the studio myself! I have had SOOO much fun checking out the new designs, and products by so many different shop owners! I can't share many of them with you yet... sworn to secrecy and all that! I admit it's one of the more difficult parts of my job! I can't wait to share not only my images... but these products! Your going to LOVE them!

For now... I can tell you that when I opened the project the wonderful, and fantastic Melli from Melli's Trinkets and Melli's Yarn Works  it had this super awesome trinket inside... just for me! Not only super sweet, and thoughtful.. but super cute!

It came inside an adorable bag, along with a handwritten note... did I tell you I LOVE it when people take the time to write a note!


When I opened it up I discovered this charming anklet! PERFECT for swimsuit season... (really it's a  bracelet, but for me anklets are more fun, and this one will fit!!)


And it even sports the cutest little charm saying "made for you" I LOVE it!
By the way... this adorable item has "friends" found at Melli's shop you better place your order now!


Thursday, May 23, 2013

A Crafty Gal

 It seems only fitting that I do a introduction to the woman behind Crafty Gal Creations. Pam has been a client of mine for so long, and I use her items as examples here all the time!

I first met Pam when she opened her business in 2010, she was looking for a product photographer who could "think out of the box". A typical white background... just not Pam's style. It was a natural fit! Pam looks for scenes and props to be used with her jewelry to really open up the imagination of her buyers. She feels that this really separates her from so many other shop owners. Pam also finds that she is picked up, and showcased in many treasuries on Etsy due to the more unique style of images she has!

Pam created her business because she was tired of department store, mass produced items. Pam found a passion in jewelry, so much so that before she knew it she had made over 100 items! She had to start selling. Today, Pam is so proud to have a shop where each and every customer feels like they are her only buyer. Pam exudes customer service and provides quality products at extremely competitive prices. While her store began as a hobby, it grew to be Pam's therapy. She finds herself the happiest when she is alone and quiet in her studio with her beads and stones. If she could do it for her sole income, she would!

Pam's best sellers are items with Earth's Natural stones in them, which is fitting because it is where her passion lies, she loves working with them. She does offer other items, and non natural stones, but that's not her focus. Combining the fact that she works with these Earth Natural stones, and that Pam only creates only one of a kind items creates an EXTREMELY special product, that she often refers to as her treasures. She jokes (at least I think she jokes) that she finds often finds it difficult to pass on something she has created because she loves each of them so much!


Recently, Pam has been making items with a little more "bling" in them. Since she has had many requests for these items. She is currently trying to have a few of these new items in her shop at all times to provide some variety.  I have to say I have LOVED seeing these in the studio! This one might be my newest favorite!
    

Pam finds inspration in many different places, including seeing a piece of jewelry on someone else. She often sees something and thinks... "If I made that, I would have______" and then she goes home and she creates it!  Other times, she is simply drawn to a particular stone, and she will make several different pieces to showcase it. 
 
 
Even though Pam and I have known each other for so long, and I see her items in my own studio every 6 weeks or so, I still learned a thing or two about her while gathering information for this post. Pam is one tough cookie! She is a retired Army veteran... and flew in a helicopter during combat training! THAT is no run-of-the-mill helicopter ride. From someone who has been afraid of flying for a large part of my life... simply getting into a helicopter is something I'm not sure I would want to do... combat training... pretty sure that includes some quick turns and ups and downs... no thank you! I am SUPER impressed by this! 

For my closing note, I DO realize that I showcased most of the items with close up, detailed shots, I did this because Pam has paid such amazing attention to detail and crafted each item with care and love.  I very much wanted you to see those details!! She offers necklaces, lanyards, earrings, bracelets, bookmarks and SO much more in her shop... I literally never know what to expect from her... but I know I always love each item! I hope you enjoyed getting to know a little more about Pam, shes a fantastic client and I consider her to be a good friend! She's stuck with my business even after she also moved away from the Denver area, and has always been supportive of my goals! Pam does offer sporadic sales AND FREE giveaways for her Facebook fans. All of her sales and promotions are announced via FB, so take a few moments and like, love, and share this fantastic shop owners social media and shop links!
www.craftygalcreations.etsy.com             http://pinterest.com/pamsjewels/         http://www.facebook.com/pages/CraftyGalCreations/128737910505845

Friday, May 17, 2013

Feature: Yarn Mama

 I was really surprised when I sent out the call for prize donations that Jessica from Yarn Mama, who I didn't know at all jumped on board! She was SO sweet in offering - not one little hat... but 3.. CUSTOM hats! That was awesome!

I have had a chance to get to know her a little better and I would love for you to have that same opportunity! 

Jessica has just opened her shop on Storenvy this year. After having so many people asking her, and her family where they had purchased the items they were wearing! It turned out to be much easier to hand them a business card, with her website then to explain over and over how she had made it and then write down or tell them all the information! (I've been there!)


Jessica prides herself on making 100% handmade items, and she doesn't put it in her store, sell it or ship it if it's not to her own personal standards and something she would be proud to let her own family wear! She LOVES spending her time crocheting and knitting since its her relaxing time as well as well as her creative outlet. She thrives off of making the ideas in her head come into something that everyone can enjoy!

Jessica draws inspiration from just about everything, ideas seem to just pop into her head all the time! Her husband and son also do a great job of offering their suggestions! 

While her business is new, and exciting Jessica is most proud of the fact that even though she was a young mom, she has been able to make a great life for her son who is becoming a wonderful young man. I often say my biggest accomplishment in life is my daughter as well! 

So welcome Yarn Mama to my little world! Be sure to check out her products and maybe find something new for yourself or a loved one along the way! Here are all the links you need!

Tuesday, May 14, 2013

Watermarking made Easy!

It shocked me to learn that many shops don't know what watermarking is, or how to do it!

Today I would like to share a few thoughts about this process and some easy, inexpensive ways that you can protect your images!

First, what is watermarking? Officially a watermark is a recognizable image or pattern in paper or print that appears as various shades of lightness/darkness when viewed by transmitted light. This "watermark" term is more commonly used to describe a layered image on top of a photograph or digital file that claims the copyright rights to that image OR product.

©VertePhotography
I use a watermark on my digital files to claim ownership of that image, so other photographers can not take the credit for it. Nor can it be sold by anyone else under copyright law. (I will explain copyright on a different day, but basically without my permission even the young lady in this image wouldn't be able to print it out, say at Walmart... because Walmart doesn't have my permission to SELL the image)


Why should you protect your images online: Shop owners, and bloggers have taken to watermarking their images so as images are shared digitally, pinned and tagged etc it's
1. Protecting another person from saying it's their item or creation (like another shop or blogger using that image to promote themselves, or their shop.)
2. People have a name, or something to search if they want to purchase or find out more about the product or image. Say if you found something on Pinterest but the link was broken. If the bloggers web address is used as a watermark you can easily contact them about it.
3. Advertising. It gets your business name, or information in front of other people.

NOTE: You should know that just because this is the standard and well practiced option, it does NOT prevent less then honest people from stealing your ideas, or images if they really want them.

How can you do it? Almost any core editing program has a layer function these days, you can pick up a old copy of Photoshop Elements (some as low as $10) and that works AWESOME. Because each version lets you not only work in layer but create a png image file where you can remove the background. (so you don't have a big square over your image) Most allow you to simply drag and drop the watermark over to where you want it, adjust size, and opacity (how see through it is)

Placement: Ideally, the watermark should be on the image, but not over the product itself. You still need people to see what your selling after all! What good is a product image if you cant SEE the product or quality of it!

Now... I perfer to do my watermarking in batches over one at a time. WHY do people do it one at a time? I think because most of those "core" programs don't allow for "batch" processing. SILLY programs! Who has time to do 100 images one by one... well maybe shop owners and bloggers don't do 100 images (or more.. my last shoot was 400+ of like 20 products!)  at a time. Fair enough.

But.... if you want consistency, and SIMPLICITY. Batch process is totally the way to go. You can pretty much set it and forget about it - unless your like me and offer it as a service. I find myself doing client images with their shop watermarks, or for other bloggers all the time so I am constantly changing my settings to their preferences and watermark images.

In past Photoshop Elements (which is a consumer grade program, it cost less then Pro-programs, so I suggest it often) You only had the option to do text, but you can control the color, font, placement and opacity still.


You simply select the folder you want to "batch process" and where you want it saved to... select any other settings such as image size changes, file name changes and your watermark (or label as its referred to in some). Hit run and BAM your computer does the rest.


Now.. ready for this... I have the TIP of the WEEK! For some it might even be the tip of the year considering how much your going to love it!

I found you a FREE software you can use to batch process your files
Yep- cus I rock like that!

You can download and read more about the program here: http://www.watermark-image.com/


It works really the same way I explained above... only it gives you a few other options... like a 3D effect... which looks really snazzy!
Product provided by: Melli's Yarn Works

Product provided by: Melli's Yarn Works

I really liked testing this software out. I even suggested it to a few clients and wrote out directions - so if anyone needs them I can post them for you. But overall it was fairly simple to navigate. I think the biggest thing was having the right image for the watermark to start with.

So if anyone needs your logo turned into a watermark - ask me! This month I will be happy to do it for free for you!

Monday, May 13, 2013

A Bow For Mama and MORE!

First, let me introduce Shirley, from A Bow for Mama. Shirley makes amazing decorations and bows that are used for all occasions. Baby showers, weddings, holidays, etc. ABFM provides your home, business, or event with the beautiful decor it deserves!

Each of her bows are handmade, they are packaged and shipped with LOVE and CARE, so that they arrive to you fluffed and beautiful! When Shirley contacted me and asked if I would take her product images for a new "super secret" product line! I almost died! I LOVE a good secret! I was fall out of my chair excited!!!!

 I received her boxes of goodies, and I could hardly wait to open them! I had an "idea" of what was inside, but to put my hands on these little gems - AMAZING!


As I unpacked the box, I was very impressed with the time Shirley had put in to separate the bows, and make sure they all floated so nothing got squished. While I did fluff a few as I was styling for her images, I didn't really "need" to! They arrived beautifully!  Now, these are not her regular bows... no this is something TOTALLY new for her! I am so excited that I finally get to share them with you! It was SO hard keeping this a secret!

These little prizes are her message board bows... or as I like to call them Little Bits from Heaven! They have 2 clips, one on the back and a smaller one on the front. I found SO many uses for them around the office as I was creating her "in use" images.


 On my pencil holder - perfect for holding reminder sticky notes or business cards I need to update in my client list...

Clipping recipe cards, or marking pages in my book.... 


As a housewarming, birthday or any celebration gift! It adds just the right bit of glam, who needs a bag! PLUS this is RE-USEABLE so the person receiving it can use it around their house again! I LOVE THAT!

I love the extra touch on top of gift boxes and bags... since they clip to message boards and can be ordered with magnets for magnet boards they make AWESOME additions to teacher gifts!

OH! Not to be outdone... but I found the BEST use for these babies! Clip them onto your napkin rings to hold a place card... TAKE THAT SANDRA LEE! Oh, and by the way.. you can stock up on the Eco-friendly napkin rings shown here... that's right with A Bow For Mama also! This makes the perfect gathering a little more special! Each guest can take the bow home with them, or you can use them yourself over and over!


Sunday, May 12, 2013

Mother's Day Treats

Today, I am so please to turn over the blog to Melanie from Violet's Buds. I have introduced her to you prior because of her shop... and her incredible creations... but today she's sharing this super sweet treat with us - that I must say, I think I am going to ask for tonight! It's simple enough my husband and daughter can do it all by themselves!

I hope you try too! Oh, and btw, Melanie has her own blog - you should check her out!
http://violetsbuds.blogspot.com

Now... enjoy!
Chocolate & sour cream. Doesn't sound good does it? My husband decided he wanted this cake for his birthday. I promise that this "cake" is good-- and super easy to make.
You will need: 1 pkg, 10 count, large flour tortillas 1 bag, 12 oz, semi-sweet or dark chocolate chips 16 oz sour cream 1/4 c confectioners sugar

Tuesday, May 7, 2013

Tuesday Tip: The DIS Function

What is DIS: Digital Image Stabilization. This is an Olympus function found on Olympus cameras, however most digital point and shoot cameras have some version of this regardless of brand.

Basically this function increases your ISO settings in order for your chip to gain more information with less available light.

NOTE: This is a DIGITAL function done on the CHIP / processor of your camera. NOT in the lens of your camera.

This function should not be compared to, or confused with the Cannon (OPTICAL) IS, or Nikon VR (Vibration reduction) or any other LENS term. It functions, acts and has a completely different effect on your images!

I first came across a client who had been doing her own product photography and had to ask what she was taking images with that was causing them to be so grainy (ok yes, digital people grainy is a film term for the "digital noise" you get on the chip.. I'm from the old school of film.. it shows sometimes).
She told me the camera that she was using... and I had to probe a little more... no way that camera was in the right mode and kicking out these images! She told me that she used the DIS mode, because someone said it would keep her images from being blurry.

OH STOP THE PRESS! 

I mean... SHUT THE FRONT DOOR (see I can be hip, lol

They said WHAT!? 

No no... let me tell you what really goes on. 

The elements of an exposure:
Your camera is like your head, right?
The eyelid is your shutter it "blinks" or opens and closes to control HOW LONG the "frame" or image is exposed for.
Your iris is your Aputure: it dilates or contracts allowing for HOW MUCH light will be let in.
The Brain is like the chip. It has to decipher the code. You can also set the SENSITIVITY of the chip (ISO) so it can "remember" or "capture" more information.

Note: These 3 things control your exposure. FOCUS is controlled by your LENS.

Which is what this "DIGITAL" IS mode is doing. It is increasing the sensitivity to light so your camera can capture more information.  This however, does come at a price. Just like in film days.. when you had to learn the differences in film speed... its the SAME concept.... they didn't even change the term when they made it digital! Lucky us!

So remember your film speeds... 100 - for BRIGHT sun, then you increased the speed according to each lower light, or faster action that you planned on shooting.... so 800 was good for inside low light, or sports... but when you got it printed it looked green and had little dots all over it, and it looked worse the larger you printed them? That was the FILM grain. Because in order to make film more sensitive to light they made the pieces that the light reflected off of (the grain) larger... so you saw it when you printed it... because you basically put it under a microscope to make a 4x6 version.

Ok... so how does this history lesson apply... take everything I just said, and change the word film, with digital... and grain with noise.

Instead of the pieces physically increasing in size they become more "sensitive" to light electronically... but the result is the same, only with better color balance. You see spots on the image which make it appear MORE broken and that "could" be described as blurry... but its not, its noisy because your seeing the pixels braking down in the image. sensitivity was turned up.  If your sensitivity is turned up, things don't look clear... so don't do it when you need quality clear images!

Now.... DIS has its place, just like 800 speed film... and that place is LOW light NO flash venues... like concerts, parties... things like that. Places where you need it to be more sensitive, because of the low light, no flash, and no tripod... but your not trying to sell an item, your trying to capture a moment.  It's like.. the last resort option to get any sort of workable image.

NOT for product photography.

If your images are blurry from camera shake (which is the most likely suspect, and the reason this  DIS mode would have been suggested at all) during your product photography sessions- you have WAY to little light on it! Instead of adjusting by controlling your ISO, which may increase the sensitivity, but adds grain/noise to your image, consider shooting during the day, or outside, or with a tripod so you can leave your shutter open longer, adjust your shutter speed, or aperture... or in just about any way...INCREASE your light... or QUALITY of light. This means less grain / noise and less distractions to your image.

I am happy to report, that my client took my advice and now even the images she has to do herself are turning out more clearly and with some practice and other tips her backgrounds are getting more and more white - and the focus is become more and more on her products! I LOVE that she continues to improve and her shop is better for it!

If you are stumped by a photography situation, want me to troubleshoot and tell you what is going on or how you can take better images - Please just ask! I love to see you succeed!


Sunday, May 5, 2013

WINNER, winner and chicken dinner!

A big shout out to Kelly, who won the Big Birthday Bash Giveaway!

Congratulations to Kelly, owner of Kiser Krafts  

I SWEAR this was ALL luck and rafflecopter.com, but funny enough - Kelly also shares my birthday - so it is equally fitting that she gets some extra goodies!!! I can't wait to hear how much you love them!


Now... I promised a chicken dinner!

This is such a fun easy dinner, and I thought awesome for Cinco de Mayo!

I take 3-4 chicken breasts  and put in the crockpot with 1 corona, salt and pepper.
(you can use apple juice if kids will be eating) Yes, if you really want a cheat you can use rotisserie chicken from the store or even left overs!

Then when its cooked (about 4 hours on high, 6-8 hours on low depending on your crockpot) I shred the chicken down. (leave in crockpot to soak up juice and keep warm)

I cook off 1 or 2 sweet potatoes (when its cold I chop them in squares and cook this in the oven - but since its warm I just do them whole in the microwave)

Take the peel off and give a light smash to them, add a little honey, and a spoonful of chipolte sauce (from the chipolte and adobo in a can you can find in any grocery, I don't like mine super spicy so I use mostly sauce no pepper, if you like yours hotter, take a pepper out of the can- deseed and cut it up - if you want blow your head off hot, leave the seeds in... and / or add 2)

Mash that in with the sweet potatoe - you don't want it to be like mashed potatos just smashed blended with honey and spice.

Use a tortilla, and place in chicken, then a spread of potatoes, and I like to add a little salsa or sliced avacodos to mine - but my husband likes colesaw (cus his would be with a extra smear of adobo sauce on his wrap)

Serve with margaritas or beer and its a party! This is AWESOME for fun gatherings since it can be served hot or cold, and you can adjust the recipe easily!


Friday, May 3, 2013

What do you give a Photographer?

On her birthday....

Here are a few of my FAVORITE things! In truth, these gifts would make AWESOME Mother's day gifts for anyone... they are not just for a  "photographer" - but they are handmade all crafted with love by small business owners and that means a TON to me! I LOVE supporting other small business and having a direct effect on someone's daily life! Now... on to the goods!

An infinity scarf, because I cant be bothered to keep a really one out of my way while I am shooting!
This yarn by the way - was THE SOFTEST! It was snuggly warm... yes I tried it on - I had to see how it should look after all!
Product provided by: Melli's Yarn Works
 Who says I don't get in front of the camera?! I had the EXTREME pleasure of working with Melli's items a few weeks ago and I FELL in LOVE! These wrist warmers not only are fun and super cute, but they allow for me to use them and my camera at the same time. (even the remote that I used to take this shot!)

OH OH OH! This one was such a hard secret to keep! I LOVE LOVE LOVE this new product, released by A Bow for Mama! Now, instead of giving a bow on top of a special gift that is disposable - I can give a FABRIC clip! That can be RE-USED! It has 2 clips, one in back and one in front (great for holding a gift tag). PLUS these little gems by A Bow for Mama, are not just for gift decor... oh no! You can use them on your pin board, or all kinds of other things as I discovered during my shoot!
Product Provided by: A Bow For Mama


I can not get enough of my Zeeuh bag, wallet and mug hugs! I want a whole new set for the summer!!!! Yes, I desire to be the envy of all my friends! I absolutely love Alicia's choice in fabrics and quality of work! If your looking to spoil someone you love (like your MOM! or ME!) this will do it!  (by the way... I am feeling the fiesta floral hint hint)
Product Provided by: Zeeuh

You know who else I really started to bond with recently... Tanya at Mystic Eye! I know I just told you all about her on Monday... but she deserves a big shout out for the sexiest wine stopper/pour spout I have seen in a long while! COME ONE! I would love (and get a lot of use) out of this bad boy! The option with the cork screw is no slouch either! I LOVE them both!
©Mystic Eye Creations

Happy Birthday to me!