©Verte Photography All Rights Reserved

Friday, August 29, 2014

Function Friday: White Balance

Want to take better photos? Who doesn't?

Sometimes we find that our images have color casts that we don't understand, that are distracting.
By learning a little bit about light, and how your camera works you can make a simple adjustment and have a HUGE impact on your natural light images.

White Balance (WB) 
simply refers to the camera mode that allows you to control how your camera sees the color temperature of light. 
By selecting the correct mode - your camera can correct setting White - back to White and saving you countless hours of photo editing and stress! 


If you haven't already - you can print these Keycards and keep them in your camera bag for quick reference!
<Get the second set here>

This double use Key Card lists both the different WB modes and WHEN you want to use them along with a kelvin guide to the color temp / type of light. 
Your most natural light, is during midday - or when you are using flash or strobe lights. 
However, as a photographer you get to choose when utilizing your natural light environment adds to your images - and when it needs to be corrected out. 

This cutie was taken in the shade during the morning and you can see the blue behind her while blurred should be cement (grey) Personally I choose NOT to correct this with WB because it really makes her eyes pop. 


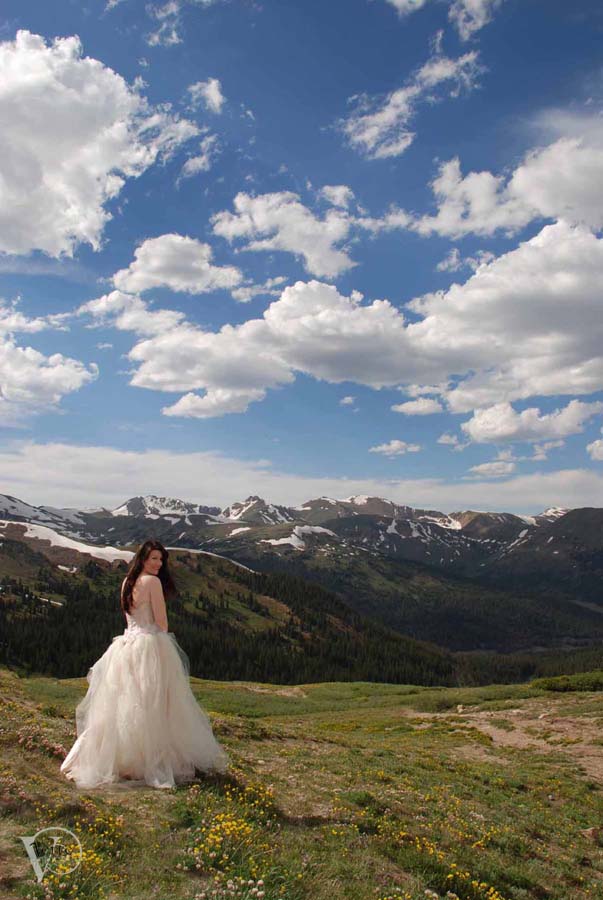
Where in this image I selected to utilise my WB to remove the cool blue tone because I felt it made her look too pale and it seemed to fight her personal style.

WB is absolutly your friend if you are doing portait work - but another BIG place to use it is product photography. If you are an online retailer doing your own images - this is a tip you want to use! 


Friday, August 22, 2014

Function Friday: Composistion


Composition (in photographic terms) refers to the placement or arrangement of the elements in your image.


Fill the Frame with your subject.


By utilizing a few basic rules of composition and combining them with some basic camera knowlage you can create stunning images.  On our third keycard reminder sheet that you can download directly from the Indie A-list you will find quick reminders for some of the most popular techniques.


If you haven't already - you can print these Keycards and keep them in your camera bag for quick reference!
<Get the second set here>


For today's lesson - I have added some additional images in order to provide a visual for utilizing those rules!
Frame your subject

By using Dad's hands, not only do you provide prospective and scale - showcasing how small this 4.5lb baby is, but you keep the attention on her. 
Precious.


Everyday snap
Change perspective.

Changing up the pose - certainly adds a lot to this image, but so does shooting at a slight angle down towards the subject rather than straight on. 
(Vertetip: there are also a lot of leading lines in the brick pattern bringing your eye towards the subjects face)

While below I created lines with the pose rather than background.


Leading Lines.


Pattern/ symmetry
Patterns can be found in lines of trees, flowers, any repeating pattern... even on the background of a product image. It simply adds interest and balance to the image. 


Taller subject (shoot vertically)

Wider subject shoot horizontally.

When I teach this, people always cringe thinking I am referring to the size of a person... but in truth - you have to take into account the pose - and how much of the surrounding area you want to be a part of your vision for the image.


Our last - and one of my most favorite is the rule of thirds. Fill two thirds of the space with either your subject - or with empty space - either option works.


Rule of thirds (lines provided for visual of the rule)


Friday, August 15, 2014

Function Friday: Flash modes

What is the biggest contributing factor to your images?
LIGHT!

What is your biggest resource for adding light to your photographs? 
The Flash!

Regardless of your camera type, you have the ability to utilize different flash options.
The first step is to understand WHAT those options are:

The above graphic is part of a collection of Keycards
and keep inside your camera bag for quick reference.
<Get the second set here>

Accessing your Flash Function

First, you will need to be in your P mode to command your flash. A / Auto / or the green square mode won't always let you control your flash!
 (For more info about the difference between Program and Auto check this out!)


Now, like with the other function buttons, typically you cycle through the different options by
1. Hitting the flash button over and over changing (or cycling through) the icon on your user display.
2. Using the arrows on your camera back (Cross keys) to select the icon from a menu display
3. Hold the button and spin a command dial (for Bridge or DSLRS)

Understanding the Basics

Much of photography is making choices. Knowing when your flash will help, and when it will hurt your images is HUGE!

First - your camera flash has a "sweet spot" too close and your subject will be over exposed (ghost like face) to far away and they will be underexposed (in the shadows, where the flash doesn't reach)
As a general rule when you use a flash that is built into your camera you want to stand about 6 feet away from your subject. This can be affected by your zoom range, and how light or dark your room is - be sure to play with your flash and get a feel for different situations. 

The biggest part of this to understand is if you are shooting a performance on stage...
like ballet, your flash wont help. You will be too far away for it to do anything more than light the backs of the heads of the other parents. 

Second - There is NOTHING wrong with using your flash outside! When you are taking images of people, it works as a "fill flash" and reduces shadows across their face. 
This is why you see professional portrait photographers using flash equipment outside! 
It provides even, and consistent light for the best exposure.


For additional information on additional flash options for point and shoot cameras
For additional information on strobe flash options
For additional information on Red Eye reduction

Friday, August 8, 2014

Function Friday: Camera Icons

Sometimes the best place to start is at the beginning. 


I recently made up some awesome Keycards for readers of the Indie Alist blog to be able to download, print and carry in their camera bags!

I wanted to offer MY readers - a bit more information on what those cards offer. 
SO.... I will be taking 1 of the cards each week and adding a bit more depth to the content it offers!
The idea behind these cards was to offer a quick reference and reminder to basic camera functions and photography techniques so that you can build your "bag of tricks"!

First up we will be talking about Camera Modes and Common Camera Icons:


 Camera Icons are typically placed on common buttons, menu or display screen so that you can adjust your camera easily (or any camera that you happen to pick up) 

P, A, S, M = Camera operation modes - are typically on a dial you turn it in order to select. 
There is also one I didn't mention "auto" or a camera icon (sometimes green, or a green square depending on manufacture) regardless of the image the selection is the same FULL AUTO = it wont even let you override the flash. DON'T use this option! For many camera's it also limits the menu you can see - so if your looking for a function like WB - you wont find it if your camera is set to this mode!

Even if you are just starting out in photography- you ARE smarter than the camera! 
Camera's can be tricked - shoot in Program so that you can make simple overrides like popping up your flash when your subject is standing in front of a window!


This is a great exsample - the camera will see the light outside the window and think you have enough for a good exposure - however... the grass outside isn't your subject! In order to see our friends here - I popped the flash for a quick capture.

For additional information about your

All consumer level cameras have "scene" modes - these are additional "preset" functions where the camera manufacture has selected the best combination of ISO, Shutter speed, Aperture, WB, and / or flash function for the common situation you are shooting.
For example a Fireworks setting would command the flash off, typically have a fast ISO (chip sensitivity) and a slow shutter. Which means you will want to have your camera on a tripod to reduce camera shake. (use a tripod for slow shutter times unless you want blurry images!)


Scene modes are a great way for someone without a lot of "technical" knowlage to be creative and experience better results in photography! Simply pick the icon that matches with your situation!

There can litterally be 100's of scene modes! While some are on a mode dial on top of your camera others may be found by pushing a button and cycling through a list, or it could be inside a menu.
You may need to look in your camera manual to find where they all are in yours!
I suggest photo coping the page that lists them all out - and adding it to your Keycards!