©Verte Photography All Rights Reserved

Tuesday, July 16, 2013

Tuesday Tip: Understanding Lens Terms

Wow are there a lot of different types of Lenses! I thought I could break down some terms for you so as you grow with your camera's you will have a better understanding of each and how it applies to you!

Now fair enough most lens don't come with coffee inside them... but I couldn't resist sharing this with you! I LOVE THIS!

Now... lets get started...

WIDE ANGLE LENS:  Basically if you look directly ahead of yourself, and hold your arms out to the edges of your vision (without moving your eyes... that was what the film standard was considered to be 50mm. As you move your arms out wider, it was considered to be "wide angle" showing more in your image then your eye would see. This is shown in the above image as the light blue and 15mm landscape.

Now with digital these numbers may mean different things due to the different size sensors and how your lens work with those sensor sizes... I know... can't make anything easy can they!? For our purposes today tho, we are going to work off of "standards" where 50mm is what your eye sees.

TELEPHOTO LENS:  If you move your arms in closer together, it is "telephoto" bringing a section of your field of view in closer to you. The closer your arms are the less field of view, but the closer things appear, and the higher number you would need to accomplish this such as the Green line above shown as a 400mm.

ZOOM LENS:  Also referred to as a Variable Focal Length Lens. When you look through it, you can change the magnification. Examples: 18-55mm, 24-70mm. This doesn't mean it has a great telephoto, simply that it changes. It's a very loose term, typically applied to point and shoot camera's with a 3x  or 16x "zoom".

Point and Shoot owners get to do some math to figure out what that all means - basically the higher the X (magnification) the more telephoto you have. If you want to figure out how much, simply take the wide angle number of your lens such as 38mm (a standard) and times it by your zoom number... for example: 38mm x 10x zoom = 380mm telephoto

FISHEYE LENS: A wide-angle lens that takes a hemispherical image. It produces a distorted image, convex in appearance, and covers a broad area of view by doing so. Focal lengths typically range from 16mm and lower. Examples: 8mm, 10mm. 

FAST LENS:  A lens that has a large aperture which allows you to take photos in low lighting without a flash. When someone is talking about "fast" lens they are talking about the "F-stop" ability of that lens, basically the maximum aperture on that lens such as: 50mm f1.4
As you will learn with Aperture settings the smaller the number of the F  the more light is is able to gather, the "faster" it is. The LARGER the number the less light that can be gathered the "slower" it is.


STANDARD LENS:  Also referred to as a normal lens. This would be considered to be the lens that gives you about the same perspective as normal vision. Nothing would appear any closer (or further away) than you would see it with your normal vision. This focal length will change depending on which type of camera that you use. If using a 35mm film camera, a 50mm lens would be considered as the normal or STANDARD lens, When using a digital camera, the magnification or crop factor must be considered when determining a normal lens.  (Again, Standard and Normal is simply the mm number of what is equivalent on your camera to what your eye sees when you look straight ahead.)

PRIME LENS:  Any lens with a fixed focal length. When you look through it, you can't change the magnification. Examples: 28mm, 50mm, 85mm, 135mm. Also referred to as a Fixed Focal Length Lens. Yes,  a 50mm lens is a "standard" as well as a PRIME lens...


MACRO LENS:  A lens that allows you to focus much closer to the subject (than a non-macro lens). Examples: 50mm 2.5 macro, 60mm 2.8 macro, 100mm 2.8 macro. Not all Macro lens are Prime lens, it is just as common to have a 28-70 macro, where you have to "lock in" the macro function when you want to use it. This simply is telling you that the lens has the ability to focus closer on a subject then others for the same range.


PORTRAIT LENS:  A lens that gives the best perspective for taking portraits. This will vary depending on the camera that you're using. Typically you will find an 85mm prime lens, while some photographers prefer not to shoot with prime lens, and opt for something with better range like an 28-120mm. It is pretty subjective, tho most professional photographers agree staying within that 28 - 85mm range is common.


While this doesn't cover all the differences of lens types... it does give you a good overview of the different classifications of lens!

Happy Shooting!

Tuesday, July 9, 2013

5 Survivor Tips to Traveling with a Kid.

 I tell you I LOVE road trips... always have!
I was easier before the family... me, a friend... the open road.

I think it reminds me of when we were young, Dad would load us up in the red Ford truck... no matter where we where, there always seemed to be a red Ford truck in our lives. Funny. We would survive on warm Coke, melted Hershey bars... oh the good ol'days... before I knew what calories and real chocolate tasted like!

In my 20's I spent a lot of time driving with the music blaring, windows down... and sunglasses on.

Now, road-trips or traveling in general has taken a whole different spin. Sure I go old school with maps not GPS, and I still bring some tunes to rock out to.. and snacks... MMMM snacks... but they tend to be more like grapes, pretzels, trail mix, water...

I also tend to have a passenger now... the bug. Who, by the way... used to get car sick. YUM. So, I thought rather then writing to you about all those travel tips you hear about all the time... I would share a few tips for traveling with a kid who does (or might) get car sick. Here are the things everyone should pack... and know... but no one ever tells you!

1. Wear a tank top under your clothes. This is extra special if your in tight quarters such as a plane when the vomit starts flying... so much easier to change (pack extra shirts (for both of you)in your carry on, or easily stored so you can change in your car) if you don't have to carry a sick kid to the tiny restroom... covered in yuck.

2. Plastic bags are your friend. Not only do they easily separate toys, or games as you travel, keep markers and other activities easy to reach... but you can put trash, or vomit covered items in them, zip them closed... and presto... smell contained.

3. Bring along Vinegar. Ok, TSA not approved. But a little spray bottle inside your toiletries bag is hardly looked at twice and kills the smell, while helping to clean seats, tray tables, car seat covers and seat belts. Extra towels when your in your own car is super nice as well!

4. Ginger Cookies. If your packing snacks anyways, bring these along. It's nice and dry, and the ginger helps to calm tummies. Keep plenty of water around as well, it will keep the kiddo hydrated as well as providing relief from the spice.

5. Skip the Milk. Now, maybe it was just us... but it seemed like Milk+Travel (of any kind even across town)+ Heat = DISASTER. Once I stopped offering milk (milk products of any sort) on days I knew we would be traveling, like to see Great Grandpa 300+ miles away.. my life got a lot easier! We would have Soy or Almond milk with our breakfast, even carring a bottle with me when we moved across country so we would have it at the Hotels. On times when I followed this rule we NEVER had an issue with being car sick. 
AMAZING!

Many kids get sick from looking out the window while traveling so if you can keep them entertained with activities inside the car, so much the better, we tried to keep her in the middle seat so she could look out the front whenever possible - did it help? Eh, maybe... it certainly didn't hurt.

Now that she's older, we have grown out of most of it... but I still follow these rules... I had a VERY hard flight to San Diego one year... and now I am more prepared. 
Plus, I can help someone else out and pay things forward if it ever comes up!

Tuesday, July 2, 2013

Tuesday Tip: Shutter Control

What does that "S" mode stand for?
Shutter Priority. It is a great function for situations where you want to control the shutter speed, but let your camera handle the rest of the settings. Almost ALL DSLR cameras, and many Point and Shoot or Bridge camera's have some form of "S" mode. Typically this is found on the dial next to your P, A, and M.

I have talked about some other modes to use to control your shutter, but we haven't really dived into "S".

So, what is Shutter Speed.

Simple. It is the speed at which your shutter opens and closes.

Perhaps the better question to start with is What is a Shutter?

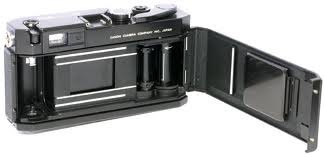
Remember you old school film camera, the film went in the back and there was the "soft spot" in the middle that you never wanted to put your fingers in... and most of you did anyways. This is your shutter... here is what it looks like close up.

The shutter sits between your lens, and your film... or your sensor chip these days. It moves out of the way opening to expose the sensor to your scene and thus creating your image. How long that shutter stays open has a direct effect on exposure of your image. I like to think of the shutter as the eyelid of your camera... if the aperture is the iris that moves larger or smaller to allow more or less light in, the shutter controls HOW LONG the light comes in... and the sensor would be the brain capturing the image. As we know from previous lessons 3 things control your exposure. (How MUCH light, How LONG your sensor is allowed to see that light, and How SENSITIVE your sensor is to that light)


So, why would you want to control the amount of time your camera sees a scene? 
Have you ever taken an image of someone waving? Was their hand blurry or clear? This has everything to do with your shutter speed.

TIP: Shutter speed is measured in seconds – or in most cases fractions of seconds. The bigger the denominator the faster the speed (ie 1/1000 is much faster than 1/100).
A shutter speed of 1/100th of a second is better for shooting HIGH speed, such as action, sports, waving hands... because it stops the action.. it is open for such a small amount of time that it appears you have frozen the movement.Where if you take the same image with a shutter speed of 1/100 it could still appear blurry.
Shutter Priority setting 1/100
 Here is my fan this morning... as you can tell the blades are moving along at a pretty good clip, seeing as how its already above 80 and its not quite 7am yet.

Note: The yellow is due to not using a flash. The light available from the ceiling fan is simply producing the yellow light, I choose not to WB or adjust anything else so we would have a baseline image as we move forward.

Shutter Priority setting 1/1000

Now it looks like the fan is turned off, right? It's not! My shutter simple opened and closed so fast that it "froze" that action.

So when would you use Shutter Priority?

When you want to stop action... such as sports, cars moving, babies moving, birds in flight, butterfly or humming bird wings... these are all calling out for a high shutter speed.


When you want to SHOW movement. Crazy idea, right? But think about it... what is the most beautiful image of a waterfall? The one where its all blending together and looks magically smooth... That's done by blurring the motion, leaving the shutter open for a longer amount of time. What about shooting your holiday photos? What if you want to show that the hummingbird was really flying when you took the image? You want it to be clear, but the wings to show motion. It helps to tell your story.

Now, this is where things get tricky... the longer you leave the shutter open the more things can go wrong for you. Even if you can hold your hands steady, you might pick up what is called motion blur or camera shake, from you breathing or moving the camera ever so slightly. The solution. TRIPOD or MONOPOD. If you plan on doing long shutter photography, like night skys, lighting or even holiday lights, putting your camera on a steady surface and not touching it is your friend!

With the 4th of July coming up.... I bet you know why this was on my mind! FIREWORKS, Baby! Controlling your shutter means you can show the movement in the fall! But remember, a TRIPOD needs to be used so you don't blur the image by holding your camera!

Happy 4th and Happy Shooting!!!!