©Verte Photography All Rights Reserved

Showing posts with label Digital. Show all posts

Friday, April 25, 2014

The Crypto Crud

It's malicious, a virus designed to prey on the one thing people hold so near,
and yet are typically so horrifically undereducated about protecting.
Have you heard?
 Are you at risk?

The newest in a round of computer viruses is making it's way around in cyberspace. This one comes to you via email and is usually embedded into an attachment that you download and open. The ultimate goal of this infection is to hold your computer
 ransom and encrypt your files until you pay the fee to have it removed and the files decrypted

The reason this newest virus is making the news... the type of file it is targeting..

Your Images.

 
After the system becomes infected, the CryptoLocker Virus will immediately start popping up on the computer.  If this happens, the best course of action is to remove it immediately.  The longer it stays on the system, the more difficult it becomes to remove and the more damage it can do to the system.

The easiest way not to fall prey to such a virus is to not open attachments that you are unsure of. Even if the email comes from a known account... if it is just a web link, or an attachment with a generic greeting... you should CALL your friend and verify that they sent it to you first!  
Be smart, use some common sense when your dealing with anything online! 

You wouldn't walk down the street waving around a million dollars in cash right?

There are a few additional steps you can take to protect yourself! 
Not just from this newest threat but for all the others that will come after it.

Thankfully many security and virus checker programs are already coming out with updates in order to find and remove this virus. If you don't already have something like...

(What I use, and have had great luck with as a anti-virus, internet security program)
or
Hitman Pro 
(which is a secondary line of defense, that I also use.) 
I suggest you look into a virus / malware security program that would best suit your needs. 
While I use these two... there are several options out there and I suggest you do your research in selecting your own.
If you're online, on a computer or any device that also contains important documents or images you want to protect that you make sure you install some sort of virus and malware protections. 
Yes. DEVICE. Even your smartphone or tablets could be suspepable to viruses and malware.

The second step I suggest would be to BACK UP your images regularly.
Back them up to a removeable harddrive, a NAS, the cloud... Disks, USB....
I suggest at least 3 different options. 
I personally drop our family images onto disks and keep a copy in our fire/waterproof safe along with a copy that is sent to Grandma, so we have one complete set "off site" so to speak.

I also use BACKBLAZE
which is a cloud based backup system that copies your ENTIRE system, as many hard drives as you want, for roughtly $5 a month. You can set it to run at night, so you have a continuous cloud backup. 
I personally like Backblaze over other cloud backup systems because you can download a whole drive, or 1 file. You can also order a drive or USB of your backup to be shipped to you if your entire computer crashes. Many people find sites such as Dropbox, or even their Google Drive account a suitable option for an online storage option for documents and image storage.
It's peace of mind. 
I also, backup all Images (personal and professional) to a removable hard drive weekly as well as a NAS (Network Attached Storage) which is basically several Hard Drives that are connected to my network. It backups any changes, or new files each night.

I don't believe that this is the first, nor will it be the last virus that will seek to attack at the heartstrings of your family... those things that everyone holds most precious... your family.
Your memories. 

I can not begin to tell you how many clients and friends I have heard crying and devastated that their images have been lost... either from computer crashes, virus, or (eek) a lost phone.With the release of this newest virus it's a good time to remind each of you how easily digital files can be lost.

However, if you take a little time... spend a minor amount of money you can safegaurd yourself!


Wednesday, August 28, 2013

The Retouching Line

Retouching, editing... re-creating or changing an image... it's a pretty hot topic. There are photographers who, like me believe less is more.

You don't like the wrinkles? You EARNED them.. every line, every imperfection... that's part of your life. Your up's, downs, and let's face it, it's reality. Just because you "can" fix, remove, or change something in photoshop... does it mean you should?

@VertePhotography "before"


I used to spend time on each image and "touch" everything that I posted for a client to view. Sometimes I would do serious retouching, sometimes just a little nudge that I felt made the image just a little better. Now, I can say I pull all my image through what I call my editing process - where I view them all, and occasionally make a small change. However, I don't retouch the imperfections on every image. That's my line. If you want it.. it's something that really bugs you, then I offer a retouching service for my clients. No problem. I "can" do it.

@VertePhotography  "after"
Like in my cooking though, I believe less is more. Your skin isn't one tone, you have highlights shadows... and different tones. I try not to remove that, even during retouching to "lessen shine" or "even skin tones". I don't want to make you look like someone else... I think your amazing just the way you are! That's not to say that I don't feel for kids with acne, or moms who's babies scratch themselves the night before a shoot. I get it... really I do! Sometimes it's simply necessary. Sometimes, it's just plain vanity. Your line between the two, is your choice.

Want me to cover your wrinkles in Photoshop? Sure... how about you tell me it bothers you ahead of time, so I can work with lighting, posing and even the magic of filters to soften and disguise them to start with? 

Your not Barbie, I am not going to make you look like Barbie. Plus... have you ever seen a portrait of Barbie? SHE even has imperfections! I feel like I am in my zone and I am LOVING my business. It's organic, natural and that's the photography I LOVE! This is my line in the sand: Retouching has become an additional expense to my clients as of last year, and I couldn't be more happy with that choice. No longer spending 40 hours retouching every image for one session, which frees up my time and energy! Now my clients really think about the images, and the work that they are getting done. For some, this hasn't limited the requests, and that's fine... I am happy to do them! I simply believe, they should be the ones to choose what their images look like, how they are going to be printed, preserved and passed down to other generations.... not me.

Next time you ask your photographer to "make it look like you lost 20 lbs" or that your 10 years younger... think about those amazing images you have of your grandmother, ones before digital retouching became the norm... are they priceless to you? Do you love them and her for who she is? Or, do you think less of her for the imperfections?


Friday, April 12, 2013

What Clients Say: Streeter & Co

April Showers bring more then May Flowers! This month I am  super excited to add this segment to my blog! 


I hope to share with you, a clients perspective on my services, or tips and solutions from them during this segment and let this continue as a guest blogging option for you all to "put in your two cents".  If your interested in creating a post, please contact me! I would love to hear what you have to say!

So now, I will be turning it over to Kristina at Streeter & CO for our First "What Clients Say" post!


"I used to be guilty of what I like to call the "Jack of All Trades Syndrome". I was always the business owner that wanted to do everything myself, if for no other reason that I wasn't willing to invest the time or the money into having someone else do things for me instead. Did you notice I used "used to be" in that first sentence? That's because I learned the value of having my items shot professionally.

Although I know my photos were better than others I have seen around the handmade shop industry, heck lets me honest - even in small business images - we've all seen them, the grainy, unclear photos - mine weren't quite that bad, but they weren't the quality I needed.  As an online merchant I know that the photos are the one chance I get to grab the customers attention and want my product, low quality images won't help me achieve that one bit. Sure, I was getting return customers that had used my products in person ordering from my store but I wasn't having the sales that I hoped for from "new customers" - why? My product photography. The images I was shooting with my amateur skills and less than fabulous camera quality (or iPhone whichever was closest) wasn't doing my products justice. I needed a different solution.


Verte Photography was the solution to my problem and I never looked back. With Verte Photography I know my products are in the hands of a passionate, talented photographer.  Candy is so wonderful to work with and thrives on making the image look so wonderful that you would like to grab it off of the screen.  I have seen such a big difference in sales and page views. Customers are liking what they see and I know this not only by the sales but by the fabulous comments that I have received.


Not only does Verte Photo have a lifetime customer but I also refer every other shop owner I know to Candy. Why wouldn't I? A Shop with fabulous products needs nothing less than the best." - Kristina Streeter, Owner of Streeter & Company

Wednesday, April 10, 2013

Product Composition

Composition: The placement or arrangement of visual elements or ingredients in a work of art.

In photography there are a lot of general composition rules.  I covered some of these in our Photography 101 series back in January. Many of them will still apply to product photography. I thought in order to keep us well rounded I should touch on this as part of our placement and perspective discussion this week... because composition and perspective really are interlinked.  In fact, Perspective is the name of one very popular style of composition!


Perspective: The angle at which you shoot your subject. We ended yesterday talking about this... you want your camera to be in line with your product, not off to a side, or higher or lower then your product.


Correct Camera height.


Shot with camera directly in front of product


But if you have jewelry or other items you need to shoot flat.. then you may need to shoot directly DOWN on your item.  I don't suggest it, but I know sometimes you have to. I suggest busting out a step ladder and leaning over your workspace. Be careful not to get in front of any lighting source!

Shooting Down at product. / Product provided by Sweetsies

Fill the Frame. Our second composition rule tells us simple what to do... rather then leaving a lot of extra space around your product, get closer and fill the frame with your item! This will provide better details as well as simply "looking nicer"
Too Far Away.


Full Frame / Product Provided by: Streeter & Co

Tip: If you have a high resolution camera, but can't focus close enough to your product you can crop in! Be sure to read up on the best way to do that, and keep your image looking sharp!


WIDE/TALL: If your product is wider then it is tall shoot horizontally, more tall then wide, shoot vertically.


More Wide = Horizontal Image / Product by: L.W. Hooks
Taller then Wide. Gift Unknown vendor.

Tip: This may also depend on where your images are going! If your uploading to a online shop, your thumbnail images may be more square, be sure to learn about any dimensional restrictions you may have before shooting!

Show the DETAILS. I don't mean just crop in on the same image... but I like to see DETAILS when I shop online. I want to see the different beads, the chain, the clasp... give me DETAILS.

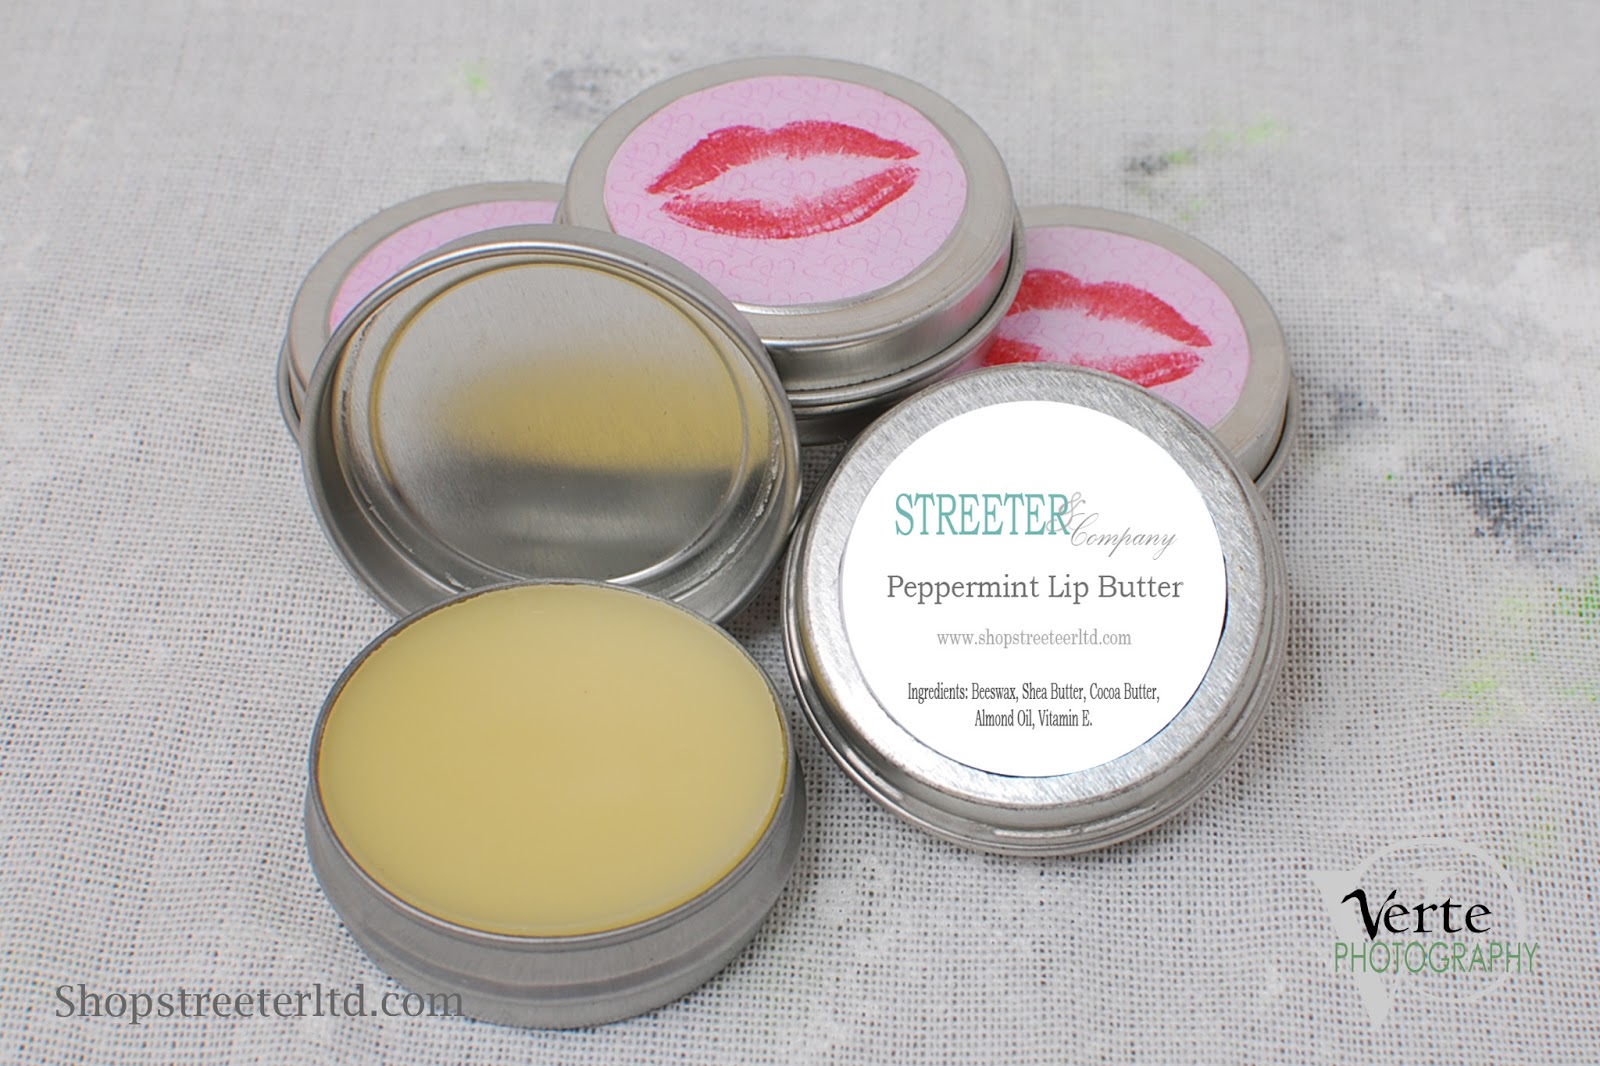
Product Provided by: Streeter & CO


Product Provided by: Crafty Gal Creations

Product Provided by: Crafty Gal Creations


Wednesday, March 27, 2013

The Making of a Light Reflector

What is a light reflector?
Simply it is a tool used in photography to reflect light towards the subject. You can use them with all different light sources such as sunlight, flash or strobe lights, our continuous lights commonly used in home studio photography, or video.


The concept is simple, light hits the reflector and due to placement it reflects it back towards the subject.  One of the most common used reflectors would be a white wall or ceiling, remember the light will change color if you bounce it off something colored! You simply point your adjustable flash towards it and the light bounces off at an angle, or use the reflector to bounce your sunlight back towards your subject!


Today, I will be showing you how to make 3 different versions of a Light Reflectors, that would be helpful in a home-made studio, like one used for small product photography. You will be happy to know that I purchased only $3 in supplies and used only these few other items that everyone should have at home, or would be easy to find! You can use any of the techniques with any of the products and mix and match to make the type that works best for you!
  • 2 1/4 boxes (recycled from shipments I have received)
  • Tape 
  • Scissors
First let me show you the Gold reflector. This is a great option to have on hand if you are shooting on a cold day, in shadows, or even when overcast. It adds a "warm" light to your image.

For this reflector I purchased 1 gold tissue pack from my local dollar store. Yep, that's it. Simply make sure that you select one that is solid gold and without any patterns to it.

I then folded my box flat and cut one edge of it, creating a long bendable piece.

Next, I set out my tissue paper (which is a thick metallic sheet, which I didn't know has silver on the other side... so in reality you could buy 1 pack and use 1/2 for one gold reflector and the other 1/2 for the silver!) 

 I used two sheets to cover the whole box, and I cut them so I could fold each section nice and smoothy.I just used clear tape I had on hand, you could do glue or whatever... just make sure its as smooth and flat as you can get it.


Then, as you can see it can be stood up and bent around in order to reflect light towards my product. (To see why I am shooting with this studio set up visit TSUA-List and read "My Dollar Store Studio")


Here is the finished product image using the Gold Reflector and shooting with the diffused light from the window....  you can see some of the gold picked up in the white background on the table and in the label.While for purposes of the other post this is done in program mode, with no editing... it shows you what you can expect... a warmer tone where the gold reflects on the product.

Next I made a silver reflector. This time I used a shallow box and wrapped it in my $1 aluminum foil purchase. I covered the whole box and flaps here it is while I was working on it.  

Again, try to keep it as smooth as possible, and I simply used tape to keep it from moving around.

Then as I set it up to be used...this one allows it to stand easily, and I can adjust flaps to angle the light if I need.


And the finished image - there is still a slight shadow from the product, but I shot this with the window to the right and the reflector to the left, with a backdrop against the wall behind.


As an alternative, you can use the aluminum foil as both the reflector and the bottom side of your background. Below, I did just that, shooting directly towards my window with the white background over it filtering some light. This is a really nice effect! Again, the product is showing a little dark because I am shooting program, with no post-editing and NO exposure compensation... all things that are easily done to create sharp and well exposed images as shown in the second image. 

No edits.


Simple Photoshop Edit

And lastly, I made a simple white reflector buy cutting down a piece of foam core and attaching a part of an old cardboard box to it to create a stand. I just used packing tape to secure it, and bent it to create the stand.


I do have to keep something (like my bottle of paint) behind now to keep the right position.


It does a great job of reflecting light to reduce shadows and provide even soft light from the diffused light already coming in from the window. Below you see an unedited, and shot in Program mode, image with the window on the left, and white reflector on the right. 


All of these reflectors provide you with a means to manipulate your available light.  With small adjustments in a basic editing program, or by simple adjustments to the camera mode all of these would make nice product images. 

This how-to post is brought to you by Streeter & Co, in partnership with TSUA-List. I have been a member of the A-List since it rolled out, and I LOVE what it does for small businesses!

To learn more about creating a home studio for your products check out my "dollar store studio" guest post on the Indie A-List blog.

 I will be continuing to tackle home studio projects, and provide you with great DIY product photography tips! I hope you come back and learn more!

Monday, February 25, 2013

Top 5 Things you can do for great Wedding Portraits

Even if you have hired a professional photographer, and followed all my other advice from this months (Love posts), there are still a few things you can do on the day of your wedding to have a dramatic impact on your images!

In my 20 some odd years of being in the photography industry I have done countless wedding, bridal and event photography. In that time I have been able to be a part of all stages, from assisting, to being the “main” photographer, to editing, creating video, and even printing the end product. In that time I have really learned to appreciate the art behind wedding photography.

 Did you know as a bride, attendant or even a guest there are countless things you can do to help a photographer and insure the images that are captured are priceless keepsakes for generations? Here are my top 5 ways of insuring great wedding portraiture!

#1 The Shoot List.
First as a couple, be sure to create a “shoot list” with your photographer. This list is the combo of shots you need it should look something like…
Bride/groom
Bride/ Groom / Grooms mom (Anne)
Bride/ Groom/ Grooms mom / Step Dad (Frank)

This list should be done in advance and copies should be on both you and the photographer’s side. A real wedding photographer will have the basics memorized- but as in many modern families there are people you want in, people who may need to be on the end to be edited out later (you laugh but we all know its true!) and even ex’s who cant be stood next to each other. The more information you can give ahead of time for these little notes, as well as the REALLY important shots you want. Like… if you HAVE to have a photo of great-great grandma and the newborn… you should speak up prior to the chaos.

#2 The Assistant
Any wedding photographer worth their salt will not be doing this solo and the shoot list will be the assistants guide to make sure everything the bride want gets done. He/ she is the backbone so to speak, and the backup. They are also the “go to” in most photographer / assistant relationships. The photographer is there for the bride. The assistant is there for everyone else. If your mom wants a shot of something, she should be told to go to the assistant with it. The assistant will either take the shot (if they are a second shooter) or will be sure to have the photographer do it. Or will at the very least be able to handle the situation without distracting the photographer away from the bride. You should clarify the role of the assistant or additional shooters in your pre-wedding consultation you’re your photographer before the wedding, and be sure to inform your bridal party… and vocal family members whom they can and cannot go to with requests.

If there is no assistant (or even if there is) you should also assign Aunt Betty (who always wants to help, and knows most everyone… you know the one.. ) to assist the assistant. Or, better yet find one from each side of the family, give them a copy of the shoot list, and let her be the runner during the bridal portraits. This can save a lot of time! The photographer or photographers assistant can say who they will need next, and she can go get them. She can also watch to make sure each combo you need is getting done… because trust me – you wont know! It also makes her feel important and keeps her from going to you with everything she thinks needs done.

#3 The Kit
I highly recommend this kit to every bride. Go to the dollar section of your local drug store or big box market and pick up these handy items.


  1.  A small sewing kit (includes tiny scissors, thread and needle, add safety pins and several boutineer pins (craft needles) to it if needed)
  2.  A pack of Mary-Kay blot cloths ($5) or some round cotton pads (dollar section) to blot shiny areas during the day- don’t forget to use them on you and your groom!
  3.  Extra lip gloss /lipstick, powder and WATERPROOF mascara
  4.  Nail file, clippers, and basic polish – you know one of your bridesmaids are going to need this.
  5.  I also recommend Tylenol, Advil, Tums, and a Powerbar.

Now the tricky part to this kit is making sure you have it with out – ALL the time. I suggest you give it to your maid of honor and put her in charge of making sure you touch up makeup and blot about every half hour. (or before each “stage” of the day at least) I have seen these kits cleverly attached to bouquets or as a cute handbag to carry all day.

#4 The Smile
Everyone should be forewarned that especially in today’s technologically crazed world, it is best to assume someone; somewhere is taking your photo, especially on your wedding day. Everyone should keep good smiles, and shoulders back, sit up straight etc… all day. Nothing looks worse in your church shots then the one bridesmaid or groomsman that is hunched over, or picking their teeth. While your photographer can (and should) do something about this in your formal shots, during the ceremony there is nothing they can do! As a bride and groom, you should always have a smile… remember to excuse yourself to the restroom to pat your underarms dry, checking for food in your teeth, or touching up make-up.

 Last… PLEASE remember a wedding is no place for gum! Your photographer will thank you for not making them edit out bright blue gum from open mouths! Fact: Some will charge you extra for it, and they should!!!

#5 Go the extra mile.
Professional wedding photographers all have a different view on the next subject. But most I know agree. If you are having a buffet, or sit down dinner it is not a good time to be doing photos. NO ONE likes having those table shots done, food in teeth and all! It is a good time to let your photographer breath, sit down, swap batteries, or reset gear for the party portion to come. Discuss in advance what your photographer typically does during this time. It is the polite thing to include your photographer (and crew) in on the meal. Some photographers will flat out refuse, while others may tell you they may take a small portion in to the kitchen area or somewhere away from guests, some may outright thank you for being so generous, and some may be even be expecting it! I find that the longer you expect them to produce amazing images, the more you should expect to feed them! This also is a nice way of thanking them for everything they are doing! Yes, they are paid to be there, but if they pass out from lack of food or dehydration think of all that equipment they are likely to break… and moments they will miss as they are carted away in an ambulance!
Found on the Wedding Bee


Tip: If you want a shoot of everyone who attended your wedding, rather then doing table shots ask for a photobooth, or photoguest book option. Or even set up an "upload" station with a laptop or cards to where they can send their own snaps of your wedding to you!
I hope these tips come in handy! I know my past brides and friends have always appreciated them!

Thursday, February 21, 2013

This and That

This week I put my daughter's lunch in the freezer instead of in her bag...
I know I know... sometimes my auto pilot would crash me into a mountain if I would let it!
That I recovered and was like "what the heck am I doing" was simply amazing!

Luckliy for me its time for

Katie Did What


I love my stamped business cards... but I am working on establishing myself with some commercial clients and wanted to offer something a little more "standard" for them... so I created this...


I am not really sure if its the style / look I am going for yet... so there is that.

What do you think? Do you really love one design, or should I start over? I totally love the retro camera look... and I am thinking of making other designs similar... maybe some retro glasses or martini glasses or something? ooooh! Scissors for crafters, or old sewing machines!

This week I am also offering a SUPER huge sale... mostly because I am so close to a business cash goal so I can purchase a new item... I just want to get there a little faster... So I am offering $25 for 1 full year of watermarking services... I mean.. for $25 (that wont even come close to covering my time for a client) you get unlimited images watermarked and returned to you typically within 24 hours...

Store Envy Link

THINK of all the time most shop owners spend on this! I know so many people who don't watermark at all.. and every time I see a pin or tweet go up of the product... I can't help but think they are not going to get any credit or sales from it! That sale ends Saturday... so I really hope a few more people take me up on this crazy deal!

This week I also had complete contact fail so to the eye Dr I go today! WHOOP That is a part of my day I would be happy to pass on! I would much rather sit here and chat with you!

Wednesday, February 20, 2013

Q and A, Verte Style

I reached out to some bloggers, crafters, shop owners, clients, friends... you know my Peeps and asked... "What don't you know?" then I clarified... about weddings, photography and such! Then I took the most popular, or uncommon and stuffed them into this post! Ok, some are paraphrased, or changed to protect the innocent.  But still... Enjoy!


Why are all my images blue?
If ALL the images are blue, outside, inside, with and without a flash then your sensor may not be working correctly. More likely you mean "why are my indoor" photos blue. Reason, you have lights where the color temperature is in that 4000-7500 K range... sometimes you find that in the "daylight" or "soft" balanced bulbs. Solution: Shoot with a flash, or find the WB mode and adjust it to balance your whites back to white! (by the way... this also answers the questions "why are my images red, yellow, orange, or green" it all has to do with the light your shooting in. More Help


Why do photographers charge so much?
1. Time.
2. Education
3. Equipment
4. Everything else.

Let's face it, we talked enough about why those big professional SLR's look better, but a "good" portrait lens can run easily 500-900$ and that's not even the "Better" or "Best". A professional photographer can have thousands of dollars in basic camera gear, not to mention bags, backgrounds, lights, props, rental space, advertising, oh and the computer and processing... not to mention having to stay on the frontier of an ever changing digital field now. Where do you expect that money to come from?

Since you don't do weddings... who would you recommended?
Let's just clarify.... I don't advertise for weddings... I don't want to tote around an assistant and deal with the choas anymore, I have done my time! However, if your throwing a party in Houston or Denver, I would totally talk to you about it! Small backyard or informal occasions are totally where my heart is right now.

However, if you want to go all out and really do it up in style. Nationally, hands down book Theresa J Photography. She and her husband Tim shoot as a team, they travel to you.. and they are the sweetest, goofiest most amazing people ever... oh yea.... and crazy talented! If I needed a photographer for myself - that's who I would call.

My daughter wants to be a photographer, where should she start?
In business school.
It is the best advice I can give anyone wanted to run their own business. You can pick up a minor in arts or photography, but the money you put in on a solid business education will hands down do you better then anything else! Most of running your own photography business is marketing, advertising and accounting!

I need help with my shop photography, what would you recommend?

1. Turn off your "camera shake" mode (that little hand with the shake marks) despite what the salesman told you it DOES not make your photos more clear. It has NOTHING to do with focus.
2. Add more light- I don't care - you need more I promise.
3. White balance is your friend. Use it.
4. INVEST in your products and just let me do them. (ok shameless plug) But, seriously up your prices $2 to cover the extra photography cost and stop spending time doing something you don't enjoy, are not good at, or are just plain frustrated with! Your clients, and new clients will buy more because they can see the quality of the product.
5. Stay tuned... I will be having many more posts on this subject coming up soon!


What do the numbers on my lens mean?
When you purchase a lens you will see numbers or the type of lens listed something like this:
AF-S NIKKOR 16-35mm f/4G ED VR
16-35mm is the Focal Length (the smaller number the wider view you will get. 50mm is considered "prime" or what your eye would see kinda like if you held your arms in a v in front of you. Everything over 50mm is telephoto. The Larger that number 100, 200, 300... the closer your lens can bring subjects to you or "zoom in" on them, if you will. 
Image from Digital Camera World
   
f/4G: This lens has max aperture of 4/f. That means that the aperture will not open more then that with this lens... so no matter what you do you wont be able to shoot at 2.8f with this lens.
Some show this as f3.5-5.6 which means the max aperture will vary depending on what focal length the lens is at... at its max telephoto it will only go down to 5.6 where at its widest focal legth (smallest number no zoom) it is capable of 3.5
You also might notice a number on your lens cap like 72mm or 68mm... that is the size needed for filters, or additional lens caps... good to know in case you lose yours! 
Clears that right up
Right?
 ok... that was a pretty tech answer... so here it is if you didn't understand the above
The first set 16-35mm control how much you can see zooming in and out. I suggest everyone start with a lens like 18-200 its a starter lens and all encompassing with wide angle, and good telephoto. 
The second set tells you how much control you will have over your depth of field. The smaller the number (or the first number if there is two) the more control you will have.
Easier huh! Now for my favorite question...
How many times can you get married and still justify paying for "amazing portraits"?

HA! As many times as you need to "get it right"! While in a perfect world this would mean getting married over and over to the same wonderful person (without the divorce)...  but well...
I do totally think you have to spend the money each time... because if you have to ask...well maybe the this time will be the one that sticks!
Now, there are a lot of other things we could dive into... on any of these topics! I will certainly cover more with lenses and aperture, along with product photography in the not to distant future.
I thought I would knock out some random ones on a Q and A format and see if you all liked it! So now it's your turn... let me know if I should make this a monthly / weekly post! Would you like to see it again? What questions would you ask!?


Tuesday, February 19, 2013

The Wedding Contract

Contracts can be scary... hopefully you have taken some time to get to know your photographer, and feel good about your decision to hire them for your wedding images. However, before you sign the deal and give any money you should read the contract and make sure you understand it fully.

If possible when you are interviewing your candidates, ask them for a copy of a contract that you can take with you. This will allow you to review everything at your convenience and with out pressure. Contracts should be as specific as possible on the photographers obligations, with everything clearly written out. This will protect both client (you) and the photographer from misunderstandings. There should be no verbal additions or promises made beyond the scope of the document.

A professional photographer will have some sort of contract for you to view. Be sure your contract has:
  • Your wedding photographer, and their contact information imprinted on it.
  • Be sure you receive a copy of the contract for your records!
  • Due dates and amounts for all payments

In a solid wedding contract there are three main parts. Here are some things to look for and be sure your contract has. If your photographer doesn't include this information generally, you may consider asking them to do a longer contract for you so that it will all be written!

General Terms/ Information:
This portion should list all the details for your wedding.
  • Date, location and time of your wedding
  • Contact information for Bride and Groom
  • Additional emergency contact for the day of the wedding
  • What time and location the photographer is to report to
  • The address of any and all venues the photographer will be required to be at. (church, park, reception area)
  • Bridal Party and Family information, who the important people are
  • Name and Cell number of the photographer
  • Name(s) of assistant photographers or second shooters (at the least a count of how many people the photographer is bringing)
  • Style of photography and important must have shots listed
  • Subjects, events to be covered such as first dance, pre-wedding, formal images... etc
  • Any additional requests or requirements from you, or your venues.


Coverage/Price:
  • Length of coverage on wedding day
  • Additional sessions included and details of packages or prints included from these
  • What kind of equipment will be used / back up equipment available
  • Film or Digital ( Is there a min/max number of images to be shot or delivered)
  • Date proofs will be available (printed or digital view?)
  • Number of proofs and complete package details 
  • Delivery details of finished package (how, when you will receive them)
  • Editing, Retouching, or other finishing details that are included or additional cost 
  • Overtime or other additional fees listed
  • Total price (itemized if possible) 
  • Re-order policy and prices
  • Meal plan. Are you required / or offering to plan a meal for the photographer?

Liability/Terms
  • Copyright: who owns the finished images, can you print them yourself, will you receive a photo release in order to do so?
  • Public usage of images (who owns what, can you post images to facebook or a blog, can your photographer? )
  • Additional Photographer/ Photo services (most have exclusions, to insure they are the only "photographer" at your wedding. If you plan on having a photo booth from a separate company or service you will need to have an amendment added so that the photo booth or operator is not considered "another photographer"
  • Limit of liability: this covers "what if"
  •  Insurance coverage of damage to property for venue
Sample Limit of Liability: If Photographer cannot perform this Agreement in whole or in part due to a fire or other casualty, acts of God or nature or terror, or other cause beyond the control of the parties or due to Photographer's illness or injury, then Studio will return all fees to the Client(s) but shall have no further liability with respect to this Agreement. This limitation on liability shall also apply in the event that photographic materials are damaged in processing, lost through camera malfunction, lost in the mail, or otherwise lost or damaged without fault on the part of Photographer. Client(s) agree that an entire wedding cannot be replicated, reenacted or repeated for the purpose of a re shoot and limits Studio's liability to the amount paid under this contract.

A Limit of Liability is basically a disclosure of what the photographer, studio or company is going to do if something goes wrong. It should list everything from if the photographer, or promised assistants do not show up to camera failure or cancellation of the wedding itself and under what circumstances they will offer a refund, or reschedule, or offer replacement product.

In most cases the limit will be a reflection of any deposits or monies already collected at that point. If you haven't paid the full amount, the photographer wont refund more then what has been paid. That line about "clients agree that an entire wedding can not be replicated, reenacted or repeated" basically means if the photographer ruins your day, your images, or your memories... your not getting back more then your photography money... nor will a court require them to. 

This is where all your due diligence, checking references, and trusting your decision to hire a professional will come to play. At the end of the day, because of the limit of liability your trusting that professional with your memories. 


Wednesday, February 13, 2013

The Photographer Search pt.2

Now you know where to look... but other then price and style what should you be looking FOR in a photographer... Here is my list of things to look for or ask before meeting with the top candidates.

Most of these questions can be answered by viewing someones website. If you don't see the answer, or it's not clear, or up to your standards either move on to the next, or if it's not a deal breaker for you then ask for clarification or explanation on the phone prior to meeting. If your mind is at ease, and you like the style and price THEN put them on the short list of photographers to meet with! Remember, you want that list to be around 3. 

1. Stability. 
  •  Look how long they have been doing weddings?
  • How long they have been in business?
  • Do they work Full Time as a photographer? 
  • Do they have a studio location?
2. Price and Service.
  • Are they in your budget?
  • Does the portfolio fit your style? Can you imagine those images hanging on your walls?
  •  What is included in the package?
This is where I am going to put in my 2 cents... many people will want the photographer to hand over a disk of images, maybe even unedited images because they have Photoshop experience. Don't fall into the trap of discounting a photographer because they wont offer you that. First, understand digital files (unwatermarked) are basically like negatives as far as copyright laws stand. A photographer makes money based on sales, its retail as much as it is a service industry. So first, if they hand you a disk they know they wont see you again. But more importantly, photographers have a certain pride in their work as artists... handing over a disk, especially an unedited disk would be akin to a painter drawing a paint by numbers - without giving you the number code and dumping paints in your lap. It's not a finished product, and they wont give you a price break for saving them the work.

Is this true of everyone, no. I in fact sell disks of my images. However, even the "unedited" images have been touched in some way. I don't give RAW images, ever. Every image of mine is "processed" through Photoshop, in what I call my "editing" process. That doesn't mean that I am whitening teeth, or fixing out of place hairs... it means I am choosing the "best of images" tossing the accidentals, and ones I knew were bad as soon as I took them... and doing what I do to provide you with the best images I can. I offer all my clients the right to purchase a disk with a photo release so you can print your own images, or use in shops and online if it is product or commercial images. I choose to do this not because I don't want to see you again, but in truth I don't like shipping prints nor do I have the time to hand deliver them anymore. Quiet frankly I find constantly pulling out images 3 months, or a year later to print 1 or 2 images a huge pain and super time consuming... so for me, it simply makes sense to offer a disk. In addition, I offer clients what most would classify as "editing" as a retouching service. This allows me to fix the teeth, hair, and do creative edits if you want me to spend extra time on that... at your request.  I can charge you per image, or for everything, but I charge extra for that work.

Because every photographer is different in this way, it is VERY important to clarify what they mean, and include when they say "editing". Just as it is when they say they give you a "disk" of images... does that mean you get a release to print and share also, are they watermarked... etc. I will cover more of this in the contract details.. dont miss that!

3. Registered business
  • Are they registered as a business with the state? You can ask to see a business license, ask for the number, or go to your states official small business website and typically search there for the name. 
  • Are they registered with PPA, WPPA, or other photography groups? This just goes towards how serious they are... are they respected by peers, well known in the community? Don't discount someone because they are not members, I know many great photographers who are not. But you may ask them why they are not.
  • Do they have insurance? Not just on their gear, but what if they damage something at the location? When I was doing time as an assistant the photographer I was with took a large backdrop up an escalator for a commercial gig... and it punched a hole in the ceiling. oops. 
4. Equipment / Assistance

  • What kind of  equipment do they own? ( I suggest looking for professional grade slr equipment multiple flashes, lenses... this would be someone serious about guaranteeing quality for your day)
  • Do they have back up gear, what is that?
  • Do they have an assistant, or a second shooter? ( the difference being an assistant, helps.. carries things, holds reflectors etc. A second shooter does additional photography when they are not helping the photographer and doubles your chances or gives two perspectives of events like the bouquet toss... one photographer could capture your face - the other the bridesmaids)
  • Is the second shooter always the same? Many photographers don't have an official "go to second" but I think if you are going to have them shoot - you should be able to see THEIR work as well as the main photographer! (interview both if possible!)
5.  Turn around time.
  • When do you get to see your proofs? 
  • Are they printed or digital proofs
  • If digital, do you have a private gallery online that you can share with friends and family?
  • Are they posted to Facebook or a blog for public viewing? (personally I am not a fan of that... for privacy reasons)
  • How long before you see the finished product?

This should give you solid information to make a short list of photographers. Keep in mind, while some of it should be very openly displayed on the website, if it's not.... ask! Don't call a studio or office and expect to be able to ask them all of this just on a random call, however. Photographers don't make money sitting around answering phones! Be respectful of their time, tell them your a bride or groom looking for additional information and you would like to ask them a slew of questions prior to possibly meeting, ask if they will schedule a phone meeting with you, or if they have 15-20 minutes to answer your questions now.  That respect will go a long way! Also, they may have an assistant or office manager answering phones... don't feel like you have to talk to the photographer only... its a good chance to get an inside look at the dynamics of the team. If they have time and the answers you need you might get more information from them!