©Verte Photography All Rights Reserved

Monday, April 29, 2013

A Mystic Eye Story

Today I am going to introduce you to Mystic Eye Creations


A husband and wife team, Dan and Tanya Podawiltz puts heart into each piece of functional art they create. You see this in each piece, they are so unique and beautiful! Dan creates the unique wood and acrylic gifts while Tanya runs the design and customer service ends. It's not many shops that I can say this about... but their photography is very well done! (nope, I didn't even do it!) But it clearly sets them apart from other stores!

©Mystic Eye Creations


Mystic Eye Creations was established in 2008 and has been responsible for providing beautiful handmade gifts ever since. Their specialty is in the area of wood and acrylic turnings, with experience beginning in 2004.

©Mystic Eye Creations
In addition they also provide graphic design services, and would also be happy to discuss your small finished carpentry needs! Could you imagine what they could do to spruce up your house!?

 I am going to let Tanya tell you a little more about their story! I hope you enjoy!

Dan!

Dan originally learned to turn in high school shop class, where he liked the art and decided to pursue it further. In 2004 he started driving over an hour each way to take formal woodworking lessons. In addition to wood turning he also learned finished carpentry, which he loves but we don’t have the room to make right now. The turning is what really drew him, though, and it was then he decided he wanted his own woodworking business.

Two and a half years later saw him attending graphic design classes at the local community college, where he met yours truly. The business was slowly percolating in his mind, and he wanted to take a design course to help him make more artistic pieces, both in color composition and potential inlay/laser work for finished carpentry projects. The business took a back seat for a bit though. Time flies when you’re falling in love, apparently.

He really started working toward it again in 2008 when he applied for a business license and buckled down with a business plan and estimating expenses. That’s where he started drawing me into the picture. My mother owned a craft business when I was growing up, and my father went to college for business management – I wanted to see his dream become reality and had better experience in how to make that happen. So, I started helping with the business plans, estimating, and designing marketing materials. We did small farmer’s markets in the area and business by word of mouth, but we had trouble getting capital for bigger shows and really taking off.


Sadly, we got what we wished for in the worst way possible. In 2011 Dan’s grandparents passed away, and with some of the money left behind and his grandfather’s workbench we had the push we needed to grow. Dan uses his grandfather’s workbench at every demo we do. That money gave us the opportunity to start an online presence and get marketing materials, extra materials to make inventory, and paid for several larger shows that catapulted our local recognition. That, essentially, brings us to today.

Some Fun Facts about Mystic EYE:
·        Any product we make in pink donates 20% of its price to the Breast Cancer Research Foundation, even if we take a loss.
·        We do shopping parties in NH, MA, ME, and VT either with or without themes.
·        We love to work with really odd materials. Banksia pods, buffalo horn, acrylics with real coffee beans or other plants, and exotic woods. What other wood worker do you know that has glow in the dark stuff?
·        We do graphic design for other businesses, such as D. Rix Creations and Carolyn E. Maul Enterprise, LLC.
·        Live demonstrations make us super happy. We connect with people and teach them about what we do.

I LOVED learning about Dan and Tanya - I really hope you got a little inspired by the story and check out their store. 

OH!!!! They have a chance to upgrade this AMAZING lathe that you see in the images above... it's getting a little worn down and they really want to keep doing the onsite presentations that they LOVE so much! I would consider it a personal favor if you took a moment of your time to follow this link and click "vote now" that's it... simple... but do it every day until May 6th! PLEASE! I would love to be a part of making this wish come true! https://www.loveourlocalbusiness.com/base/lolb2desktop?region_id=us&content_id=20617

 To learn more - shop - or explore Mystic Eye Creations here are all the links you need!

We’d love it if people could Like us on Facebook (www.facebook.com/mysticeyecreatioins), 
or follow us on twitter (www.twitter.com/mysticeyec). 

We’re not too picky. J
Check us out in action!  The process: http://www.youtube.com/user/mysticeyecreations


Thursday, April 25, 2013

It's not every day

That I feel like big things are coming!

Today is that day though! I am crossing fingers and hoping for some great news to come to my families world. Without jinxing anything I am simply going to say that in order to prepare I am taking some steps to simplify my commitments to the blog and my business over the next month or so.

One of those changes you will notice will be an AWESOME giveaway in order to celebrate my birthday - but you can call it a Can-dy-Mayo (cinco de mayo) celebration or an early Mothers Day party! I'm not picky!

The giveaway will go live May 1st and run till May 5th - with my birthday right in the middle! (don't forget to send presents, just kidding!)

Also, over the course of May rather then doing hard hitting, and time consuming posts on photography like I have the past few months... I am going to limit myself to one or two solid tips and reminders each week. I would LOVE to host another Q&A post if you all have questions simply let me know!

In addition, you will note that each of my WONDERFUL shops and blogs who donated an item to the giveaway will be featured in some way. Some will be shop reviews, some in  teaching posts, some as guest posters... but all should be fantastic reads and I am really excited to share them with you!

As for the changes....
Don't panic!!!

Verte isn't going anywhere... well, I am not closing up shop or anything! I still will be here week after week blogging, and supporting business owners, and taking amazing photography for your business and personal needs! I do suggest if you are planning on having me do work for you in the month of May, that you book my time NOW!

Hopefully, I will have more to share with you soon! In the mean time... Keep on Clicking!

Monday, April 22, 2013

Happy Earthday!

It's Earthday, and I don't think I can pass up this opportunity to talk to you a little about things you can do to effect change.  Hopefully I can give you a few ideas on simple changes you can make to green up your own corner of the world and internet! We take being green seriously here at VERTE... it is who we are, and in everything we do.

1. Recycle batteries. Batteries are a necessary evil it seems with today's technology. Between kid toys, camera equipment and all our games and handheld devices it seems like even with rechargeable, we are always picking up some new battery to replace something. However it is VERY important to recycle, or dispose of old batteries in a SAFE way!  Batteries contain heavy metals such as mercury, lead, cadmium, and nickel, which can contaminate the environment when batteries are improperly disposed of. When incinerated, certain metals might be released into the air or can concentrate in the ash produced by the combustion process. PLEASE don't just toss old ones into the trash! Most companies like Best Buy, Walmart etc have some sort of recycling option for you, or you can visit http://corporate.interstatebatteries.com/recycling/ to find additional options in your area!

2. SHIP GREEN! While I always use recycled boxes, and reuse materials to pack and ship orders as well as personal shipments. I have found a way to step it all up a notch and now my portrait packaging will also be done in 100% recycled bags from ECOENCLOSE Not only a green company but based in Longmont, CO! They shipped me a sample pack, and I couldn't be happier with the options available! They even offer biodegradable tape!

3. Take your website GREEN! If you host a website why not check out some of the green options! WHO KNEW a website could be green! Companies like GreenGeeks.com and Hostgator.com (and countless others) offer competitive prices, and are green certified! How does that work? Here is the link to Hostgator's story, I like them because they are Texas based!

4. Share the love! Purchase from other Small businesses who ship green, and offer green products. People like Streeter & CO, who use biodegradable peanuts to ship their items... YES! They really do dissolve in water, it was kid tested just this weekend! Here is a great list of small businesses who are all ECO-Friendly!

5. Teach your kids. It takes so little to get kids excited about growing plants, recycling, and picking up trash when they see it. They WANT to do these things! But let's also teach them that we should buy things packaged with less waste, because most foods marketed to kids is not! Share with them how taking care of their toys so they can be passed along to other kids is not only earth friendly but can really bring happiness to other kids! Simple changes can spark major results!

Friday, April 12, 2013

What Clients Say: Streeter & Co

April Showers bring more then May Flowers! This month I am  super excited to add this segment to my blog! 


I hope to share with you, a clients perspective on my services, or tips and solutions from them during this segment and let this continue as a guest blogging option for you all to "put in your two cents".  If your interested in creating a post, please contact me! I would love to hear what you have to say!

So now, I will be turning it over to Kristina at Streeter & CO for our First "What Clients Say" post!


"I used to be guilty of what I like to call the "Jack of All Trades Syndrome". I was always the business owner that wanted to do everything myself, if for no other reason that I wasn't willing to invest the time or the money into having someone else do things for me instead. Did you notice I used "used to be" in that first sentence? That's because I learned the value of having my items shot professionally.

Although I know my photos were better than others I have seen around the handmade shop industry, heck lets me honest - even in small business images - we've all seen them, the grainy, unclear photos - mine weren't quite that bad, but they weren't the quality I needed.  As an online merchant I know that the photos are the one chance I get to grab the customers attention and want my product, low quality images won't help me achieve that one bit. Sure, I was getting return customers that had used my products in person ordering from my store but I wasn't having the sales that I hoped for from "new customers" - why? My product photography. The images I was shooting with my amateur skills and less than fabulous camera quality (or iPhone whichever was closest) wasn't doing my products justice. I needed a different solution.


Verte Photography was the solution to my problem and I never looked back. With Verte Photography I know my products are in the hands of a passionate, talented photographer.  Candy is so wonderful to work with and thrives on making the image look so wonderful that you would like to grab it off of the screen.  I have seen such a big difference in sales and page views. Customers are liking what they see and I know this not only by the sales but by the fabulous comments that I have received.


Not only does Verte Photo have a lifetime customer but I also refer every other shop owner I know to Candy. Why wouldn't I? A Shop with fabulous products needs nothing less than the best." - Kristina Streeter, Owner of Streeter & Company

Thursday, April 11, 2013

This and That

This week has been short!
That means really I have been super busy! I can't believe its Thursday already! Where does the time go!!!

I have many clients with new secret products, and I am getting to open a new client box this morning so I am very excited to see what she has sent! I wish I could share some of the images over the past week... but its all very hush hush... but its killing me!

This week was also school class photos for the little one.
That she decided to do her hair like Abby from NCIS is PRICELESS!
This kid, I tell you! If you want to know what my kid looks like - look up Punky Brewster from the 80's hit show... I know... way before your time!(mine too... *wink wink*)

That, we get stopped in stores and people comment on it all the time is so funny! It puts me in an 80's kind of mood this morning!

This morning its raining and THAT means it's a great day to buckle down, get creative and bust out some fab new product images! I hope to be able to share some next week!

For now - chew on this: The lead singer of Flock of Seagulls was a hairdresser before he joined the group. Go figure.


Wednesday, April 10, 2013

Product Composition

Composition: The placement or arrangement of visual elements or ingredients in a work of art.

In photography there are a lot of general composition rules.  I covered some of these in our Photography 101 series back in January. Many of them will still apply to product photography. I thought in order to keep us well rounded I should touch on this as part of our placement and perspective discussion this week... because composition and perspective really are interlinked.  In fact, Perspective is the name of one very popular style of composition!


Perspective: The angle at which you shoot your subject. We ended yesterday talking about this... you want your camera to be in line with your product, not off to a side, or higher or lower then your product.


Correct Camera height.


Shot with camera directly in front of product


But if you have jewelry or other items you need to shoot flat.. then you may need to shoot directly DOWN on your item.  I don't suggest it, but I know sometimes you have to. I suggest busting out a step ladder and leaning over your workspace. Be careful not to get in front of any lighting source!

Shooting Down at product. / Product provided by Sweetsies

Fill the Frame. Our second composition rule tells us simple what to do... rather then leaving a lot of extra space around your product, get closer and fill the frame with your item! This will provide better details as well as simply "looking nicer"
Too Far Away.


Full Frame / Product Provided by: Streeter & Co

Tip: If you have a high resolution camera, but can't focus close enough to your product you can crop in! Be sure to read up on the best way to do that, and keep your image looking sharp!


WIDE/TALL: If your product is wider then it is tall shoot horizontally, more tall then wide, shoot vertically.


More Wide = Horizontal Image / Product by: L.W. Hooks
Taller then Wide. Gift Unknown vendor.

Tip: This may also depend on where your images are going! If your uploading to a online shop, your thumbnail images may be more square, be sure to learn about any dimensional restrictions you may have before shooting!

Show the DETAILS. I don't mean just crop in on the same image... but I like to see DETAILS when I shop online. I want to see the different beads, the chain, the clasp... give me DETAILS.

Product Provided by: Streeter & CO


Product Provided by: Crafty Gal Creations

Product Provided by: Crafty Gal Creations


Tuesday, April 9, 2013

Product Placement and Posing

I know, crazy me... talking about posing inanimate objects... but it is true! I spend more time placing an item then I do shooting it. There is a lot of thought and attention to detail needed to showcase an image! In commercial photography they don't really call it "posing" they call it "styling".

Lets talk about some of the most popular items
  1.  Jewelry
  2. Crochet and Knit items
  3. Stitched and Sewn
  4. Reflective and Clear (this could be jewelry, but we will use jars and tins for our example)

Jewelry, Reflective and Clear items. By far the most time consuming of all the items I shoot. So why is that? Let's go step by step.
  • I sort all the product, like items together, with similar styles and colors grouped up also. This allows me to look at a glace at what I have and select the best backgrounds for each.
  • I put on anti static gloves. I don't want to leave fingerprints, or extra hairs or dust on anything.
  • I clean each item with a soft cloth.
  • I check them for stray hairs, or fibers that often get stuck in chains (esp if they are shipped to me on top of cotton packing like this:
Product and Packaging provided by: Crafty Gal Creations

I suggest putting items in plastic or wrapping them in tissue to reduce the fibers that attach themselves! 
  • I set my studio, with the tools I will need, backgrounds, props, etc.  I also set up lights, and test everything to insure quality. 
  • Now I am ready to get started to shoot!

 Crochet, knit, and sewn items: While most of the steps above apply, I don't have to typically worry about fingerprints on these items. However, I do have to spend extra time checking the stitching, hems, materials for stains, or yarn changes or errors that I try not to highlight in the image. Overall the biggest thing is making sure there are no extra pet hairs, fibers or strings or yarn hanging off. Because you want to be able to shoot detail shots of all fabrics, hooks, clasps, buttons, stitching and etc.

Once I am ready to shoot - it is all about how to "pose" the product and placement on the background itself. You know from previous posts that the more space you leave between your product and the background, the more blurry, or out of focus your background will look when you use your macro, flower, or aperture controls. It may also help you reduce shadows depending on your lighting situation.
Below are my tips for successful posing and placement.

Placement: I like to center my products on the background, and depending on product leave anywhere from 6 inches to 4 feet to the vertical portion of my background. The larger the item, the more space I leave. (also, the more likely I am to use additional lighting so the vertical background doesn't get underexposed due to lack of light... I want it all to look seamless, and consistent.)

 There is nothing wrong with the above image, you can see the product. However, the light on the props and the twisted hook on the earing give it a little bit of a haphazard look... combined with the horizon being off and the opposing agle of product and it just doesn't feel pleasant to look at. (Granted, I did have to crop and twist to make this point I did originally shoot the horizon straight)


Posing: Looking at how you are placing your items makes a big difference. You can create something that is a good photography, but doesn't really display your item, or worse, if done in a sloppy manner you can give your clients the impression that photographs are an after thought, or that you don't take care with your products. Ouch! By putting thought into them, you can go from good to captivating with ease.
Product Provide by: Crafty Gal Creations
 There is nothing wrong with the above image, you can see the product. However, the light on the props and the twisted hook on the earing give it a little bit of a haphazard look... combined with the horizon being off and the opposing agle of product and it just doesn't feel pleasant to look at. (Granted, I did have to crop and twist to make this point I did originally shoot the horizon straight)

 However, by sliding the earnings to a hanging position over the sound hole (yes, I looked up the name of the hole on a guitar and thats what it said it was... who knew) The hooks are showcased better, the image is less distracting and your product becomes the focus. It's a simple change. 

Consistent: I also find that when I am shooting the SAME item or items that are the same size, it behooves me to set my camera on a tripod, and place the items in the same spot. so the item is a consistent size shot after shot. Because you don't want to end up with this kind of a difference.


Product and Packaging provided by: Crafty Gal Creations

Product and Packaging provided by: Crafty Gal Creations


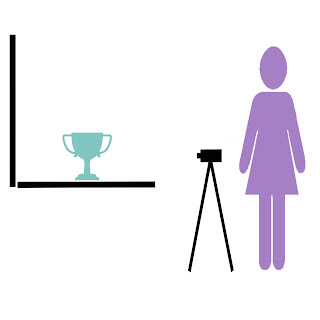
 Tripod: A tripod is your friend. It will keep your camera in one place for consistency. If you shoot the same size over and over again, make a note of the zoom, and where products are on the background, and your tripod (mark them with tape or marker if you can) then you can recreate this anytime you need!

Camera Placement: Place your camera to the height of your product, and directly in front of it, not at your eye level. This will allow you to keep your horizon line straight, rather then making your products appear to be tipped or slanted, which makes your image look sloppy and less appealing.

Product appears to be sliding off  image due to horizon line and angle.
Twisted Product Sample Image / Product Provided by: Streeter & Co
 
Nice, straight on clean image.
Take your Time: Especially when working with beaded items, chains and stones, you need to take your time. I have a little rolling stool.. yep just like the doctors office. I roll in sit down and bust out my tweezers and other small tools so that I can easily turn, flip and place each small item. In the end, details sell.  Even if your not placing each bead just so... making sure your product is straight and your camera is lined up will make a dramatic difference.


Monday, April 8, 2013

Setting up for Sucess

Why bother to shoot your own products if your not going to take the time to be SUCCESSFUL! The point to having photo's is to showcase your images, so people can see what they are buying right? So let's make sure we have the tools we need to from this....


To this!
Product Provided by: Crafty Gal Creations


Depending on your product, and set up you need to think about how the light will hit the items, what part will reflect, what shadows can be created, and what adjustments do you need to make so you don't see shadows, as well as making sure each part is shown, and showcased the best it can be.

There are a few secrets to this.


1. Tweezers are your friend. I use these to place each stone, bead and chain in just the right place.
2. Cleaning cloth. I use my soft clothes from cleaning my lens to polish stones and remove any finger prints, fibers or dust that may be on a product
3. Cotton Gloves. These are so I don't get new finger prints on items as I am working on them. They are special gloves from the photo lab, same quality that they use when handling negatives. You can also use latex or even finger cots (found in the bandage section of your drug store). I never cared for them, but its a viable option.
4. Time. Don't try to do this in a rush
5. Stable work area. Placing product on a table that can be bumped or with a fan moving in the room can be a nightmare...please save yourself the headache.


Now, if you have been following along in this series we have covered...
Backgrounds: Part 1 Part 2 and Part 3
Finding the right location for your home studio
Finding the right light
White Balance
Setting up your DIY studio*
and now, collecting the tools to success.

Which brings us to product placement, posing, and perspective.
These will be our focus this week! Be sure to come back!

*I have delayed the release of the DIY studio available light - as well as a followup to the Dollar Store studio due to (of all things) TIME to shoot the images for them! I hope to get the images done this week and fit them back into the schedule - but I wanted to make sure you still had some great information to chew on this week! For now, you can view the First part of the Dollar Store Studio from the link above - it gives you some basic guidelines and some very helpful tips!


Thursday, April 4, 2013

This and That: Easter

Good Morning! Did you miss me?


Katie Did What

This morning is the Easter Party and egg hunt at the lil' ones school - She is SO excited. Mostly because she gets to show off her new super cute "pop star" outfit. That, was how this post should have started... last week.

Sorry about that! I had it all ready to go, and was waiting for images to upload when I got super busy... and bam... before you knew it... here we are, a week later! I even had to push some DIY studio posts back because I am missing images for them... =( hopefully we will get caught up next week for you!

This week I tried out a new recipe for the crock-pot... do you use yours? I LOVE mine! I read a post last week about doing Easter Ham in it... why have I never thought of that! So I did ours... it was GREAT... mostly because we were not cooking for a crowd.

This year, again we are away from friends and family and that makes our holiday's "small-a-days" so I picked up ham for the crockpot and made a nice honey pomegranate glaze for it. We also enjoyed balsamic carrots, and smashed potatoes... I also made deviled egg salad... rather then taking the time to make individual eggs. Again.. BRILLIANT!  


This week I wish I could say I spent a ton of time catching up on posts, and working on adding more images... did you know I average 5 images per post... but I am simply not finding the extra time. I am trying to go back and do 2 posts a day. That is my goal! So if your reading something and it makes no sense because there are not images... please let me know! I will do it the next chance I get!


This is an image of my FAB new bag from Zeeuh that I have been DYING to share with you all... she made it custom for me... it was a great experience working with Alicia.. she provided me with some great fabric options and even met me for some CRAZY good ice cream and coffee to hand deliver it! Talk about good service! Along with my new bag came a matching mug hug! EEK! Wont I look stylish going to appointments and networking meetings now! Oh, and that cute wallet (the back side is shown) that is a little goodie I picked up for myself around the holidays!


That is the mug-hug that started it all... I LOVE this color combo!


And this is an image of the cute gift card holder ... that I use for my cards - its super cute! Just look! (ok those are her cards shown... but really that's the right thing to do!)


I am telling you THAT is a woman YOU want to do business with! Great products, sweet person and really... you make a difference in her families lives directly when you make a purchase from her... so HOW can you say no to that!
Zeeuh Store


This week I also had the EXTREME pleasure of guest posting on the A-list site... I LOVE the A-list, which is really a collection of fantastic shops and people to do business with! I worked very hard on this guest post! It was a true labor of love for me. (ok... this again was last week... but I am SO happy about it I still had to share!)

That was really the highlight of my work week!


This week I have also been thinking alot about a new service I want to offer... I am having a hard time with a name - but its basically going to be my version of a product review (with a photo twist, of course!) That means if you make / sell your own products... you can contact me to be first in line! While I am still working out some details... I know it will be FREE and SIMPLE!